IBM/Lenovo Thinkpad T61 Hard Drive Replacement
Duration: 45 minutes
Steps: 6 Steps
Thinking of giving your ThinkPad a performance boost with a shiny new SSD? This guide will walk you through the steps to access the hard drive slot and swap out or insert your new drive. It’s easy, and we’ll be with you every step of the way. Let’s get that laptop feeling fresh again!
Step 1

– Flip your computer over so the back side is looking up at you like a little turtle!
– Find that sneaky screw hiding in the bottom left corner of your device.
Step 2
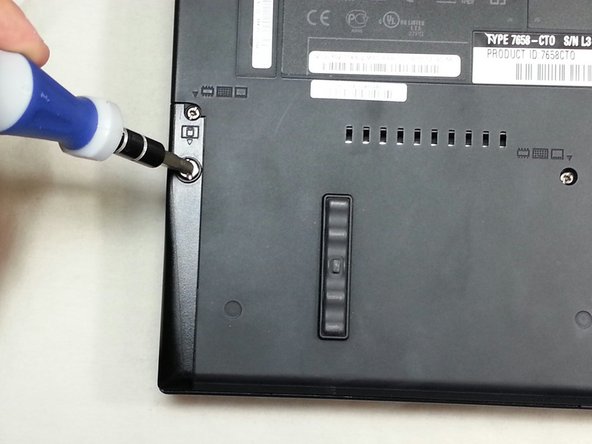
– Grab your trusty #0 Phillips screwdriver and unscrew that 17 mm screw with confidence. You’re doing great!
Step 3

– Gently lift the plastic cover off the hard drive by pulling it up and away from the computer. You’ve got this!
Step 4
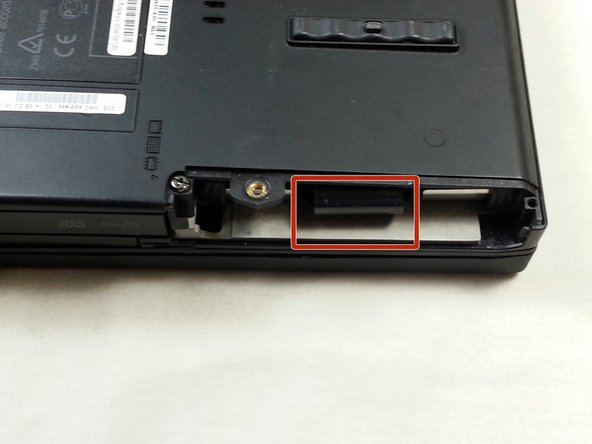

– First, let’s get started by finding that sneaky black tab tucked away in the hard drive port. Take a peek and make sure you’ve got it located!
– Now that you’ve found it, grab your trusty screwdriver and gently pull the black tab out of its slot. Easy does it!
Step 5


– Give that little black tab a gentle tug, and—voilà!—the metal tray with the hard drive will glide right out.
Step 6

Just a heads up, this picture is missing a hard drive, but don’t worry, the steps will still be the same!
– Carefully peel away the plastic covers from both sides of the hard drive. You’ve got this!