Dell XPS 13 9350 Motherboard Replacement
Duration: 45 minutes
Steps: 24 Steps
This guide will walk you through replacing the motherboard in your Dell XPS 13 9350. The motherboard is the heart of your device, connecting all its critical components. If you’re facing power issues with your Dell XPS 15, a new motherboard might be the solution. Before diving in, check the troubleshooting section for common symptoms like failure to boot, overheating, and power problems to make sure this is the fix you need.
Step 1


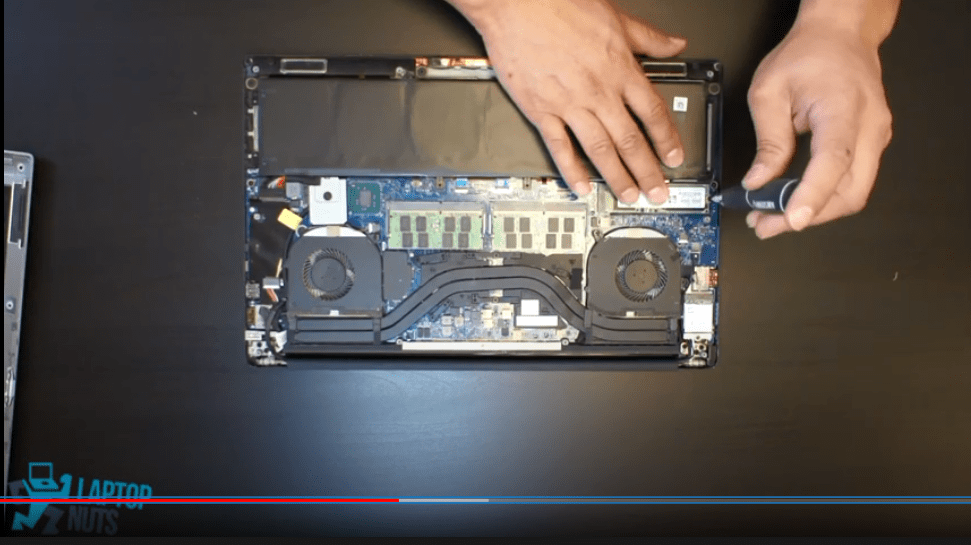
– Carefully remove the eight 4 mm T5 Torx screws from the bottom cover—it’s like unlocking a treasure chest!
Step 2


– Grab a plastic opening tool and gently pry open the ‘XPS’ flap right in the center. You’ve got this!
Step 3

– Pop open the flap and unscrew the single Phillips screw hiding underneath.
Step 4

– Get your trusty opening picks or a plastic pry tool ready! Start prying open those case clips from the back edge, and let the adventure begin!
Step 5

– Pop off that bottom cover—time to let your device breathe!
Step 6


Keep your cool and resist the urge to yank it up!
– Gently tug the battery cable connector toward the battery to unplug it from its socket—nice and easy, no rush!
– Flip open the display and press that power button for a solid five seconds to zap any leftover charge hanging around in the system.
– If the connector’s playing hard to get, try nudging one side, then the other, like a little dance, to ease it out of its socket.
– Still stuck? Grab a spudger and use the pointed end to give the connector indent a gentle push—just enough to slide it free. No need to wrestle with it!
Tools Used

Step 7


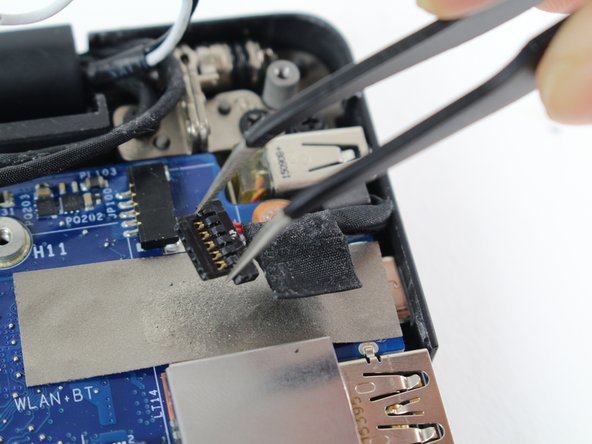
– Grab those tweezers and gently pull the white connector out and away from its socket—it’s like unplugging a tiny power cord! Easy peasy.
Tools Used

Step 8


– Gently pop up that standard flat black connector tab with your hand. Easy does it, like you’re flipping open a cool hidden treasure!
Step 9


– Unscrew and free the 4 mm Phillips #0 screw that’s holding the fan to the motherboard. Let that little guy breathe!
– Next up, carefully remove the 4 mm Phillips #0 screw that’s anchoring the fan to the base of the computer. Easy does it!
Step 10


– With your right hand, gently lift the larger part of the motherboard that’s nearest to the fan. You’ve got this!
– Now, with your left hand, carefully pull the fan out at a cool 30-degree angle from underneath the motherboard. Easy peasy!
Step 11


– Let’s get started! Remove the four 3 mm Phillips #0 screws from each corner of the battery – it’s time to set that battery free!
Step 12


Keep it cool—no lifting upward.
– Gently tug that battery cable connector right towards the battery itself to pop it free from its cozy little socket.
Step 13

No need to kick the speakers out—just peel off the tape and slide that battery right out from under the speaker cables. You’ve got this!
– Gently lift up any tape holding the speaker cables to the battery—like peeling a sticker off your favorite notebook.
Step 14

– Time to say goodbye to the battery! Gently remove it from its cozy home and set it aside. You’re one step closer to getting things back to normal!
Step 15


– Let’s get started by removing the eight 4 mm Phillips #0 screws from the motherboard. Take your time and make sure they’re all out before moving on to the next step.
Step 16


– Spot the red and black cable connector hanging out at the bottom right corner of the motherboard. It’s waiting for you!
– Grab your trusty tweezers and gently wiggle the cable connector out of its socket by pulling it to the right and then lifting it up. Slow and steady wins the race!
Tools Used
Step 17


– Grab those tweezers and gently flip open the Zero Insertion Force (ZIF) connector—you’re doing great!
– Using the tweezers, carefully pull the ribbon cable away from the ZIF, bringing it towards you. You’ve got this!
Tools Used
Step 18


– Grab your trusty tweezers and pop open the white ZIF connector with a quick flip—easy peasy!
– Now, gently pull the ribbon connector out of the ZIF using your tweezers, moving it towards you like a pro.
Tools Used
Step 19


– Grab your tweezers and gently flip open that ZIF connector—easy does it!
– Now, use those same trusty tweezers to carefully pull the orange ribbon connector out of the ZIF. Just give it a little tug toward yourself, and boom, you’re golden!
Tools Used
Step 20


– Grab your trusty tweezers and gently wiggle the black cable connector out of its socket by sliding it to the right. Smooth moves, you’ve got this!
Tools Used
Step 21


– Grab your trusty tweezers and carefully nudge the black and white cable connector out of its socket by pulling it gently to the right. You’ve got this—steady hands win the day!
Tools Used
Step 22

– Start by finding the connector at the top right of the motherboard. It’s a little hidden, but it’s there waiting for you!
– Now, grab your tweezers and gently pull the cable connector to the right to detach it from its socket. A smooth move will do the trick!
Tools Used
Step 23


– Spot the final black cable connector chillin’ in its spot.
– Grab your trusty tweezers and carefully nudge that black cable connector out of its socket by pulling it to the right. Easy does it!
Tools Used
Step 24

– Gently lift the motherboard with your hands. Take your time and make sure everything stays steady.
Success!