iPod 4th Generation or Photo Headphone Jack Replacement
Duration: 45 minutes
Steps: 8 Steps
No sound coming through? Time to swap out that headphone jack! Let’s get your audio back in action!
Step 1

Before diving inside your iPod, make sure to slide that hold switch to lock. Look for the orange bar—it’s like your iPod saying, ‘Hey, I’m on hold!’
Step 2


Gently wiggle the pick back and forth—like you’re coaxing it into the groove—until it slides in further.
– Slide an opening pick into the gap between the plastic front and the metal back of the iPod, making sure to get it in there as far as you can on the right edge.
– Once you’ve got that pick in place, use it to gently push against the plastic front panel to pop open five little retaining tabs (check out the third photo for a visual!).
– Keep that pick gliding along the edge of the iPod, prying as you go to release the remaining retaining tabs.
– When all five tabs on the right side are free, the case should pop open with ease!
Step 3

Alright, the iPod’s case is cracked open, but hold up—don’t pull it apart just yet! There’s a sneaky orange ribbon cable still hooking the headphone jack to the logic board. Take it easy, and let’s tackle that next!
– Gently open the case like a book, keeping the dock connector edge at the top, and carefully place the rear panel next to the front half of the device. Take your time and make sure everything is aligned before moving on.
Step 4

Alright, repair champ, handle this ribbon cable like it’s made of spun sugar—because it kinda is. If you’re swapping out the battery, feel free to skip disconnecting the headphone jack from the motherboard. Just prop the rear case against a box and tape it in place so it doesn’t wiggle away. Keep things steady, and be sure not to tug at that delicate little headphone jack cable. You’ve got this!
– Grab a plastic prying tool or your trusty fingernails and gently pop off that orange headphone jack cable. Make sure to lift straight up on the connector itself—no tugging on the cable, okay?
Step 5

– Take out the two shiny silver T6 Torx screws from the headphone jack—easy as pie!
Step 6
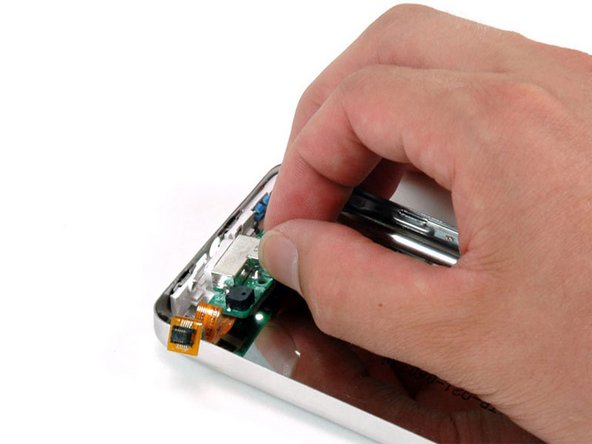
– Time to set that headphone jack board free! Gently grasp it and lift it out of the device.
Step 7

– Flip the headphone jack board over like you mean it.
– Use your finger tip or a trusty spudger to gently pop up the black connector that’s keeping the headphone jack cable locked in. Easy does it!
Step 8

– Put your device back together by working backwards through the steps—it’s like retracing a treasure map, but with fewer pirates!
– If you need help, you can always schedule a repair.