Lenovo ThinkPad X1 Extreme Trackpad Replacement
Duration: 45 minutes
Steps: 7 Steps
Hey there! Ready to breathe new life into your Lenovo ThinkPad X1 Extreme Gen 1 with a fresh trackpad? This step-by-step guide has got your back. The trackpad keeps you in control, but it can wear out and stop vibing with your fingers. To swap it out, you’ll first remove the battery and tackle four screws – simple stuff! Remember to check that your device is completely powered down before diving into this repair adventure.
Step 1


Before you dive in, be a champ—turn off your device and unplug it first!
These screws might get a bit loose, but they’ll stick around with the cover. No need to fully take them out; just let them hang tight!
– Flip the laptop over so you’re looking at its bottom, with the trackpad nearest to you.
– Grab your trusty Phillips #00 screwdriver and loosen up the seven captive screws.
– Take a blue opening pick and gently slide it into the gap between the bottom panel and the chassis—pop off one clip on each side like a pro.
– Carefully lift off the back cover and set it aside. Look at you go!
Tools Used

Step 2

– Grab your trusty Phillips #00 screwdriver and get ready to tackle those four 4 mm screws sitting pretty above the battery. Let’s get this show on the road!
Step 3

– Time to get this repair started! Gently lift the speaker modules on either side of the battery out of their pegs, and carefully unwind the cable from the front of the battery.
– Now, set those speaker modules aside where they won’t get in the way.


Step 5

– Carefully pop the battery out of its cozy little home in the frame and take it out of the device.
Step 6

– Grab your trusty 1.5 mm flathead screwdriver and set your sights on those four screws holding the trackpad in place. Unscrew them with confidence and let the trackpad breathe free—you’re doing awesome!
Step 7
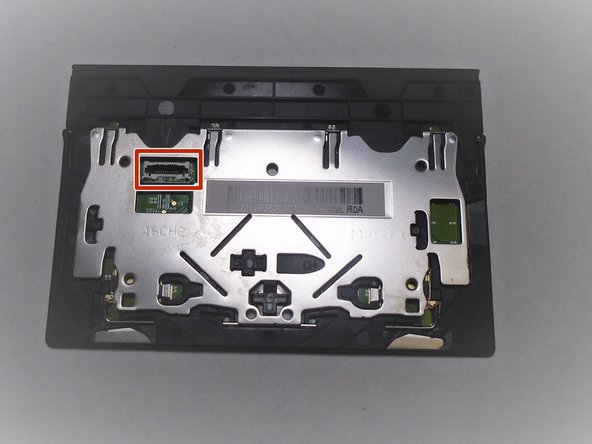

– Gently pop the retaining tab on the trackpad cable connector using a spudger. You’ve got this!