Microsoft Surface Pro 5 Teardown
Duration: 45 minutes
Steps: 12 Steps
Microsoft seems to be in a bit of an identity search. They’re calling the new Surface Pro ‘the most versatile laptop,’ which basically means this tablet is also a laptop (that doubles as a studio surface). We’re diving in to help out with that little existential question! Welcome to the Surface Pro 5 teardown – it’s all about uncovering what makes Microsoft devices tick. Want to stay in the loop and get the latest teardown updates? Follow us on Facebook, Instagram, or Twitter. And remember, if you need help, you can always schedule a repair.
Step 1


– On the outside, the Surface Pro might seem almost identical to last year’s model, but what truly counts is the magic happening inside:
– A stunning 12.3” IPS PixelSense Display boasting 2736 × 1824 resolution (267 PPI) for crisp visuals.
– Power-packed Intel Kaby Lake processors ranging from Core m3 (4M Cache, 2.70 GHz) up to Core i7 (4M Cache, 4.00 GHz) CPU.
– Memory options galore with 4 GB, 8 GB, or 16 GB of 1600 MHz DDR3L RAM to keep things running smooth.
– A spectrum of solid-state storage from 128 GB to an impressive 1 TB for all your digital treasures.
– Capture memories and meetings with an 8 MP rear-facing 1080p camera and 5 MP front-facing 1080p Windows Hello camera.
– Stay connected with a USB 3.0 port, micro-SD slot, Mini DisplayPort, and SurfaceConnect charging port.
– Seamless connectivity through 802.11a/b/g/n/ac Wi-Fi and Bluetooth 4.1—because life’s better with fewer wires!
Step 2


– Stacked right on top of its older sibling, the 5th gen Pro is basically its identical twin. It’s rocking the exact same ports in the exact same spots, and its size matches perfectly—no surprises here.
– Flip to the back, and you’ll find that Microsoft flexed its engineering skills with an upgraded hinge design. This little marvel swings out an extra 15 degrees, hitting a comfy 165º angle. Sweet range!
– The only noticeable tweak? The vents are bigger now, but sneakily cut into a different edge of the perimeter trench. This clever move makes them way less obvious. Nice touch!
Step 3


– This sleek exterior keeps the surprises coming—turns out the opening procedure matches the Surface Pro 4 perfectly! Fire up some iOpener heat to soften things up, grab your suction cup to lift the display, and then glide an opening pick through the adhesive like a pro.
– Here’s where things really mix it up—Microsoft swapped out the easily removable blade SSD for some extra battery space. So, last year’s handy upgradeability takes a seat this time around.
– Other updates include a web-like heat sink design, a four-cell battery upgrade, and a sharp new black colorway that’s ready to impress. Let’s keep rolling!
Tools Used

Step 4

It looks like Microsoft has finally put N-trig’s tech to good use, slapping their label on the chips after acquiring them back in 2015.
– Flip over the display, and you’ll find a bunch of tiny chips hanging out, looking pretty important. They’re cousins to the N-trig modules rocking the Surface Pro 4 vibe:
– Microsoft X904169 06 CL1714
– Microsoft X904163 01 CL1715
– Macronix MX25U1635F 1.8V 16 Mb MXSMIO serial flash memory
Step 5


It seems that a big chunk of the upgrade came from giving the heat sink a little makeover, inspired by a certain Zerg unit.
– Microsoft has given the passive cooling system a major overhaul, allowing both the Core m3 and Core i5 models to run smoothly and silently, without the need for fans – a big improvement from last year’s m3-only fanless design.
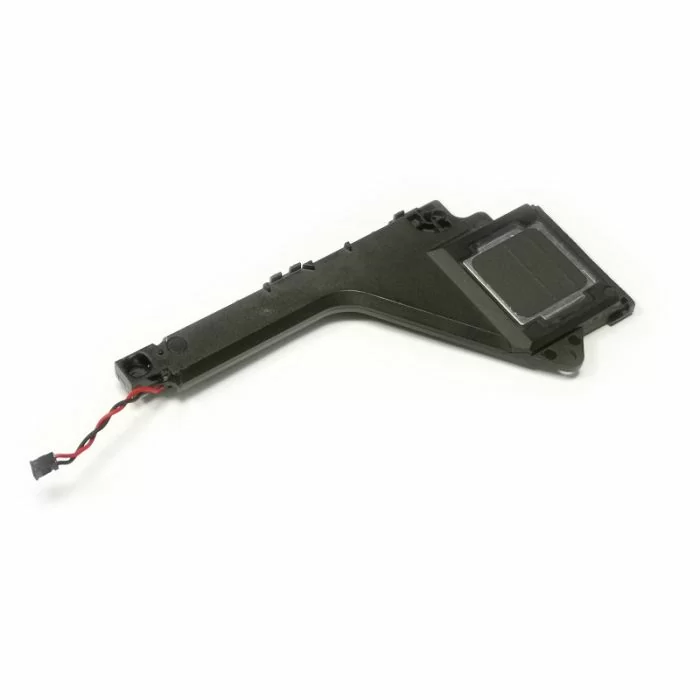
– Now that the heat sink is out of the way, let’s remove a few more components to free up the motherboard. It’s currently stuck under one of the speakers and a sensor/camera bezel, so we’ll need to carefully take those out before we can proceed.
Step 6

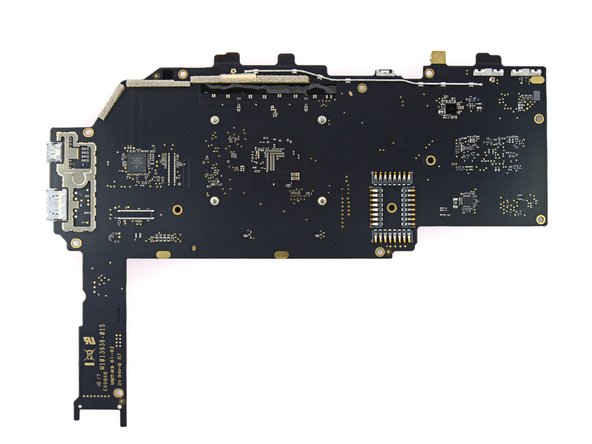
– Alright, the motherboard is out—time to check out its brainy buddies:
– Intel Core m3-7Y30 Processor
– Samsung KUS020203M-B000 NAND flash memory
– Samsung K4E8E324EB-EGCF 1 GB LPDDR3 1866 MHz DRAM (four chips giving us 4 GB total)
– Marvell Avastar 88W8897 802.11ac, NFC, and Bluetooth SoC
– Nuvoton NPCT650SBBWX trusted platform module
– Winbond W25Q128FV 128M-bit Serial Flash Memory
– Monolithic Power Systems MP2949A tri-loop digital multi-phase controller with PMBus interface and MP3376A 8-channel WLED driver
Step 7

– On the bright side, here are some extra goodies:
– Freescale/NXP M22J9VDC Kinetis K22F 512KB 120 MHz ARM Cortex-M4 Based MCU
– Texas Instruments BQ25700A Battery Buck-Boost Charge Controller
– Realtek ALC3269 Audio Codec
Step 8


– IC Identification, Part Deux: Let’s scope out your power friends:
– Monolithic Power Systems MP86901-A and MP86902-B are your dynamic duo for power phases. Check their specs to ensure smooth operation.
– Texas Instruments CSD87334Q3D – a stellar 20 A power block ready to hold its ground.
– Monolithic Power Systems NB685A – bringing the energy as your 12 A synchronous buck converter.
– For your 8 A synchronous buck needs, Monolithic Power Systems NB679A and NB680GD are ready to shine.
– Monolithic Power Systems NB681 is stepping up as a trusty 6 A synchronous buck converter. Compact but mighty!
– Need a 3 A step-down converter? Texas Instruments TPS62085 is holding steady for the job.
– Finally, Texas Instruments TPS62140 is your go-to for 2 A step-down conversions with a nod to efficiency.
Step 9

– IC Identification, pt. 3:
– Monolithic Power Systems MP2370DGT – This one’s your go-to white LED driver. If you need some lighting action, this chip’s got you covered.
– Texas Instruments TPS62175 – A compact 0.5 A step-down converter, perfect for managing power with precision.
– Texas Instruments TPS70933 – A smooth 150 mA LDO regulator. It’s here to make sure everything runs at the right voltage, quietly and efficiently.
– Texas Instruments TLV3011 – A comparator with a built-in voltage reference. It’s like a tiny referee, keeping everything in check.
– ON Semiconductor CAT24C16 – This 16 Kb serial EEPROM is a great little memory chip. Also, you’ve got the Winbond W25X40CL, which adds a 4 Mb serial NOR flash memory for a bit more storage muscle.
– Bosch Sensortec BMI160 – A 3-axis accelerometer/gyroscope. This one’s like your phone’s sense of balance, knowing exactly which way is up.
– Bosch Sensortec BMA254 – Another accelerometer, but with a bit more mystery. It’s likely part of the setup too, helping with motion detection.
Step 10


– IC Identifications, pt. 4:
– Texas Instruments SN74AVC2T245 – your trusty dual-supply bus transceiver.
– Texas Instruments TS3USB30E – the high-speed USB 2.0 1:2 switcher-upper (mux/demux switch).
– Nexperia (formerly NXP Semiconductor) 74LVC125A – the quad buffer/line driver with a 3-state vibe.
– Nexperia (formerly NXP Semiconductor) 74AUP1G32 – a no-nonsense 2-input OR-gate. It’s got you covered!
Step 11

– Alright, here’s the scoop from our previous Surface Pro teardown: that battery is seriously glued in place and doesn’t like to budge easily. Plus, once it’s out, it doesn’t sit back quite the same way.
– This four-cell lithium-polymer battery packs a solid 45 Wh punch (7.57 V x 5940 mAh). That’s an impressive 18% boost in capacity (and a full double-up on cell count) compared to the older model.
– So, instead of wrestling with adhesive today, we’re letting it stay put for now…
– For a quick comparison, the 10.5-inch iPad Pro we cracked open last week runs on a 30.8 Wh battery—smaller, but still mighty.
Step 12


– That’s a wrap, folks!
– In short, it’s pretty much the same as its predecessor—except for losing the last easily swappable part, the modular SSD. Yep, Microsoft really wowed us—by setting the bar even lower than expected.
– Want to see more teardown magic? Check out our Surface Laptop teardown!
– Hey, curious about the Core i7 Surface Pro? Thanks to Creative Electron, we’ve got the juicy details.
– Not a huge difference between the models, but that mystery space under the heat sink? Turns out it’s packing some extra cooling muscle with a fan.