Lenovo Yoga 920-13IKB Speaker Replacement
Duration: 45 minutes
Steps: 5 Steps
Ready to bring your Lenovo Yoga 920-13IKB back to life with some fresh sound? This guide will walk you through the process of replacing the speakers, step by step. Let’s get that audio back to its full glory!
Step 1


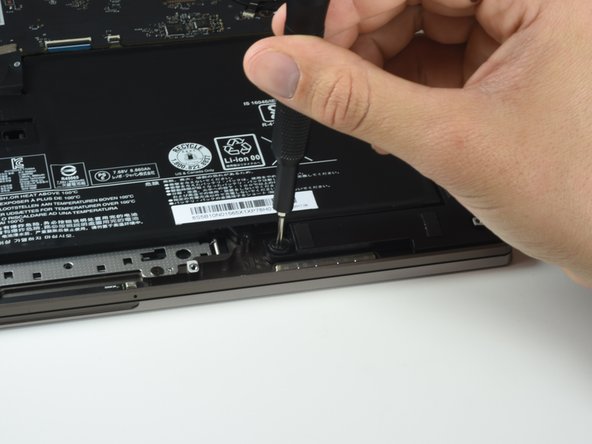
Turn the device upside down to reveal the screws hiding beneath the back cover.
– Unscrew those ten 5mm Torx T5 screws on the back cover to give it some wiggle room and loosen it up!
Step 2


– Time to get started! Slide your trusty opening tool under the back cover to gently pry it loose.
– Now, use your hands to pull the cover up and release the tab that’s holding it in place at the center. You got this!
Tools Used

Step 3

Alright, here’s the deal—this works for either the right or left speaker. Spot the one that’s giving you trouble, and then dive right in to get it swapped out!
– Take out the two 3mm Phillips #00 screws that are keeping the speaker snug in its spot.
Step 4
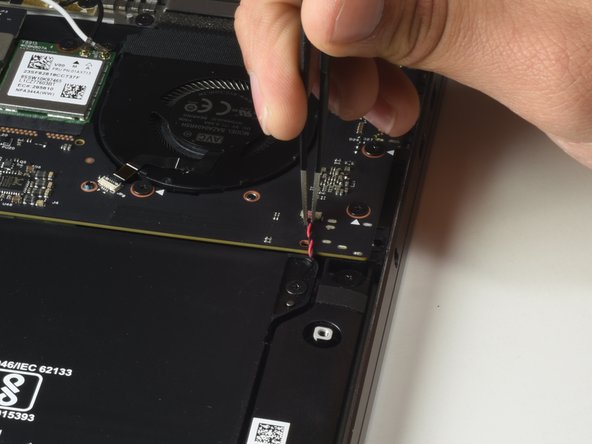

– Carefully unplug the red and black wire from the motherboard to give the speaker its freedom!
Step 5

– Time to get this repair started! Carefully lift up the speaker using your trusty Opening Tool, and then remove it.