
LG G Stylo Headphone Port Replacement
Duration: 45 minutes
Steps: 7 Steps
Having some trouble with static or distortion coming through your headphones? Don’t worry, we’ve got you covered! This step-by-step guide from Salvation Repair will walk you through the process of replacing your headphone port, starting with removing the back cover and ending with the new port installation. If you need help along the way, you can always schedule a repair.
Step 1


Remember to shut down the phone completely before diving into the fix—your phone deserves a proper nap before surgery!
There’s a little notch on the left side that’s just begging for the plastic opening tool to slide in like a charm.
– Let’s get started by removing the back cover. To do this, place your trusty plastic opening tool on the bottom left side of the device and gently pry it up. Take your time and be patient, it’s easier than you think!
Step 2


– Take the plastic opening tool and gently wedge it into the slot at the bottom of the battery. Once you’ve got a good grip, lift that battery out and finish the job with your fingers—nice and easy!
Step 3


– Grab your trusty Phillips #00 screwdriver and get to work removing the eleven 3.9mm screws holding the back in place. They’re clearly marked, so you can’t miss them—just unscrew and set them aside like the pro you are!
Tools Used

Step 4


Removing the motherboard cover can be tricky if it’s your first time. If you’re having a tough time, grab your plastic opening tool and gently work it into the grooves along the edge. Keep at it until the cover pops off. Patience is key—you’re almost there!
– Once you’ve unscrewed all the screws, grab your trusty plastic opening tool, slide it into the groove at the bottom left corner of the motherboard cover, and lift it up gently. Smooth and steady wins the race!
– Heads up! Make sure you pop out that SIM card before messing with the motherboard cover. Technically, you could skip this step, but trust us—you’ll avoid a stuck SIM card situation when reassembling later. Save yourself the headache!
– As you pop out a clip, feel free to use your fingers to release the motherboard cover completely. Easy breezy! Set it aside carefully, because teamwork starts with tidy tools.
Step 5
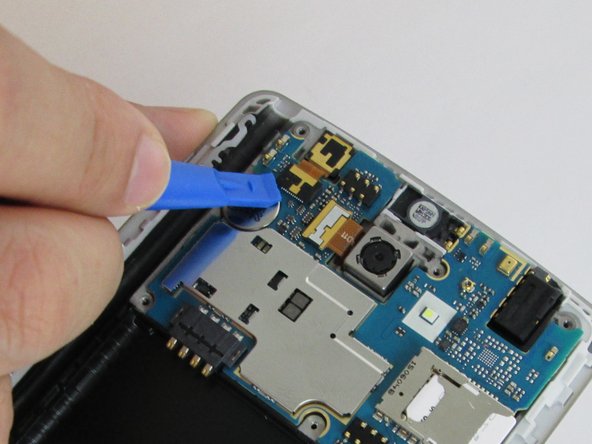

Handle those ribbon cables like a pro—gentle and steady wins the race! They’re tiny but mighty, and your device needs them to stay functional.
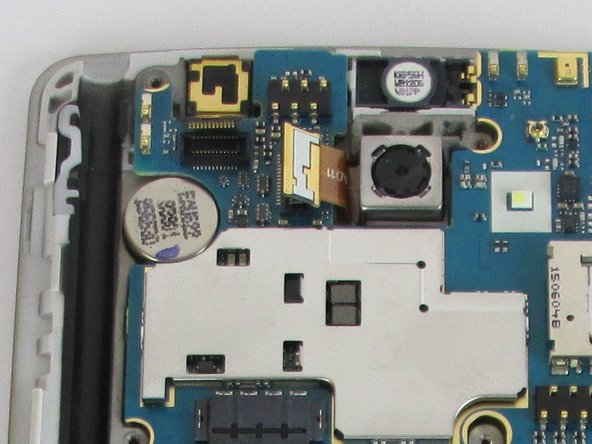
The third photo shows you what the ribbons should look like once you’ve successfully popped them off. Nailed it!
– Gently slide the plastic opening tool beneath the ribbons where the cables are linked, and give it a little lift to free those cables. You’ve got this!
Step 6


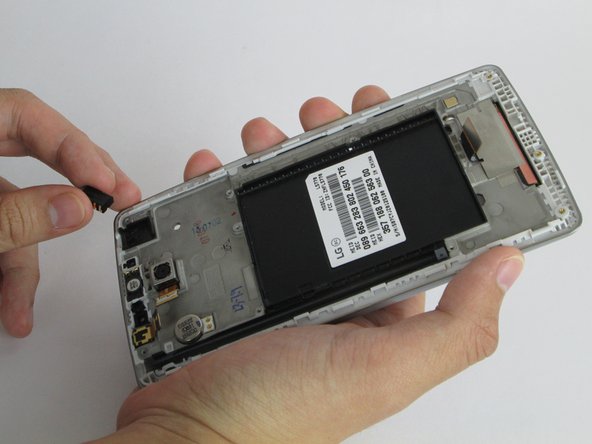
This step should be a breeze as long as all the ribbons have been properly disconnected.
– Let’s get that motherboard out! Use your plastic opening tool to carefully pry it upward and completely remove it.
Step 7

The headphone port sticks in place thanks to some seriously clingy adhesive, so roll up your sleeves—it might take a bit of elbow grease to pry it loose. Don’t sweat it, you’ve got this!
– Slide the plastic opening tool under the headphone jack at the bottom corner and gently pop it up. Once it’s loosened, use your fingers to pull out the headphone port—easy-peasy!