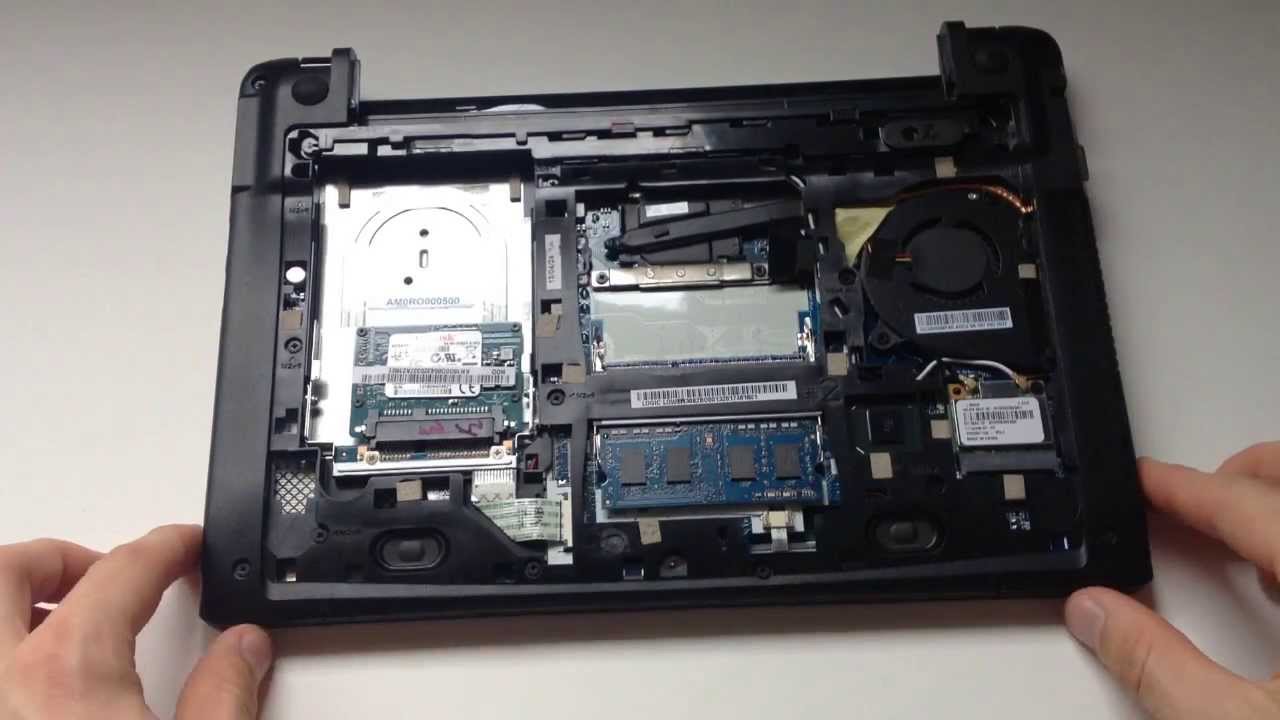
Acer Chromebook C710-2847 Cooling Fan Replacement
Duration: 45 minutes
Steps: 20 Steps
Computers work hard, and working hard means heating up! The cooling fan is like your computer’s personal breeze, pulling air through to keep things chill. But if dust decides to set up camp or the fan waves goodbye, your computer could be at risk of overheating. Let’s tackle this issue together!
Step 1


– Flip the laptop over so it’s chilling on a flat table, bottom side up—like it’s ready for a spa day.
– Using a spudger or your trusty finger, pop it into the hole on the battery release slider and give it a little push.
Tools Used

Step 2


– Grab that trusty spudger and slide the slider to the right—keep it there like you’re holding the door for a buddy!
– While you’re holding the slider in place, use your other hand to gently pull the battery back and away from the laptop. Easy does it!
Tools Used
Step 3

Heads up! This step will nix your device warranty.
– Time to get started! Use your trusty screwdriver to carefully pierce the warranty sticker – don’t worry, it’s a necessary step to get your device fixed.
– Now, let’s get to the good stuff. Unscrew and remove the #0 6mm Phillips screw, and set it aside in a safe place where it won’t get lost. You’re making great progress!
Step 4


– Gently slide the back panel towards you, making sure your fingers land on the bumpers for the best grip.
– Now, give the front edge a little lift to pop that panel off and you’re all set!
Step 5


The hard drive is linked to the laptop by a ribbon cable. Gently lift the side of the drive facing you—just an inch is all it needs! Keep it smooth and steady; a torn ribbon cable means you’ll be calling in the pros. Nobody wants that, right?
– Gently raise the hard drive assembly using one finger, starting from the bottom left corner.
Step 6


– Grab the hard drive assembly and keep the end closest to you near the laptop. It’s totally fine to lift the far end a bit, just don’t be afraid to tilt it towards you.
– Unscrew the two silver #0 3mm Phillips screws on each side of the hard drive — one on the left, one on the right.
Step 7


– Grab the hard drive’s base securely with your right hand like you’re giving it a supportive handshake.
– With your left hand, gently slide the hard drive out of its snug little home, and keep a firm grip to make sure the ribbon cable doesn’t get yanked along for the ride!
Step 8


The RAM stick will spring up with a little nudge!
– Gently nudge those metal tabs sideways to release the memory stick.
Step 9


– Gently lift the RAM stick up and away from the laptop, like you’re pulling a bookmark out of a book. Simple and smooth, just how we like it.
Step 10


– Time to get this repair started! Use a spudger or your trusty fingernails to gently pry up and release the two gold connectors sitting on top of the wireless card. Easy does it!
Tools Used
Step 11

– Let’s get started! Begin by removing the black #0 3mm Phillips screw located at the top right of the wireless card. Grab your trusty screwdriver and carefully unscrew it.
Step 12


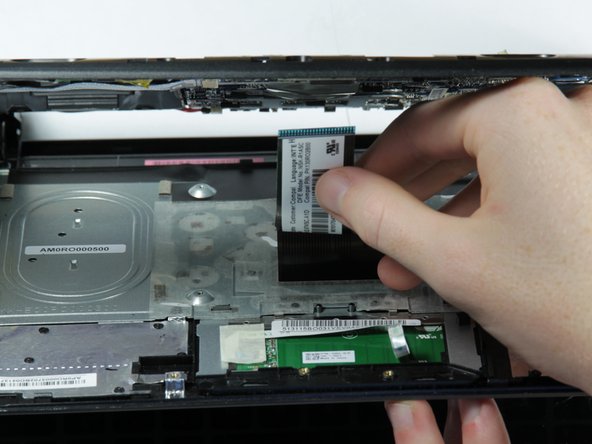
– The wireless card will pop up like it’s ready for takeoff.
– Lift it up and slide it out—you’ve got this!
Step 13


– Give the SD card a little push until you hear that satisfying click, then watch it pop out like magic.
– Grab the card and slide it out gracefully.
– Unleash your inner DIY hero and start unscrewing. Time to set those screws free!
– Sixteen #0 6mm Phillips screws are waiting for their escape—don’t forget to count them!
– Oh, and there’s one tiny #0 3mm screw feeling left out—invite it to the party too!
Step 14

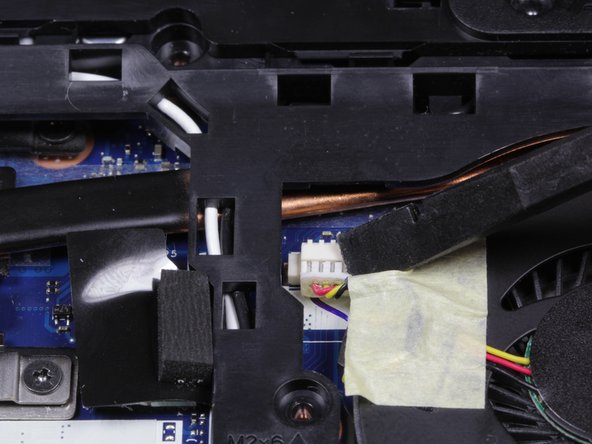
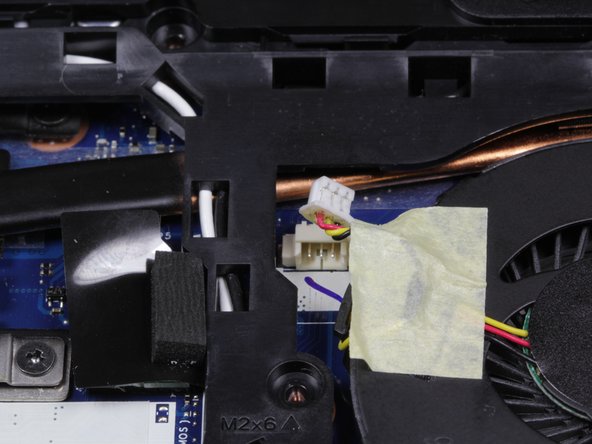
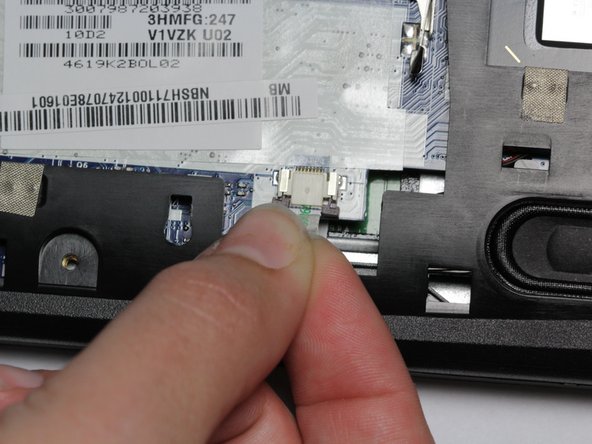
– Let’s get started! Begin by carefully unplugging the fan power cable. Use a spudger to gently pry the connection loose, then pull the cable towards you to release it.
Tools Used
Step 15
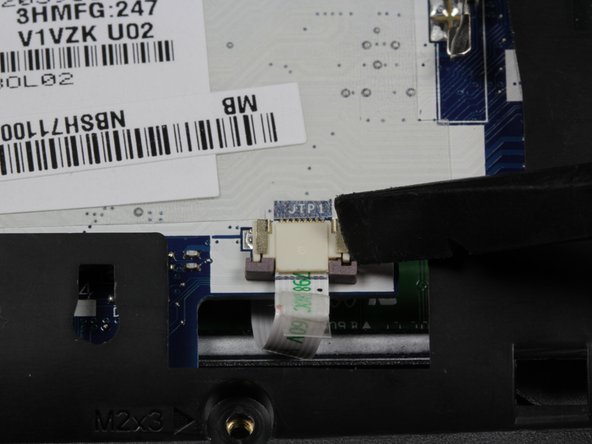

– Using the spudger, slide those two little brown clips towards you to unplug the cable nestled beneath the lower RAM slot. You’ve got this!
– Now, gently give that clear plastic tab a tug towards you to pull the cable free. Easy peasy!
Tools Used
Step 16
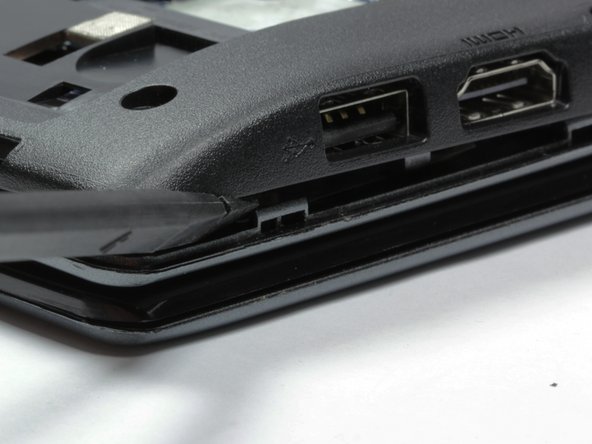

– Grab your spudger and start at the USB port on the right side of your laptop. Gently work your way around the bottom half of the case, moving clockwise. It should pop off with a little patience, and just like that, you’re on your way to a smooth repair. If you need help, you can always schedule a repair.
Tools Used
Step 17

Be careful not to lower the keyboard assembly too much, or you might end up giving the keyboard ribbon cable a rough time. Let’s keep that cable nice and cozy!
– Swing that laptop hinge open to about 45 degrees, just like you’re cracking open a book.
– Gently lower the keyboard assembly halfway down between the case and the screen, like a smooth dance move.
Step 18
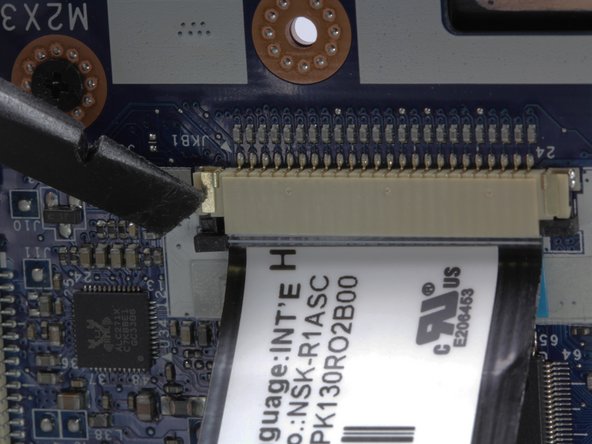

– Time to get that ribbon cable out! Use a spudger to gently press down on the black tabs, and it should come free from the case in no time.
– Now, carefully pull the ribbon cable out of its slot – easy does it!
Tools Used
Step 19

– Gently tilt the keyboard assembly down towards the screen until it gracefully pops free from the clips near the hinges. Patience is key—those clips can be sneaky!
– Once the keyboard is detached, place it aside somewhere safe and cozy.
Step 20
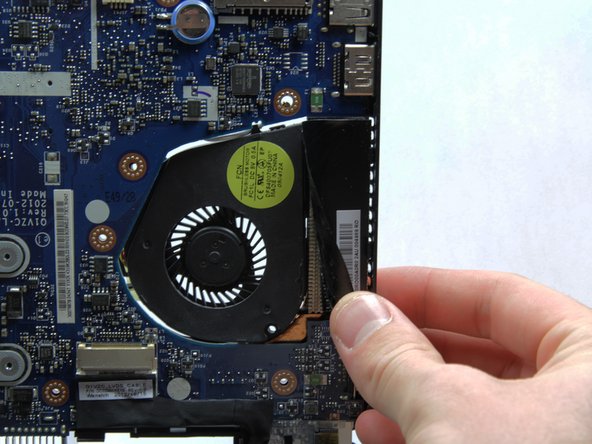

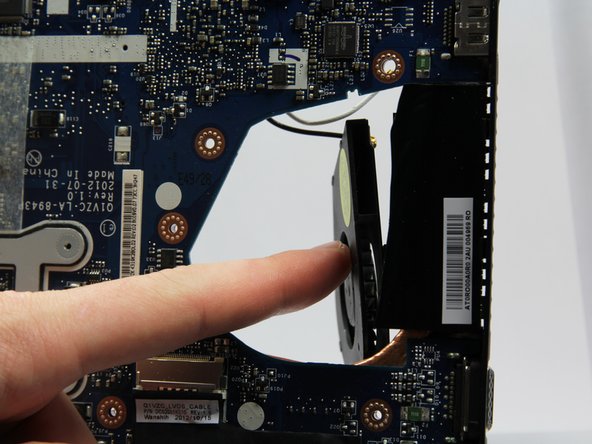
– Swing that hinge open to a cool 90 degrees!
– Gently peel back the left edge of the tape that’s keeping the fan cozy on the right side of the motherboard.
– Give the fan a little nudge to help it slide out the back of the laptop.