Acer Chromebook C710-2847 RAM Replacement
Duration: 45 minutes
Steps: 6 Steps
RAM is like the speedy assistant your programs rely on to grab data pronto. When you’re juggling lots of programs at once, your computer’s gonna need more RAM to keep everything running smoothly and avoid a meltdown!
Step 1


– Flip the laptop over so it’s chilling on a flat table, bottom side up—like it’s ready for a spa day.
– Using a spudger or your trusty finger, pop it into the hole on the battery release slider and give it a little push.
Tools Used

Step 2


– Grab that trusty spudger and slide the slider to the right—keep it there like you’re holding the door for a buddy!
– While you’re holding the slider in place, use your other hand to gently pull the battery back and away from the laptop. Easy does it!
Tools Used
Step 3

Heads up: This will nix your warranty, so proceed with confidence and a dash of daring!
– Grab your trusty screwdriver and gently pop through that warranty sticker—it’s just a sticker, no big deal!
– Twist out the #0 6mm Phillips screw and set it aside like a pro—keep it safe, you’ll need it later!
Step 4


– Gently slide the back panel towards you, making sure to grip it at the bumpers for the best leverage.
– Carefully lift the front edge to pop off the panel.
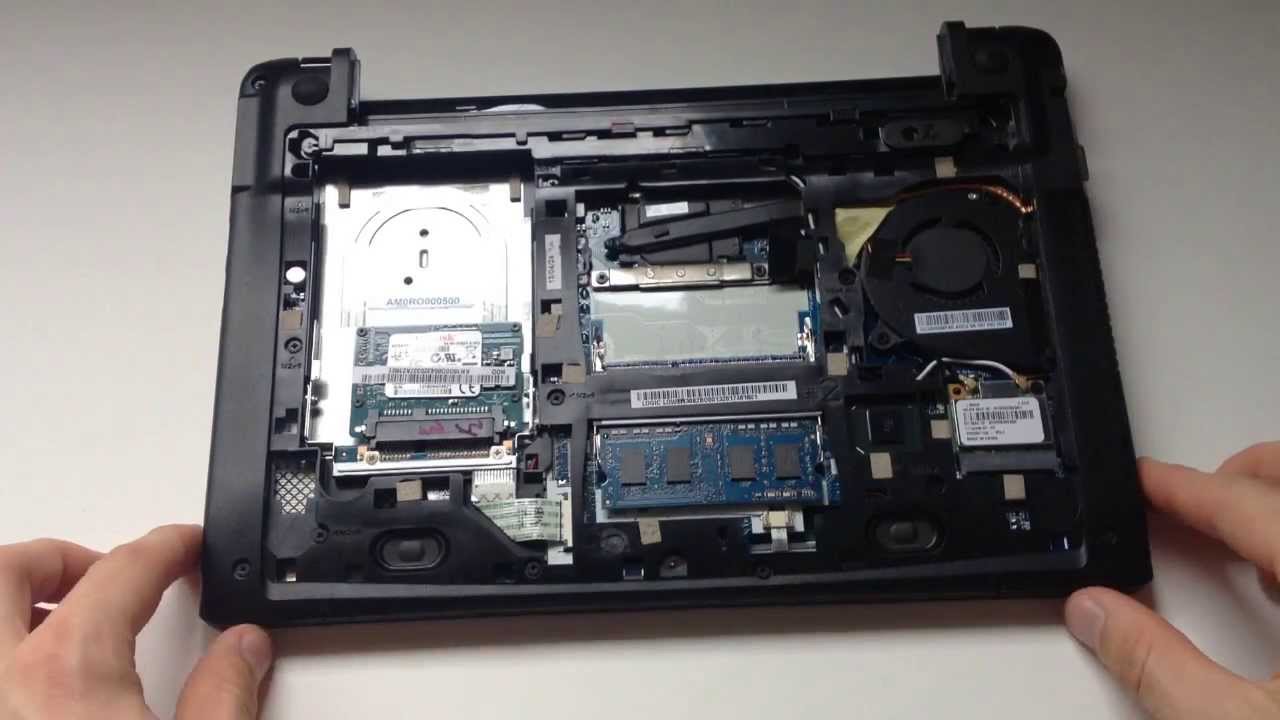
Step 5


Give the RAM stick a little nudge—it’ll pop up like it’s been waiting for this moment all along.
– Gently nudge the metal tabs sideways to free the memory stick. Easy does it!
Step 6


– Alright, you’re all set! To put your device back together, just follow the steps in reverse. Easy peasy!
– Need a hand or run into trouble? You can always schedule a repair!