Dell Inspiron 1545 Display Replacement
Duration: 45 minutes
Steps: 15 Steps
Displays can be tricky, with lots of little parts that might need attention. This guide focuses on accessing the major components, but it’s your gateway to tackling the smaller bits if needed. Keep calm, stay curious, and dive in!
Step 1

– Before you even think about yanking out that battery, make sure the laptop is totally unplugged from all power sources and powered down. Safety first, rockstar!
– Flip that laptop onto its back like you’re giving it a spa day. Let’s get to it!
Step 2

– Gently slide the release latch while pulling the battery back with a smooth motion. You’ve got this!
Step 3

– Gently slide that battery out of its cozy little bay.
Step 4
– Pop out the battery, and then grab a trusty Phillips #1 screwdriver to remove the two 3mm screws hiding underneath. They’re the heroes holding the Center Control Cover in place.
Step 5
– Flip the laptop onto its front side, then open the display all the way—it’s time to give it some room to breathe!
Step 6
Handle the Center Control Cover with care—it’s super delicate! Use prying tools gently and patiently to avoid any oops moments.
– Pop off the Center Control Cover from your laptop—easy peasy! You’ll spot a small divot on the right side; that’s your sweet spot to start prying this bad boy off.
– Gently lift the Center Control Cover away from the laptop like a pro.
Step 7
– Unscrew the two 5mm Phillips #1 screws perched at the top of the keyboard and get ready to dive into the fun of repair!
Step 8
Go easy on that keyboard when you’re taking it out—yanking too hard could mess up the keyboard or its connector. Patience saves repairs!
– Gently slide the keyboard out and away from the laptop, then lift it up to reveal the keyboard connector. You’re doing great!
Step 9
– Gently lift the latch that holds the keyboard cable in place on the motherboard, and then carefully disconnect the cable.
Step 10
– Gently lift the keyboard up and away from the laptop like you’re peeling back the lid of a treasure chest.
Step 11
– Unscrew the two 5.5mm Phillips #1 screws from the laptop base—you’re doing great so far!
Step 12
– Gently detach the black and white wires from the WLAN that connect to the display—just pull them straight up, no force needed!
– Unravel those wires so they’re all set to glide through smoothly in the next move.
Step 13
– Flip your laptop back to its upright position, nice and easy.
– Gently detach the Wed cable and Camera1 cable from their respective spots on the Motherboard—just follow the markings. Loosen those wires a bit so they’re not too tight.
– Now, carefully pull the black and white wires that were connected to the WLAN through that little hole.
Step 14
– Alright, let’s tackle this! Pop off the Camera1 cable, the Wed cable, and those black and white wires from their comfy routing guides. Easy peasy, right?
– Next up, grab your trusty Phillips #1 screwdriver and take out the four screws (5mm, two on each side) holding the display assembly in place. You’re doing awesome!
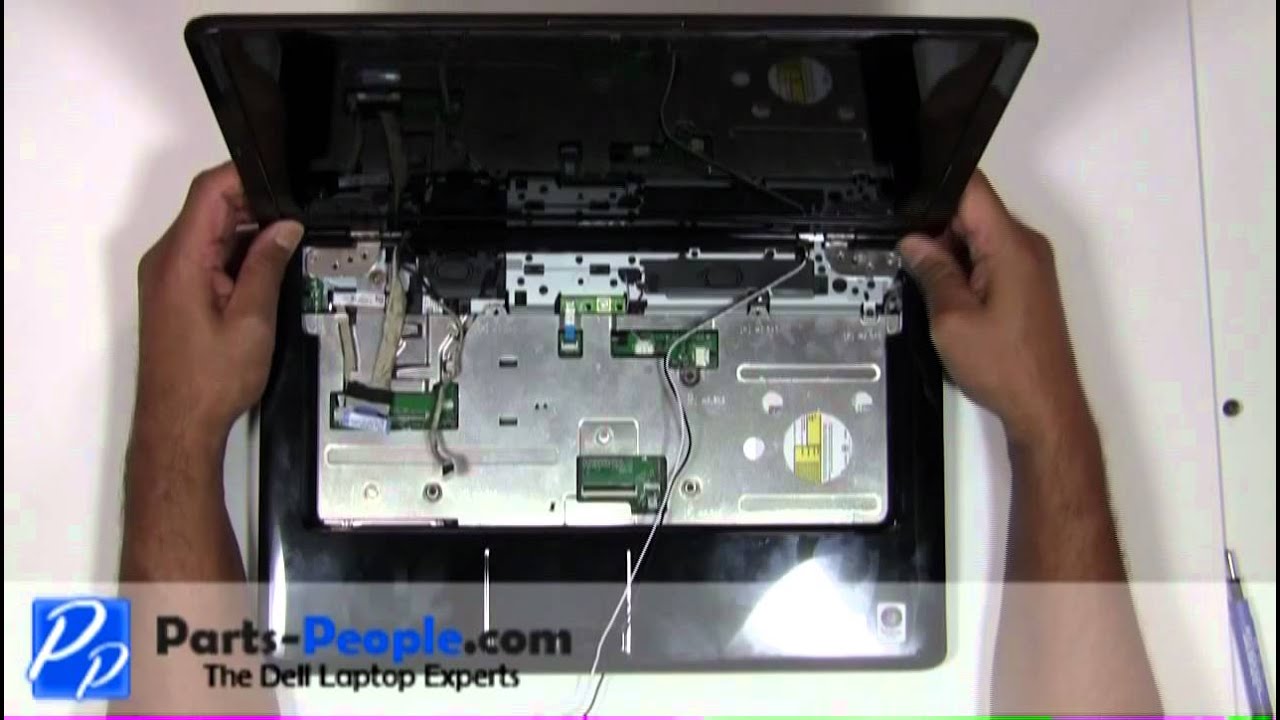
Step 15
– Gently lift the display assembly up and off the computer—like peeling back the lid of treasure chest!