PlayStation 2 Slimline IR Sensor Replacement
Duration: 45 minutes
Steps: 7 Steps
Get ready to dive into the world of the Playstation 2 Slimline! In this guide, we’ll help you find and swap out the Infrared Sensor, the little hero that lets your PS2 controllers and remotes communicate wirelessly, just like they’re plugged right in. Let’s make your gaming experience smooth and hassle-free!
Step 1
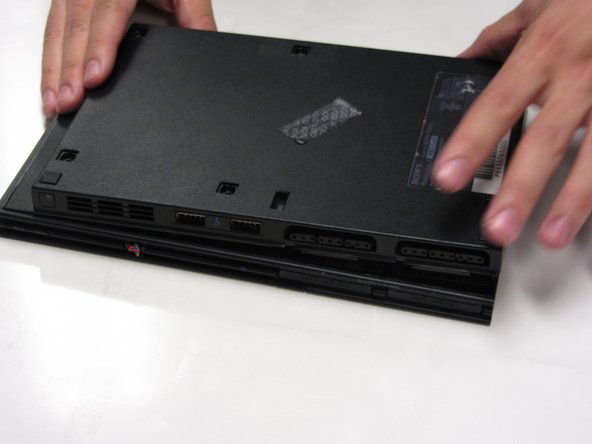
– Unplug all the cables from the console and gently turn the unit upside down to expose its base.
Step 2
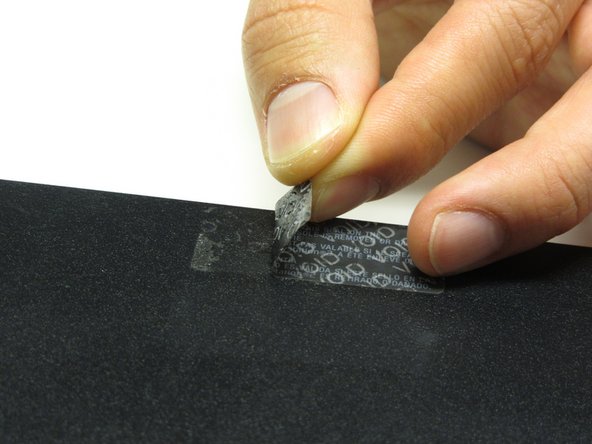
Heads up! One of the little feet is hiding under that sticker you see in the photo. Just a friendly reminder: peeling off this sticker will wave goodbye to any warranty you have with Sony. So, think twice before you go on a sticker adventure!
– First, let’s get started by locating the 6 feet on the base of the unit. Use a spudger to carefully pry them off, and voila! You’ll reveal the screws underneath.
Tools Used
Step 3
– Grab a #1 Phillips screwdriver and take out all six 4.0 mm screws holding down the base of the unit. Easy peasy, you’ve got this!
Step 4
Pro tip: If things are a bit snug, feel free to use your hands to gently nudge the outer shell apart. A little extra oomph goes a long way!
– Start at the corner where the power and Ethernet ports hang out together. Grab your trusty spudger, pry open the outer shell, and keep going all the way around the unit. You’ve got this!
Tools Used
Step 5
– Find the IR sensor hanging out at the front, right corner of your device. It’s just waiting for you to give it some attention!
Step 6
– Carefully unhook the ribbon cable that links the IR sensor to the motherboard. Take your time to avoid any accidental tugs.
– Pro tip: Always handle ribbon cables by the plastic grips on each end. Grabbing them anywhere else could cause damage and leave the cable useless. Be gentle!
Step 7
– Carefully pop out the IR Sensor from its cozy little spot—no need to rush, just take it nice and easy!


