PlayStation 2 Slimline Fan Replacement
Duration: 45 minutes
Steps: 8 Steps
Ready to rescue your PlayStation 2 Slimline’s fan? Let’s locate it, swap it out, and get your console back to chilling like a pro!
Step 1

– Unplug all the cables from your console, and flip that bad boy over to check out its base.
Step 2


Heads up: One of the feet is hiding under the sticker shown in the photo. Peeling off this sticker will void any warranty with Sony, so proceed with care!
– Find the 6 little feet on the bottom of the unit. Use a spudger to gently pop them off and uncover the hidden screws underneath.
Tools Used

Step 3


– Grab your #1 Phillips screwdriver and unscrew all six 4.0 mm screws from the bottom of the device. You’re doing awesome, keep going!
Step 4


Tip: If needed, use your hands for a little extra oomph to separate the two parts of the outer shell.
– Start at the corner where the power and Ethernet ports are hanging out, and gently pop open the outer shell with a trusty spudger. Keep the momentum going and work your way all around the unit like a pro.
Tools Used
Step 5


– Spot the fan hanging out in the front left corner of the unit—yep, that’s the one!
Step 6


– Gently peel away the sticker that’s keeping the power cords snug against the unit.
Step 7
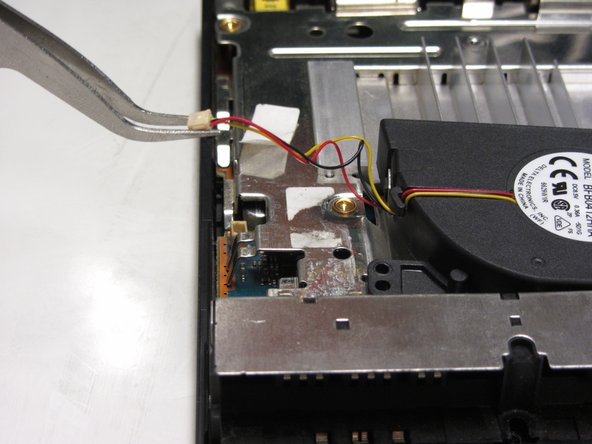

– Use a pair of tweezers to gently lift the connector off the motherboard with a confident, upward motion. Be steady, you’re doing awesome!
Tools Used

Step 8


– Now it’s time to put everything back together—just rewind the steps, and you’re good to go!
– If things get tricky, don’t stress! You can always schedule a repair.