Xbox One Kinect Teardown
Duration: 45 minutes
Steps: 14 Steps
Following our recent Xbox One teardown, we’re diving into the Kinect 2.0, the revamped next-gen version of Microsoft’s voice, vision, and motion control accessory. Stay tuned for all the cool details from our teardown crew in New Zealand! For more fun updates, check us out on Instagram, grab some tasty tidbits on Twitter, and join the conversation on Facebook. If you find yourself needing a hand, feel free to schedule a repair!
Step 1


– Ready to level up your connection game? Salvation Repair is here to help you navigate the impressive upgrades in Kinect technology:
– A 1080p HD wide-angle camera for those crystal-clear visuals.
– An active infrared camera that sees in the dark like it’s got night vision superpowers.
– A multi-microphone setup that comes with noise cancellation and responds to voice commands like a well-tuned assistant.
– Top-notch processing power handling 2 gigabits of environmental data per second—efficiency at its finest!
Step 2

– This cable is snugly attached to the Kinect’s brainstem, making it a bit tricky to detach. Take your time with it!
– Time to dive in and disassemble that Xbox!
– Looks like that voice command feature isn’t quite ready for action yet. We’ll be tackling this teardown the classic way!
Step 3


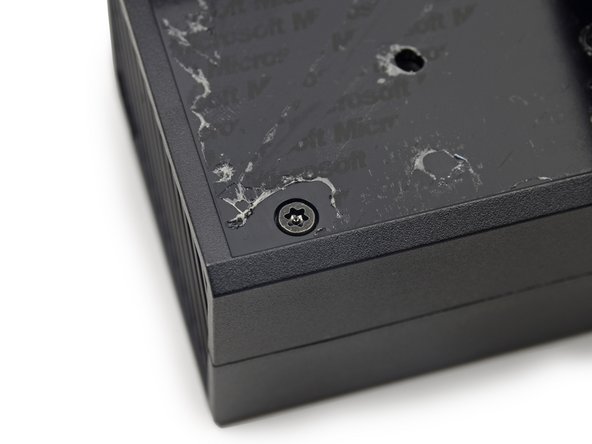
– It’s time to dig in and find those sneaky screws!
– Let’s get this repair started by removing the two long T10 Security Torx screws and the two short T10 Torx screws that are hidden beneath the adhesive. Having the right tools can make all the difference, check out our Pro Tech Screwdriver Set to make this process a breeze.
– With your trusty screwdriver in hand, give those screws a few twists and you’ll be inside in no time. Take a look around and get familiar with the inside of the device.
– It’s no surprise that the adhesive has the manufacturer’s name on it – it’s a challenge to remove, but don’t worry, you’ve got this! Let’s keep going and see what other surprises are in store.
Step 4


– Now that the screws are out of the way, it’s time to crack open the Kinect and take a peek inside—let’s see what makes it tick.
– For those keeping track, Microsoft labeled the Xbox One Kinect as model 1520.
– Oh, and Microsoft sends a little hello all the way from their headquarters in Seattle.
Step 5


– Let’s get started by taking apart the fan assembly – don’t worry, it’s easier than it sounds! We’ll break down the grille, cowling, and fan as we go, so you can see exactly what you’re working with.
– Take a look at the 5 volt DC fan, made by Nidec and labeled as U40R05MS1A7-57A07A. It’s a key component, and we’re excited to show you how to work with it.
– Now it’s time to get to the good stuff! We’re talking about the components under the plastic casings – the fun part of any repair. Let’s dive in and explore what’s inside.
Step 6


It’s time to resort to Plan B…
– With the outer shell removed, we get a peek at some green internals. As tempting as it might be to tug and pull, let’s keep it cool and methodical—time to gently remove components the proper way.
– Starting at the base—well, the foot area—we carefully lift the camera assembly off its perch, like a ninja catching it by surprise.
– Next, we peel back some rubber padding to uncover a few sneaky screws. But hold up—we hit a bit of a roadblock here. No worries, patience is key!
Step 7


– Time to get creative, but not too creative – we’ll leave the office chainsaw in its box for now.
– Plan C is a go: carefully disconnect this tiny light board, it’s smaller than you think but plays a big role.
– This little board is home to an LED and a sensor, so let’s handle it with care.
Step 8


Check out that updated design! It looks like Microsoft gave the old model a bit of a facelift, moving the IR projector to give it a more streamlined, two-eyed look. We’re likely dealing with a STMicroelectronics STV2000 I2C Deflection Processor/RGB Preamplifier here.
– Time to peel back another layer of this tech onion—let’s clear out that next bit of cover in our way!
– Eye spy an IC chip—looking good!
– Microsoft X871141-001 – According to our pals over at Chipworks, this chip is the successor to the Prime Sense chip from the original Kinect. Judging by the font and package codes, it hails from STMicroelectronics.
– Samsung K4B1G1646G-BYH9 1 Gb (128 MB) DDR3 SDRAM—fast and reliable, doing its thing!
– ON Semiconductor NCP6922 Power Management keeping everything running smooth and steady.
Step 9


If you’re not fluent in ASL, here’s what your Kinect is tuned in to detect.
Watch your words around your Kinect—it might just have a knack for spotting fibs! Apparently, it can even pick up on the pulse in your face. How wild is that?
– This teardown is starting to feel like a quirky game of steady hands—stay focused!
– Set the robot monocle aside and take a closer look at the camera.
– Gently lift out the camera, making sure not to rush.
– Now it’s time for the lens. Handle it carefully—no sudden moves!
Step 10


Modular cameras bring a grin to our faces, giving us a delightful nod to another robot.
– Flip the second camera over to the back, and you’ll spot these labels:
– The front side is where the action is—it’s got a little more circuitry going on. Here’s what stands out in the mix:
– S/N: S1337573123
– P/N: X861135-001
– A/N: 1337-MS2802-09
– Texas Instruments TPS54325 – According to the tech wizards at Chipworks, this is an adaptive on-time D-CAP2™ mode synchronous buck converter. Fancy, huh?
Step 11
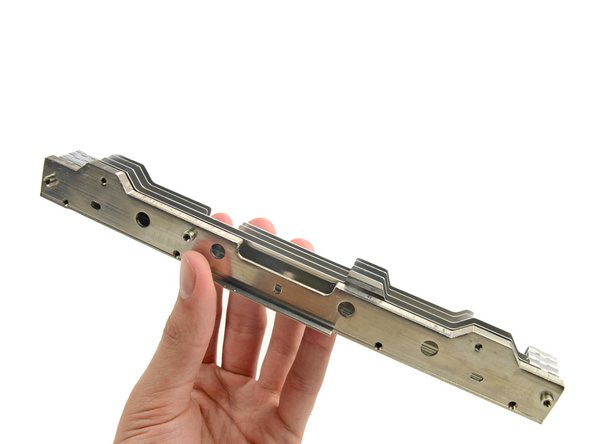

– Alright, get ready—this frame bracket is on its way out!
– Multiple layers of metal bring some serious sturdiness to the Kinect, while keeping space for all the components.
– Form meets function here—this bracket is doubling as a heat sink, complete with some trusty thermal pads sticking to it.
Step 12


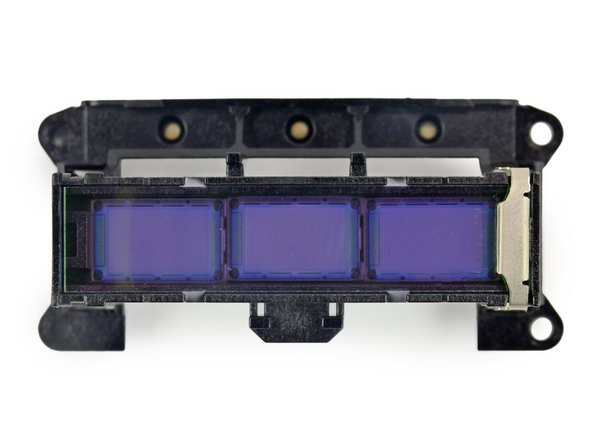
Microsoft is boasting a game-changing leap with three times the clarity of the previous Kinect. Let’s just say, this tech totally earns the nickname Tri-Fi!
– Those vibrant purple filters are hiding what looks like three IR blasters. If we could see in infrared, it would probably be a wild visual experience.
– For now, you’ll just have to enjoy the invisible IR magic lighting up your living room, a sight only your Kinect can appreciate.
– Microsoft is also boasting about their new Active IR technology, which lets your Kinect see you in the dark—kind of like the night vision mode on every camcorder since the 90s.
Step 13


– All aboard the fix-it train!
– Spotlight on the suspects: IR projector parts 1 through 3.
– More silicon in the teardown? Yes, please!
– TI LMV339I: The low-voltage comparator champ is here.
– Possible lineup: Intersil ISL58302. Triple laser diode driver, anyone?
– Fanout like a pro with the ON Semiconductor NB3L14S LVDS buffer.
– Keep your cool with the ON Semiconductor NCT75 temperature sensor.
Step 14

– Xbox One Kinect Repairability: 6 out of 10 (10 is the easiest to repair).
– Getting inside is a breeze, and once you’re there, swapping out the fan is a piece of cake!
– While the interior isn’t packed with fixes, most parts are modular and secured with screws. If you’re looking to replace one of the many cameras, you’re in luck…
– However, the three tiny IR blasters in the center of the sensor bar are a different story. Those little guys are soldered in, thanks to Microsoft’s design choices.
– Be prepared for a bit of a challenge getting inside, as screws are cleverly hidden under tamper-evident tape and tricky clips.
– The same screw types from the original Kinect are back, including that pesky T10 Security bit that can make repairs a bit tricky.
