PlayStation 3 Super Slim WiFi Antenna Replacement
Duration: 45 minutes
Steps: 24 Steps
Dive into the PlayStation 3 Super Slim Teardown to uncover the magic behind the scenes of your console! Get ready for a detailed exploration of the motherboard. If you’re looking to swap out the antenna, just jump to Step 19 for all the juicy details. Happy repairing!
Step 1

– Get ready to unleash the beast! The PlayStation 3 Super Slim is packed with impressive specs, including:
– HD 1080p, 1080i, 720p, 480p, and 480i output – that’s a whole lot of high-definition goodness!
– LPCM 7.1ch surround sound, Dolby Digital, Dolby Digital Plus, Dolby TrueHD, DTS, DTS-HD, AAC – your ears will thank you!
– Cell Broadband Engine – the brain behind the operation
– RSX GPU – the graphics guru
– 256MB XDR Main RAM and 256MB GDDR3 VRAM – plenty of memory to go around
– Available with 12 (flash memory), 250, or 500 GB (upgradable!) internal storage – store all your favorite games and more!
Step 2


– Okay, so here’s the deal. We ended up grabbing our PlayStation 3 Super Slim in a bundle. It looks like Nathan Drake found another epic treasure, and this one’s definitely worth a shout-out.
– So, what’s actually packed in this bundle? Glad you asked:
– 250 GB PlayStation 3 Super Slim System
– DualShock 3 Wireless Controller
– AV Composite Cable (no HDMI in this bundle, unfortunately)
– AC Power Cord
– USB Cable (for charging that trusty DualShock controller)
– Uncharted 3: Drake’s Deception (Game of the Year Edition) + Dust 514 (Downloadable content included)
Step 3


– We wanted to see how the PS3 Super Slim measures up to the original Slim model—the console it’s stepping in to replace.
– Spoiler alert: our little experiment gave us just what we expected. The Super Slim? Big name, tiny frame.
– At first glance, the backs of both consoles seem alike, but take a closer look and you’ll spot some major updates that make the Super Slim stand out.
– First up, the cooling vents are noticeably smaller. Translation? The fan inside is likely downsized too, which means it’s got less heat to handle.
– Next, the port layout is subtly shifted. This answers a burning question we get a lot—can you swap Slim and Super Slim motherboards? Sorry to say, but no dice on that one.
Step 4

– One of the most noticeable changes in this model—and a major complaint from users—is the shift to a manual top-loading disc drive.
– It seems ditching the tray was a smart move to trim down both costs and size for the Super Slim. While this decision has definitely raised some eyebrows, it’s similar to other recent size-focused adjustments we’ve seen.
– Not only does this change help Sony’s bottom line, but it also ensures the PS3 stays relevant in the long run. When the Playstation 4 rolls out, expect the PS3 Super Slim to stick around at a more budget-friendly price point.
– The new door is made of thin, plasticky material, which means this PS3 now needs extra space above it to swap discs. So, no more squeezing it into that tiny shelf—give it some breathing room!
Step 5

– The lower part of the Super Slim resembles its earlier version, but guess what? The Wi-Fi indicator light is taking a little vacation! No worries, though—the absence of this light doesn’t mean the Super Slim is missing out on Wi-Fi goodness.
– On the bright side, the front of the Super Slim still boasts two USB 2.0 ports, a hard drive indicator light, and a bunch of logos that show off its capabilities, including the classic Blu-ray Disc logo. You’re all set!
Step 6


If you’ve been timing yourself, that’s just one Phillips screwdriver and a quick 5 to 10 minutes to swap out a hard drive. Easy peasy!
– Pop off the PS3 Super Slim’s hard drive bay cover—no tools needed! Underneath, you’ll spot a bright blue Phillips screw just waiting to be unscrewed.
– Once that screw is out of the way, you can slide out the Hitachi TravelStar Z5K320 2.5″ SATA II 3.0Gbps 250 GB 5400 RPM hard drive with ease. Simple as that!
– Here’s the awesome part: Sony makes this super flexible! You can swap in any 2.5″ laptop hard drive you want—no weird firmware or unusual cases to mess with. Just grab your new drive, pop it in, and enjoy all the extra storage space your heart desires.
Step 7


– Those little rubber feet are hiding three screws on the outer case and giving the PlayStation 3 Super Slim a nice grip. Sneaky, right?
– And just when you thought you were in the clear, a cheeky Warranty Void sticker blocks the fourth screw! Poof, it’s gone!
– Honestly, these feet aren’t a hassle at all; they’re super easy to pop off, serve a purpose, and tidy up the console’s appearance.
– As for those stickers? Total nonsense! We think you should feel the same way.
Step 8

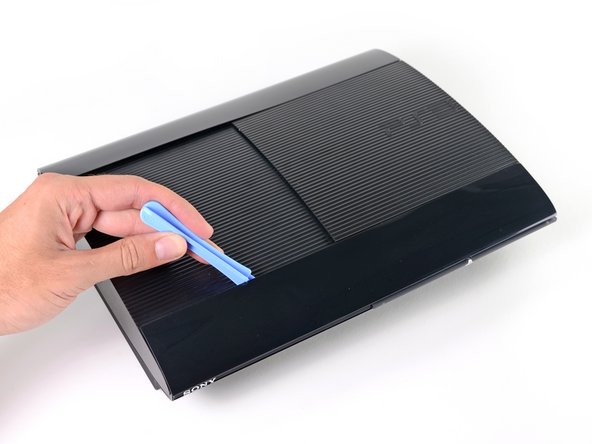
– Grab a plastic opening tool to breeze through those outer bezels like a pro.
– Underneath the front outer bezel, you’ll spot the ever-so-tempting laser warning sticker just waiting for your attention.
– Taking off the bezels not only reveals the screws we need to tackle but also opens the door to the inner workings of the Super Slim.
Step 9

– Alright, time to dive in! Let’s slide off the top cover and see what treasures await beneath the surface of the PS3 Super Slim. Exciting stuff, right?
– Looks like we’ve got an internal plastic casing playing protector for most of the components here. Time to gently move forward!
Step 10
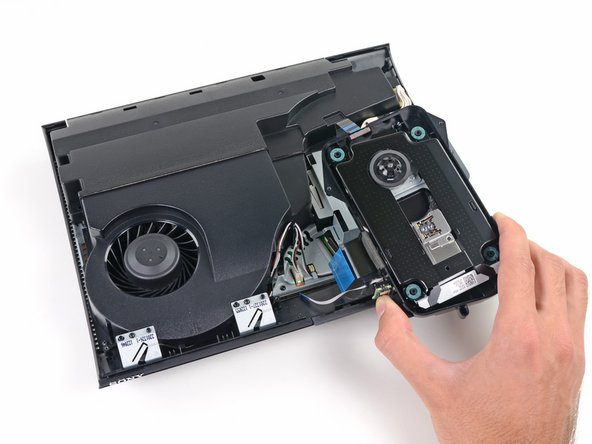


– Once you’ve popped off the top cover, let’s dive deeper by taking out the manual top-loading disc tray. It’s like unwrapping a surprise!
– Now, the tray-free disc loader in the Super Slim might have its critics, but hey, it’s designed with repairs in mind, and that’s a win in our book!
– Keep an eye out for the laser lens, which is marked as KEM-850 PHA 0672 23020A. It’s a little gem in this setup.
– We’ve heard some mixed reviews about the noise level from the PS3 Super Slim’s disc drive, so we made sure to check out Sony’s efforts to keep things quiet:
– The drive is cushioned on super soft rubber bumpers and encased in a noise-reducing plastic tray, which helps to absorb those pesky vibrations.
– That said, don’t expect it to completely silence the sounds coming straight from the drive through that thin plastic tray door. It’s still a bit chatty!
Step 11


– The power supply module is easy to pop out from the back of the case. Simple as that!
– Even though the components are neatly arranged, getting inside the power supply can be a bit tricky. It’s held together by four screws and some tough plastic clips that might put up a little fight.
– Much like the PS3 Slim, this power supply works with inputs from 100V to 240V AC, so it’s ready to roll wherever you are in the world.
– Good news for energy-saving fans: the power consumption is lower now! The PS3 Slim was rated at 12V and 18A DC, but the Super Slim has dialed it down to 12V and 13A DC. Power down, but still plenty of juice.
Step 12


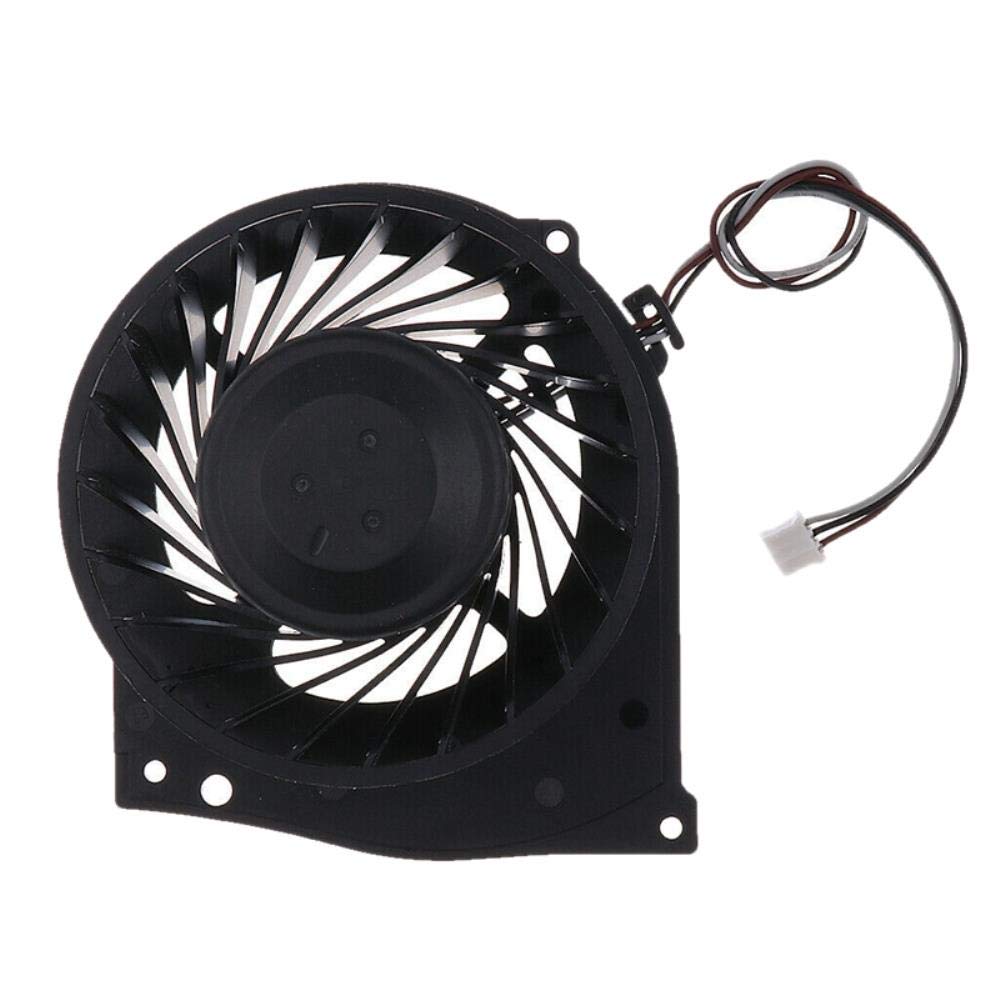
– Next, we’re carefully removing the motherboard and fan assembly from the lower case—our journey continues!
– We were a bit surprised to find out that the entire motherboard assembly has to come out just to get to the fan or heat sinks, but hey, it all adds up to a sleek and sturdy design.
– On the front of the fan assembly, we spot the Wi-Fi and Bluetooth antennas. Pretty neat, right?
– Etched onto the antennas, we find the TE Connectivity logo. Fun fact: TE Connectivity says their antenna designs have made their way into all sorts of wireless gadgets, even some super-cool gaming consoles!
Step 13

– Let’s take a peek under door number two… and guess what we found? The motherboard!
– After a few nerve-wracking moments, we managed to carefully lift the metal frame off the motherboard. Phew!
– A quick once-over reveals the GPU has got plenty of thermal paste, but the CPU could use a bit more love. Room for improvement, indeed!
– Time to get hands-on and make some tweaks. If you need help, you can always schedule a repair
Step 14

– Now, give that motherboard a gentle 45-degree tilt and you’ll see some of the key players that power up the PlayStation 3 Super Slim:
– Cell Broadband Engine CXD2996BGB
– Hynix H5RS5223DFA 512 Megabits GDDR3 VRAM (four chips total, giving you 256 MB of pure power)
– Sony CXM4027R MultiAV driver
– Panasonic MN8647091 HDMI transmitter
– Elpida X1032BBBG-3C-F 1 Gb (split across two chips for a total of 256 MB) XDR DRAM
Step 15

– Let’s take a look at some of the cool Cartesian ICs hanging out on the top of the motherboard:
– Sony RSX CXD530 ‘Reality Synthesizer’ – the magic maker!
– Marvell Avastar 88W8781 SoC WLAN/Bluetooth chip – your wireless buddy!
– Sony CXD9963GB I/O bridge controller – the connector extraordinaire!
– Macronix MX29GL128FLT2I flash storage – where all the good stuff is stored!
– Sony CXD5132R SATA/PATA Blu-ray drive controller – the movie maestro!
– Integrated PCB Wi-Fi antenna – keeping you connected like a pro!
Step 16

– Here are a few quick tips for the back side:
– SW3-302 SCEI 1220EM42E
– BD7761EFV 227 T25
– Intersil ISL6332 MDRZ H223BCC
– IDT 4227ANLG 1149L
– Texas Instruments TPS53123 Dual Synchronous Step-Down Controller
Step 17


The Super Slim has certainly shed some size and weight in the fan department compared to the Slim.
– The Super Slim lets its guard down as we tackle the squirrel cage fan and a pair of heatsinks—no sweat.
– In this (final?) PS3 edition, Sony took a cool approach, using cutting-edge tech to make the same console trimmer, lighter, and quieter—focused on refinement rather than revamping performance.
Step 18


– PS3 Super Slim Repairability: 7 out of 10 (10 means it’s a breeze!)
– Getting to the hard drive is a straightforward task—swap it, repair it, or upgrade it with no sweat.
– The modular tray-free disc loader is a dream to replace. It’s good design for repair nerds!
– You’ll need some standard tools—nothing exotic except a T8 Security bit. Easy peasy.
– Watch out for the cheeky little ‘Warranty Void’ sticker—it’s more annoying than dangerous.
– The power supply is pinned down by a bunch of clips. Not a big deal though, as you probably won’t be cracking it open often.
– To get to the fan or heat sinks, you’ll have to disassemble the entire motherboard assembly. A little tricky, but doable with patience!
– The sliding disc tray door feels a bit flimsy and might not love too much wear and tear. Handle it with care to keep it happy!
Step 19

– Peel off those rubber feet from the bottom of the console—they’re not staying for this party.
– Unscrew the screws hiding under the rubber feet and the one playing shy beneath the warranty sticker.
Step 20


– Grab a flat-head screwdriver and remove those sneaky security screws on the side.
– Slide off the side cover and gently pop out the front flaps—you’re doing great!
Step 21

– Let’s get started by removing two screws from the disk tray – this will allow you to take off the top and get to the good stuff!
Step 22

– Keep that disk tray in place! Just give it a gentle lift to uncover the screw securing that side of the power board.
– Next up, carefully take out the power assembly to access the Bluetooth and wireless connections. You’re doing great!
Step 23


– Detach the wireless aerial from the motherboard so you can swap it out for a toggle antenna. Let’s get this done!
Step 24

– To get your gadget back in action, just work through the steps in reverse. Easy peasy!
– If you need help or run into any snags, you can always schedule a repair.