PlayStation 3 Super Slim Teardown
Duration: 45 minutes
Steps: 18 Steps
Almost six years after the original PlayStation 3 hit the shelves, Sony introduced the PlayStation 3 Super Slim, the third version of their beloved console. It’s definitely slim, but is it truly super? Only a thorough teardown can reveal the truth. Let’s dive into the inner workings of this revamped classic. Enjoying these awesome teardowns? Stay in the loop with all the latest teardown updates! And if your old PS3 is throwing a YLOD tantrum, remember, if you need help, you can always schedule a repair to keep it out of the landfill!
Step 1

– Geared up and ready to shine, the PlayStation 3 Super Slim packs some serious punch in an ultra-compact design. Check out these standout specs:
– HD output options including 1080p, 1080i, 720p, 480p, and 480i
– Immersive audio with LPCM 7.1 channel surround sound, Dolby Digital, Dolby Digital Plus, Dolby TrueHD, DTS, DTS-HD, and AAC support
– Powered by the mighty Cell Broadband Engine™
– Graphics powered by the RSX® GPU
– Loaded with 256MB XDR Main RAM and 256MB GDDR3 VRAM
– Available storage options: 12GB flash memory, or 250GB and 500GB internal drives (yes, you can upgrade!)
Step 2


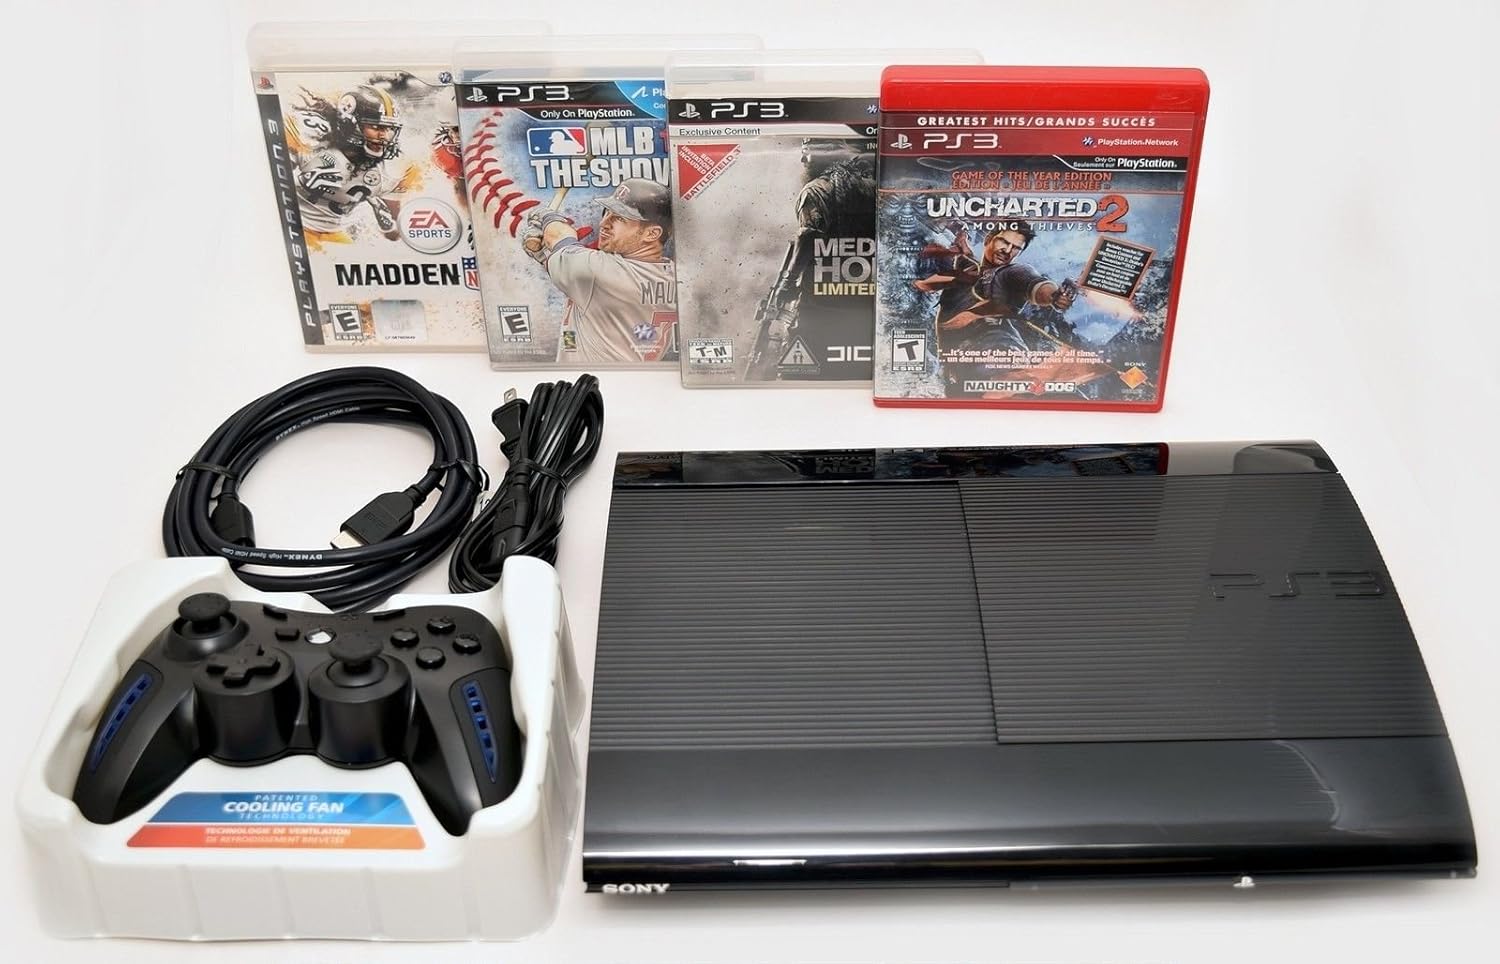
– We’re not complaining, but we had to snag our PlayStation 3 Super Slim as part of a bundle deal. After all those epic quests, Nathan Drake finally uncovered a treasure that’s truly worthy of some applause.
– So, what’s in this awesome bundle? Glad you asked:
– 250 GB PlayStation 3 Super Slim System
– DualShock 3 Wireless Controller
– AV Composite Cable (unfortunately, no HDMI cable is part of this package)
– AC Power Cord
– USB Cable (essential for charging that DualShock controller)
– Uncharted 3: Drake’s Deception (Game of the Year Edition) + Dust 514 (Downloadable content included)
Step 3


– We were curious to see how the PS3 Super Slim compares to the original slim model, the one it’s taking over.
– Call us quirky, but our tests confirmed our expectations. The Super Slim might have a grander name, but it definitely trimmed down some serious pounds.
– While the backs of both consoles may look alike, they reveal a lot about the changes made in the Super Slim.
– First off, the cooling vents are noticeably smaller, which likely means the fan is also smaller and has a lighter workload.
– Plus, the port layout has been shifted just a tad, clearing up a common question we often hear about motherboard compatibility: Nope, you can’t swap the Slim and Super Slim motherboards.
Step 4

– One of the standout changes in the new model—and, let’s be honest, a bit of a head-scratcher for many—is the switch to a manual top-loading disc drive. Yup, no more motorized tray action!
– We’re pretty sure they ditched the tray to save on costs and make the Super Slim more compact. It’s a bold move that stirred up quite a bit of chatter, reminding us of another time when size really mattered.
– On the plus side, this change helps Sony keep production costs down and sets the PS3 up for the long haul. When the PlayStation 4 finally drops, chances are the Super Slim will still be on shelves, rocking a budget-friendly price tag.
– Fair warning: The disc door is made of thin, lightweight plastic, giving it a bit of a flimsy vibe. Plus, you’ll need some extra space above the console to pop in a disc—so no more squeezing the PS3 into tight shelves. Give it some breathing room, and you’re good to go!
Step 5

– The bottom part of the Super Slim still rocks a familiar vibe compared to its predecessor, though it’s missing a Wi-Fi indicator light.
– No worries—just because there’s no Wi-Fi light doesn’t mean the Super Slim isn’t packing Wi-Fi capabilities. You’re good to go!
– Still holding their ground on the front are two trusty USB 2.0 ports, a hard drive indicator light, and a lineup of logos—including the iconic Blu-ray Disc logo. Classic!
Step 6


If you lost count, it’s just one Phillips screwdriver and barely 5 to 10 minutes to swap out that hard drive. Easy-peasy!
– First, let’s get started by removing the hard drive bay cover from your PS3 Super Slim – it’s easier than you think, and it comes right off! Underneath, you’ll find a bright blue Phillips screw waiting to be removed.
– After you’ve taken out that screw, the Hitachi TravelStar Z5K320 2.5″ SATA II 3.0Gbps 250 GB 5400 RPM hard drive will come out with ease.
– One of the coolest features of the PlayStation’s hard drive is that you can upgrade it with any 2.5″ laptop hard drive – no need for fancy firmware or special enclosures, just swap it out and enjoy the extra storage! If you need help along the way, don’t worry, Salvation Repair is here for you.
Step 7


– Three of the outer case screws are cleverly concealed by small rubber feet, which also give the PlayStation 3 Super Slim a bit of grip—pretty handy!
– But wait—what’s this? Blocking the fourth screw is none other than the notorious Warranty Void sticker. Well, not for long—it’s out of the way now.
– These rubber feet? Honestly, they’re not a hassle at all. They pop off easily, add a functional touch, and even give the console a cleaner look.
– As for stickers like this one, let’s just say we’re not fans. We think they’re unnecessary, and we bet you will, too.
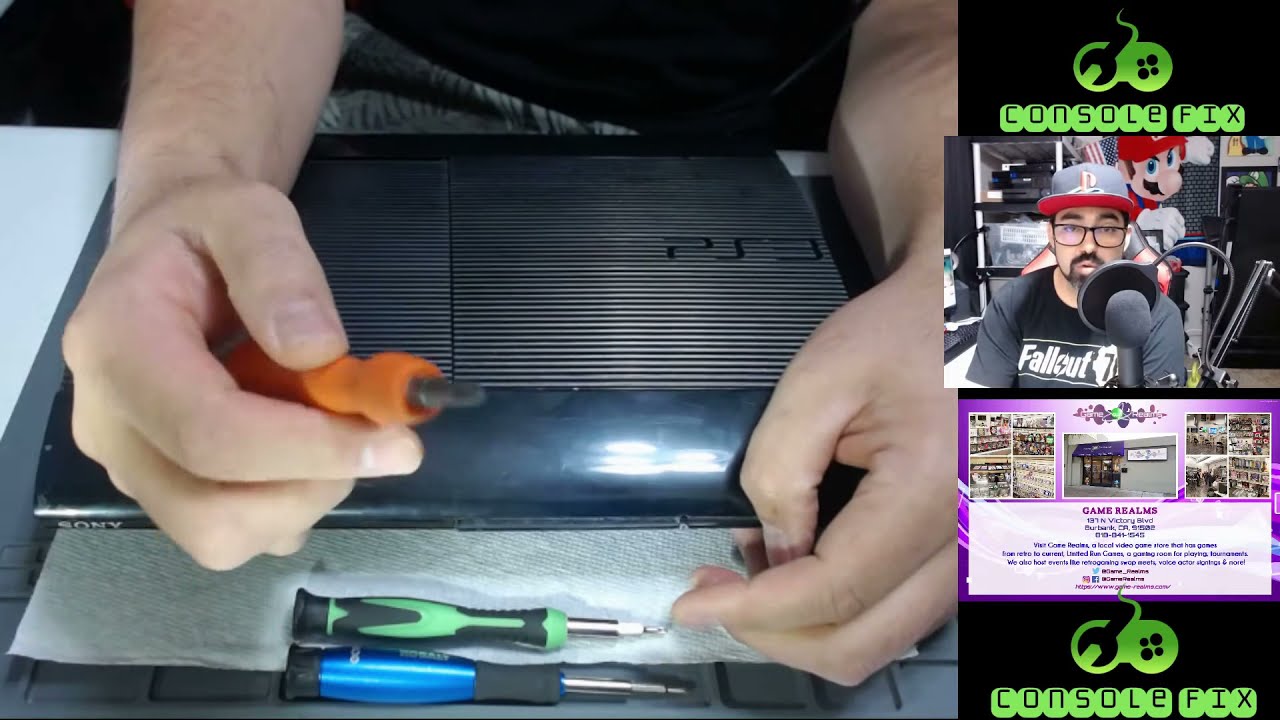
Step 8
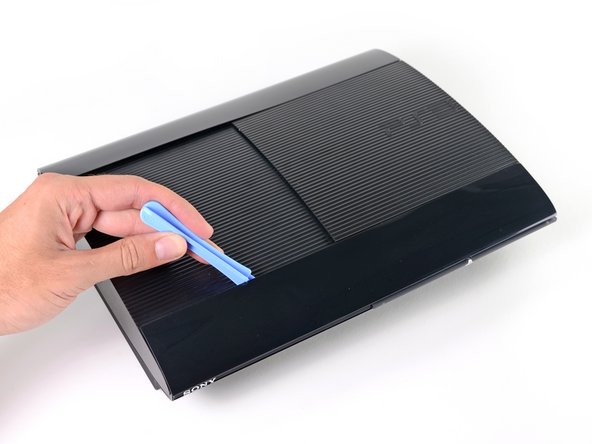

– Whip out a trusty plastic opening tool to finesse those outer bezels—this makes it easy-breezy to handle.
– Hidden under the front outer bezel, we discover the super-enticing laser warning sticker daring us to proceed further.
– Popping off the bezels also reveals the screws we need to tackle to crack open the elusive Super Slim. Let’s roll!
Step 9

– Alright, let’s dive in! What secrets are hidden within the PS3 Super Slim? Time to slide the top cover aside and find out.
– Seems like we’ve got internal plastic casing shielding nearly every component in here.
Step 10


– Once you’ve popped off the top cover, let’s dive deeper by taking out the manual top-loading disc tray.
– The tray-free disc loader in the Super Slim? Love it or hate it, it’s definitely designed for easy repairs.
– Check it out: the laser lens is marked as KEM-850 PHA 0672 23020A.
– We came across some mixed reviews about the noise level from the PS3 Super Slim’s disc drive, so we wanted to share Sony’s attempts at noise reduction:
– The drive is cushioned with super soft rubber bumpers and encased in a noise-dampening plastic tray that helps absorb vibrations.
– But, don’t expect it to silence sounds coming straight from the drive through that thin plastic tray door.
Step 11


– You can easily pop out the power supply module from the back of the case—no sweat!
– Even with a nice, tidy layout of components, getting inside the power supply is no walk in the park. The casing is locked up tight with four screws and some pretty stubborn plastic clips.
– Just like the PS3 Slim, this power supply is a globe-trotter, ready to handle input voltages ranging from 100V to 240V AC.
– Looks like the overall power consumption has taken a step down! While the PS3 Slim was rated at 12V and 18A DC, the Super Slim is cruising at a cool 12V and 13A DC.
Step 12


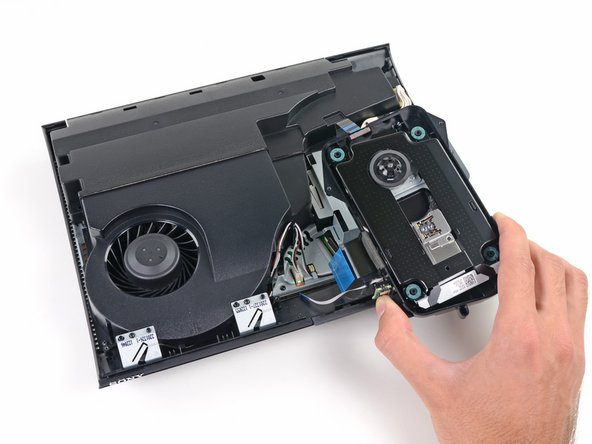
– The motherboard and fan duo depart from the lower case as we dive deeper into the repair adventure.
– We were slightly bummed to realize that the whole motherboard setup has to come out to access the fan or heat sinks—but hey, it’s all part of this sturdy, sleek design!
– Looking at the front side of the fan assembly, we discover the antennas for Wi-Fi and Bluetooth.
– Etched on the antennas is the TE Connectivity logo—a nod to their innovative antenna designs that have rocked the wireless device world, including cutting-edge gaming systems.
Step 13

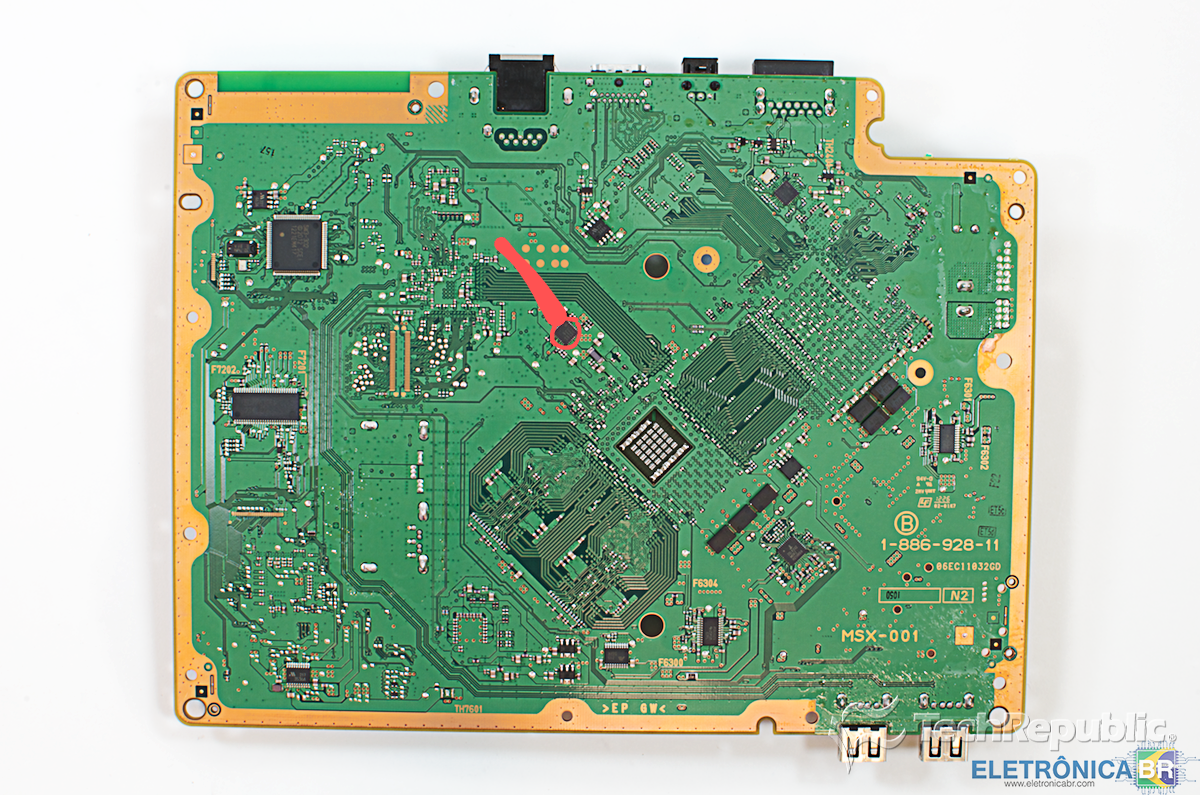
– Behind door number two… the legendary motherboard awaits!
– After some careful prying and a deep breath, we managed to lift the metal frame off the motherboard—success!
– A quick glance shows the GPU’s thermal paste is spot on, but the CPU? Let’s just say it could use a little extra love.
– A little upgrade here could make life even sweeter for those who love to tinker.
Step 14

– Time to give that motherboard a stylish spin—turn it 45 degrees to unveil the magic behind the PlayStation 3 Super Slim’s powerhouse squad:
– Cell Broadband Engine CXD2996BGB
– Hynix H5RS5223DFA 512 Megabits GDDR3 VRAM (multiplied by four chips for a slick 256 MB)
– Sony CXM4027R MultiAV driver
– Panasonic MN8647091 HDMI transmitter
– Elpida X1032BBBG-3C-F 1 Gb (teamed up on two chips for a smooth 256 MB total) XDR DRAM
Step 15

– Alright, amigo, time to identify the heavy hitters on this motherboard! Let’s give it up for these superstar Cartesian ICs hanging out near the top:
– Sony RSX CXD530 ‘Reality Synthesizer’—the brainiac of graphical excellence.
– Marvell Avastar 88W8781 SoC WLAN/Bluetooth chip—your wireless wonder.
– Sony CXD9963GB I/O bridge controller—smooth sailin’ for data flows.
– Macronix MX29GL128FLT2I flash storage—packing memory in style.
– Sony CXD5132R SATA/PATA Blu-ray drive controller—spinning discs like a champ.
– Integrated PCB Wi-Fi antenna—signal game is strong.
Step 16

– Here are a few quick tips for the flip-side:
– SW3-302 SCEI 1220EM42E
– BD7761EFV 227 T25
– Intersil ISL6332 MDRZ H223BCC
– IDT 4227ANLG 1149L
– Texas Instruments TPS53123 Dual Synchronous Step-Down Controller
Step 17


The Super Slim has definitely shed some pounds and trimmed down its fan compared to the Slim—sleek and efficient upgrades all around!
– Time to cool things down! We’re popping out the squirrel cage fan and taking off two heatsinks—it’s a breeze, we promise.
– In this (final?) round of the PS3 saga, Sony’s using cutting-edge tech to make the same console feel sleeker, lighter, and quieter. Performance stays the same, but hey, it’s all about style and stealth!
Step 18


– The PS3 Super Slim scores a 7 out of 10 for repairability – not too shabby!
– Getting to the hard drive is a breeze, making it easy to repair or upgrade whenever you need to.
– The disc loader is super modular, so swapping it out is no big deal.
– You’ll need standard tools, except for a T8 Security bit – just a heads up!
– Watch out for that pesky ‘Warranty Void’ sticker, but don’t worry, it’s mostly harmless.
– The power supply is tucked away behind a bunch of clips, but luckily, you probably won’t need to mess with it too much.
– To get to the fan or heat sinks, you’ll need to remove the entire motherboard assembly – it’s a bit of a process, but you got this!
– The sliding disc tray door can be a bit finicky and might break if you’re not careful, so be gentle with it. If you need help, you can always schedule a repair with Salvation Repair.