Nintendo DSi Lower Case Assembly Replacement
Duration: 45 minutes
Steps: 6 Steps
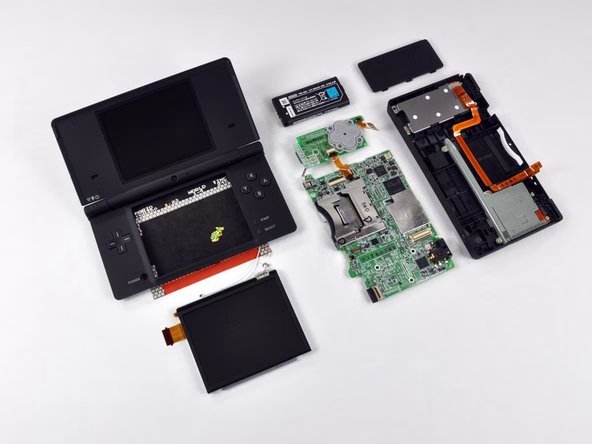
Let’s swap out the lower case assembly, which includes the trigger buttons, SD slot, and stylus holder. It’s a straightforward yet satisfying task that’ll have your device feeling brand new!
Step 1


The screws are still attached to the battery cover, so no worries about losing them.
If you’re having trouble gripping, just give the other side of the device a gentle tap to loosen things up.
– Use a Phillips screwdriver to loosen and remove the two screws holding the battery cover to the lower case—easy peasy!
– Gently grab hold of the battery cover and lift it up and away from the lower case. Nice and smooth!
Step 2


Check it out! There’s a handy little tab at the top of the battery that makes it super easy to pop out. No fuss, no muss!
Just a heads-up: the liquid damage indicator is cozy under the battery. Be gentle when prying it out, or you might accidentally give that indicator a little too much love!
– Grab your trusty spudger tool (or just your fingernail if you’re feeling adventurous) and gently pop the battery up from the top.
– Hold onto that battery and smoothly lift it out of the DSi. Easy as pie!
Tools Used

Step 3


Sometimes those old rubber feet just don’t want to let go and might break apart as you pry them off. No worries! Grab a fine-tipped tool and gently scrape out any stubborn rubber bits still hanging around.
– Peek under those two red-highlighted rubber feet—sneaky screws are hiding there!
– Grab a spudger and pop those rubber feet out of the lower case like a pro.
Tools Used
Step 4

– Let’s get started by unscrewing the lower case from the DSi! First up, you’ll need to tackle these screws:
– Six 5.2 mm Phillips #00 screws.
– And don’t forget that one sneaky 2.7 mm Phillips #00 screw.
Step 5


– Slide your spudger between the lower casing and the lower panel at the top-right corner of the DSi—like you’re cracking open a secret treasure chest.
– Gently glide the spudger along the edge of the outer casing, working your way around to create a clean separation between the body and the casing.
– Keep at it! Carefully trace the spudger all the way around the body of the DSi until most of the lower case is loosened and ready to pop off.
Tools Used
Step 6


Hold up! The lower case is still tethered to the motherboard by the volume and SD board cable (marked in red). Don’t yank it off just yet—patience is key!
– Gently lift the lower casing from its bottom edge like you’re unveiling a surprise.
– Use a spudger to carefully pry the volume and SD board cable up from its cozy spot on the motherboard.
– Once that cable is free, you can go ahead and remove the entire outer casing with ease.