Step-by-Step Guide: Nintendo GameCube Lens Recalibration
Duration: 45 minutes
Steps: 10 Steps
Get ready to dive into some handy skills with this guide!
Ready to tackle some retro gaming magic? In this step-by-step guide, you’ll: Open up your Nintendo GameCube’s outer shell, get up close and personal with the optical drive motherboard, and fine-tune the potentiometer to zap away 98% of those annoying Disc Read Errors (DREs). Let’s make your GameCube shine again!
Step 1


Keep a steady grip on the bottom wall so it stays put when you flip it back over.
– Flip the GameCube over so it’s chilling upside down.
– Now that those four screws are out of the way, flip the GameCube back to its original position—good as new, almost!
– Grab a 4.5 mm gambit screwdriver and unscrew the four screws hanging out at each corner (check out the second picture for some guidance).
– Be sure to stash those screws in a safe spot where they won’t pull a disappearing act on you!
Step 2


– With both hands, grab the top of the Gamecube and gently lift it off, revealing the inner workings of the device.
– Place the top panel safely aside.
Step 3


No need to unhook the ribbon connecting the Gamecube to the front panel—just let the front panel chill right at the front of the console.
– Let’s get started! On the front panel, you’ll find two clips on opposite sides that keep it attached to the console. Gently press on these clips, as shown in picture 1, and the front panel will come right off.
– Now, let’s move on to the rear panel. Use the same technique you used for the front panel – it’s a breeze! Check out picture 2 for a visual guide. Remove the rear panel and you’ll be one step closer to fixing your device.
Step 4

No need to unplug that cooling fan wire from the power button switch board! You’ve got this!
– Grab your trusty #2 Phillips screwdriver and unscrew those two screws like a pro.
– Gently nudge the cooling fan up a bit, slide it out with care, and set it aside like a champ, keeping it out of the way of the rest of the GameCube.
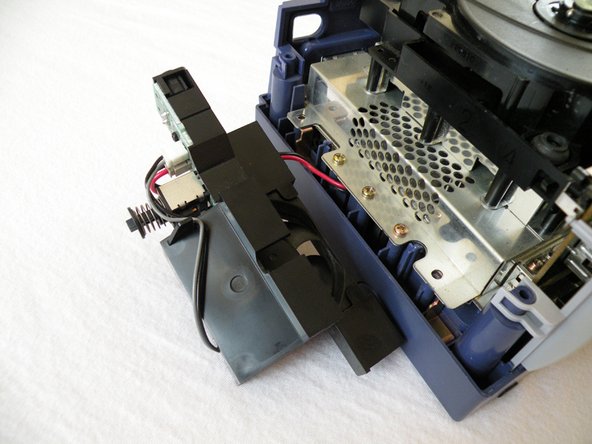
Step 5

– Start by finding and removing the twelve (12) Phillips #2 screws that are scattered around the metal chassis under the optical drive.
– Out of those twelve (12) screws, three (3) are hiding underneath the cooling fan housing, so be sure to check there!
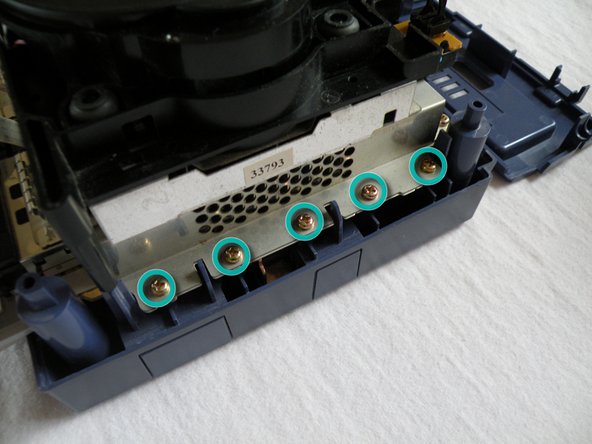
– Five (5) screws are tucked away to the right of the optical drive unit. Take a look at picture 2 to spot them easily.
– The remaining four (4) screws are located at the rear of the unit, just like you see in picture 3.
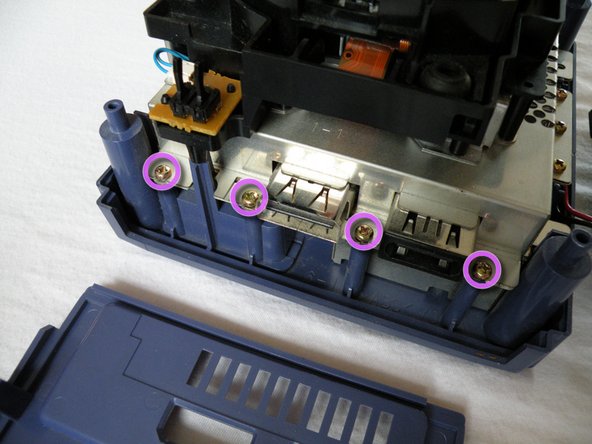
Step 6

– Unscrew the four Phillips #1 screws holding down the memory card ground springs at the front of the console. Grab that driver and get to it!
– Lift off the ground springs and put them aside somewhere safe for later—don’t let them wander off!
Step 7
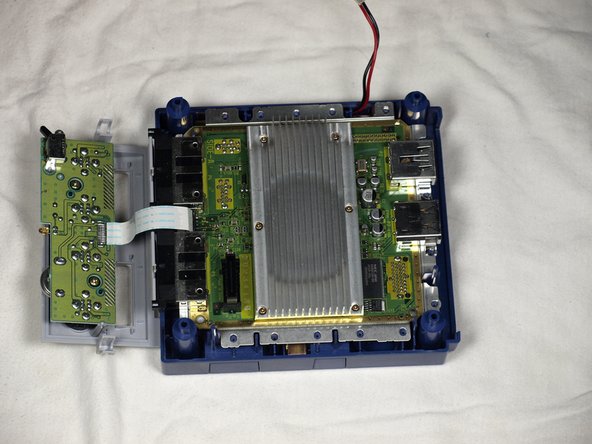


The optical drive is hooked up to the motherboard through a snug slot at the front-right of the unit. A little muscle is needed to pop it out, but you’ll get there—steady hands win the race!
– Gently take out the optical drive unit, treating it like the precious gem it is!
– Now, set the rest of the Gamecube unit aside with care and turn your attention to the optical drive. Check out picture 3 for a handy visual guide!
Step 8

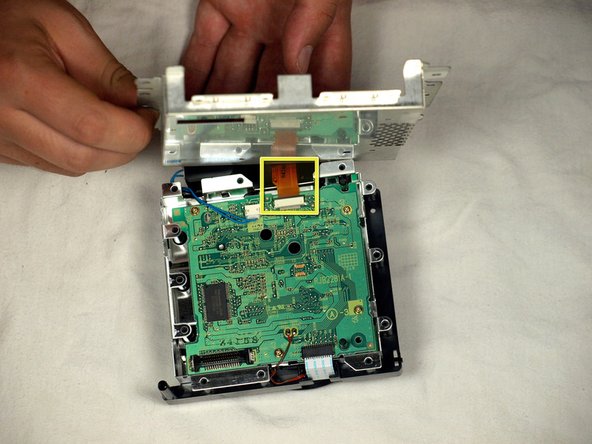
Be gentle when lifting here—there’s a sneaky little brown ribbon underneath! Check out Picture 2 for a visual.
For this next step, grab an old Gamecube disc and pop it onto the optical drive unit—it’s like a shield for the lens, keeping it scratch-free and happy!
– Beneath the optical drive unit that you’ve just liberated, you’ll find six trusty Phillips #1 screws keeping the metal chassis snugly in place. Let’s tackle those screws!
– Unscrew all six of them and set the metal chassis aside like a pro.
Step 9

Be careful not to overdo it with the potentiometer – turning it too far can make the laser super strong and potentially burn those discs!
The potentiometer is right where you see it in the pic—yep, that tiny cross-wing screw chilling on top of a black box.
Let’s tweak that potentiometer to amp up the optical lens laser.
Cranking the potentiometer clockwise would just make the laser weaker and throw more DRE messages at you.
– Grab a tiny flat-head precision screwdriver and give the potentiometer the gentlest nudge—just 3 degrees counter-clockwise. Easy does it!
Step 10

Don’t forget to put the memory card ground springs back in place before powering up your console again. It’s a crucial step to get your device up and running smoothly!
When those pesky DRE messages are finally gone, give the potentiometer one more tiny nudge—1 degree, to be exact. Think of it as giving your lens a little extra armor against any future DRE drama.
Like we said earlier, this might not solve all DRE issues if the root cause is elsewhere in the system. But hey, this should handle around 98% of DRE headaches!
– Put your device back together by working through these steps in reverse. Take your time—you’re almost there!
– If you need help, you can always schedule a repair.
Success!