Nintendo 64 LED Replacement Guide
Duration: 45 minutes
Steps: 6 Steps
When the red LED on the front of your console doesn’t light up even with the power on—and you care about keeping your system looking sharp—this guide will walk you through swapping out that little bulb with ease.
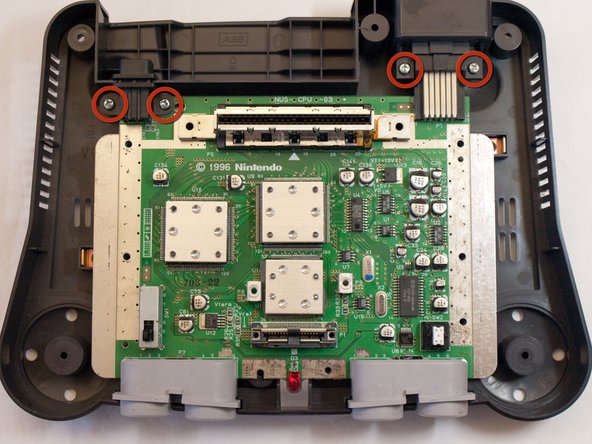
Step 1

– Once you’ve got the top cover off the console, shift your focus to the front of the motherboard. Right there, you’ll spot the red LED bulb shining like a beacon.
Step 2
– Peeking out of the plastic bulb are two tiny electrodes—they look like little pins. Spot those bad boys! Each pin takes a dive downward and pokes through the motherboard via two side-by-side holes. Easy peasy!
Step 3

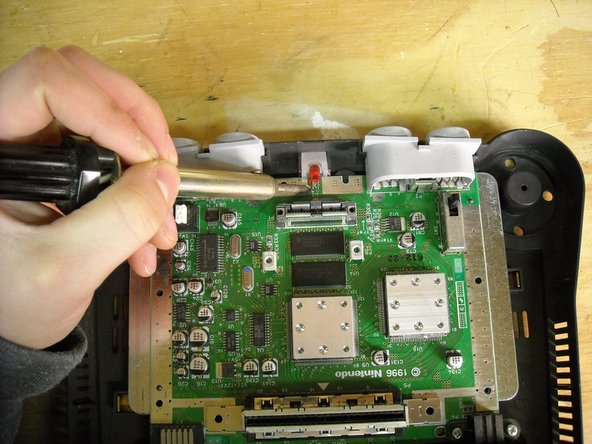
– Got a soldering tool handy? Heat it up until it’s nice and toasty! Once it’s hot, gently press the tip onto one of the pin slots to loosen up that connection between the pin and the board. Then, repeat the same move on the other pinhole. Easy peasy!
Step 4

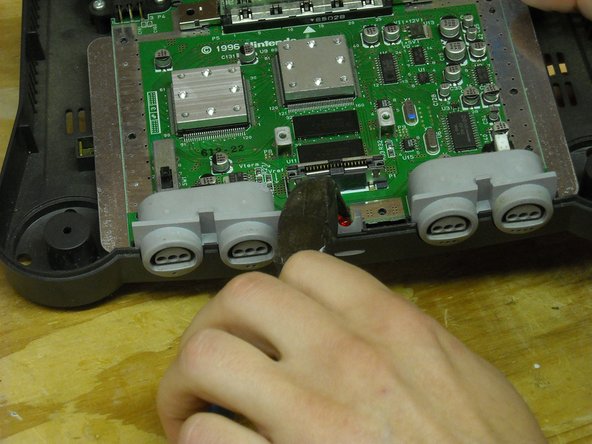
– Slide a thin screwdriver under the LED light and gently pry it upward until the light points toward the ceiling. Then, grab some trusty pliers to wiggle and jiggle those pins loose until they’re ready to pop out from the motherboard.
Step 5

– Alright, you’ve successfully taken out the old light, and it’s time to bring in the new one! Grab your shiny new LED light bulb (make sure it’s rated at no more than 3.4 volts). Now, slide its two pins into the motherboard, just like the original LED was installed.
Step 6
– Now that the pins are through and your new bulb is in place, just like the old one, it’s time to get this show on the road! Heat up the area around the holes and pins with your soldering iron, then touch some soldering metal to the hot spot. This will create a solid bond between the pin and the motherboard, and before you know it, the electricity will be flowing and your bulb will be shining bright! If you’re feeling stuck, don’t worry, just take your time and remember, practice makes perfect. And if you need help, you can always schedule a repair
Success!