Samsung Galaxy TabPro S Battery Replacement Guide
Duration: 45 minutes
Steps: 9 Steps
Is your tablet acting up by not charging, heating up, or losing battery power too quickly? Sounds like it’s time for a battery replacement! Follow this step-by-step guide to easily swap out your tablet’s battery and get it back in action.
Step 1
– Flip your device over and place it gently face down on a flat surface. Make sure it’s comfy and ready for the next steps.
Step 2
– Pop the iOpener into the microwave for a quick 30-second warm-up. Once it’s heated up, lay it on each side of your device for about 20 seconds to help soften up that stubborn adhesive seal.
Tools Used
Step 3
– Let’s get started by using a plastic opening tool to carefully pry open the back of your device. This is the first step in giving your device a brand new lease on life!
Step 4
– After you pop it open, you’ll see three spots (highlighted in red) that need to be unplugged to keep the party going.
Step 5
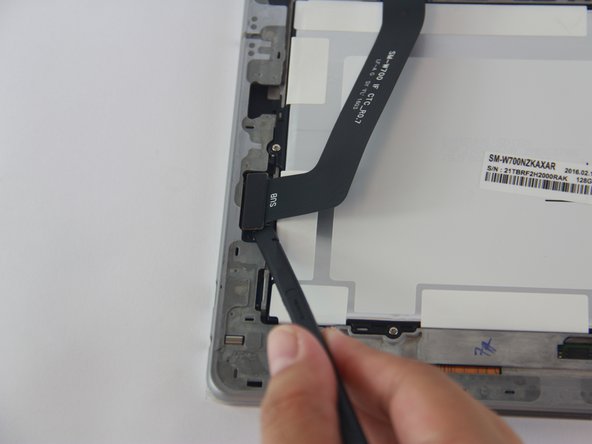
– Grab your trusty black nylon spudger and get ready for some gentle magic! For that black ribbon cable, just apply a little upward pressure from underneath until you hear a satisfying pop. You’ve got this!
Tools Used
Step 6
– Gently coax the small orange ribbon cable away from the motherboard using the black nylon spudger tool. Take your time and be careful—it’s all about that gentle touch!
Tools Used
Step 7
– With a gentle touch, take your trusty black nylon spudger tool and carefully lift the long orange ribbon cable away from the motherboard. You’ve got this, and remember, if you need help, you can always schedule a repair.
Tools Used
Step 8
– Grab your J000 screwdriver and work your magic by unscrewing those five 3.4 mm Philips screws!
Step 9
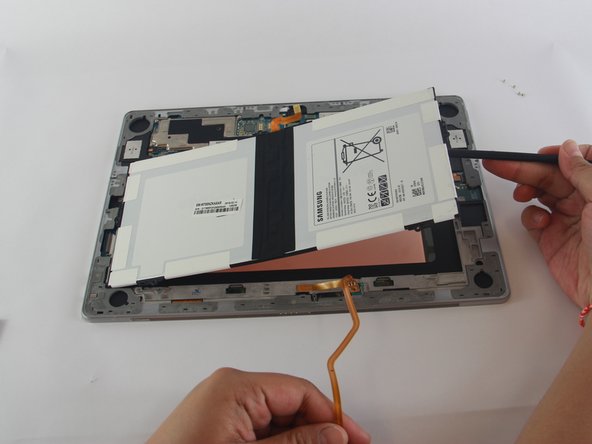
– Pop off the leftmost ribbon cable, unscrew all five screws, and use a black nylon spudger to lift the battery out of the device. Easy does it!
Tools Used
Success!


