Nokia Lumia 2520 Battery Replacement Guide: Step-by-Step Tutorial
Duration: 45 minutes
Steps: 9 Steps
Step 1
When you’re using a heat pad, make sure to sport some padded gloves to keep those fingers safe from burns!
Nuke the pad for 30 seconds to get a nice, even heat on all four sides. Give it a rest and don’t nuke it again for another two minutes.
– Warm up a heat pad and place it on each side of the device to ensure it’s nice and cozy.
Tools Used
Step 2
When you’re gently lifting the screen away from the chassis, keep an eye out for that sneaky ribbon cable connecting it to the logic board. We don’t want any accidental snips!
– Slide the pick gently between the glass and the device to nudge them apart. A set of suction cups can be your trusty sidekicks to help lift that glass off.
– Take it slow and steady while prying the screen away from the chassis—rushing it could lead to a cracked or broken screen, and nobody wants that!
Step 3
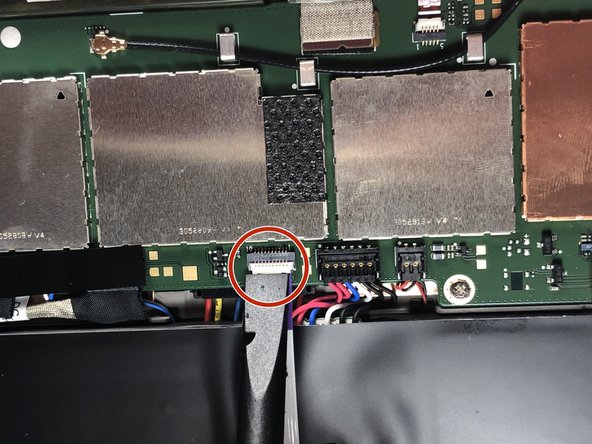
– Gently pull the ribbon cable out from its cozy connection port on the board. It’s like giving it a little hug goodbye!
– Now, let’s glide on over to step 4 and gracefully detach the ribbon connection from the screen. You’ve got this!
Step 4
– Grab your trusty plastic pry tool and gently pop off both connections like a pro!
Step 5
– Time to get started! Set the screen and display assembly aside, we’re about to give them some TLC.
Step 6
Before you pop out the battery, be super careful not to puncture it, because, you know, acid!
Opt for a plastic pry tool instead of a metal one when you’re diving into the world of wires and soft battery cases. It’s a safer bet and keeps things smooth sailing!
– Gently pop off the battery connector from the logic board using a trusty plastic pry tool. Take it slow and steady—you’re doing great!
Step 7
– Gently lift off the ribbon that’s snugly resting over the battery. You’re doing great!
Step 8
Be careful with that sharp tool! We want to keep your battery intact and happy, so handle it with care.
– There are four screws holding the battery snugly to the chassis. Grab your trusty PH0 Phillips head screwdriver and give those screws a gentle twist to loosen them up. You’re doing great!
Step 9
The battery is held snugly in place with some adhesive at the bottom. So, feel free to apply a bit of pressure when prying it out—you’re doing great!
– Now it’s time to put your device back together—just retrace your steps like a pro!
– Oops! If you ran into a hiccup, remember, it’s okay to hit cancel.
– You’ve got this! If you need any extra support, feel free to schedule a repair.
Success!


