DIY Microsoft Surface Laptop 7 (13.8-inch) Left Speaker Replacement
Duration: 45 minutes
Steps: 14 Steps
Dive into this guide to swap out the left speaker on your Microsoft Surface Laptop 7 (13.8-inch). You’ll find the left speaker cozying up next to the headphone jack and USB-C ports. If your speaker is sounding a bit crackly or like it’s auditioning for a static radio show, it might be time for a replacement!
Step 1


Before kicking off this repair, let your laptop’s battery dip below 25%. A charged battery could go from zero to fiery real quick if things get messy.
– Unplug all cables and power down your laptop completely. Let’s give it a break before we dive into the action.
Step 2


– Shut your laptop and flip it over so those rubber feet are showing off on the table.
Step 3


Watch out for those little feet—they have a tendency to pop off faster than a jack-in-the-box! Keep an eye on them so they don’t wander off.
You can also use the point of a spudger, but keep in mind that it’s a bit riskier – if you’re planning to reuse the foot, you might end up damaging it instead.
– Slide one arm of your angled tweezers into the recess near the upper right edge of one of the feet. Gently, of course!
– Pry up and remove the foot with your tweezers.
– Repeat the process to remove the remaining feet. Easy-peasy!
– To install a foot, just line up the pegs on the bottom with their cutouts in the frame and press the foot into place. You’re all set!
Tools Used


Step 4


As you dive into this repair adventure, make sure to keep a close eye on each screw and return it to its cozy home when you’re done!
While the Surface Laptop 7 loves its Torx Plus screws, don’t worry—standard Torx bits will do just fine. Just remember to apply steady downward pressure to keep those pesky strips away!
– Grab your trusty Torx Plus 5IP screwdriver and get ready to tackle those four pesky 4.5 mm screws (with their little washers) that are holding the lower case in place. Let’s make this happen!
Step 5


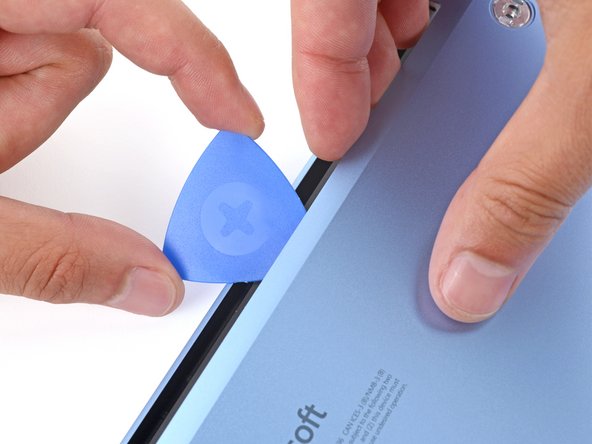
Keep that pick away from the edges—nudging it too close could mess with the antenna bar, and no one wants that!
– Let’s get started! Carefully insert the tip of an opening pick under the top edge of the lower case, about an inch (2.5 cm) to the left or right of the Microsoft logo. This is the beginning of your repair journey with Salvation Repair!
Step 6
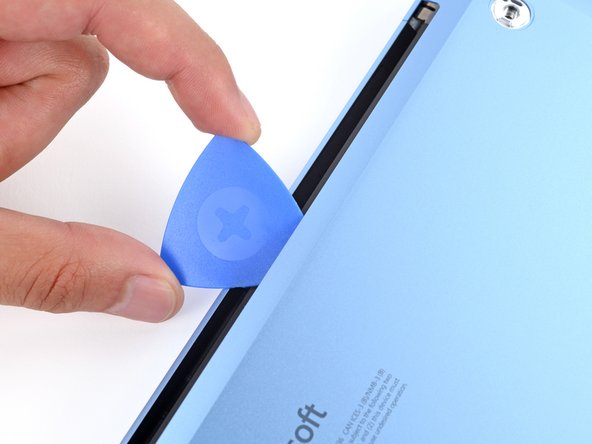

– Give that pick a little twist to lift the lower case just enough so you can grab it with your hand.
Step 7


– Gently pop off the lower casing and set it aside. You’ve got this!
Step 8

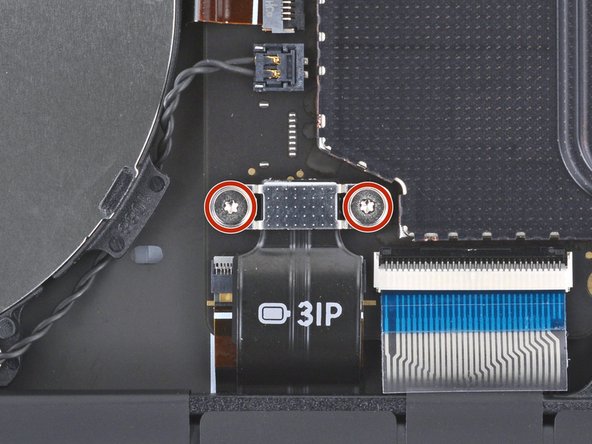

– Grab your trusty Torx Plus 3IP screwdriver and get ready to tackle those two 2.3 mm-long screws holding down the battery connector cover. Let’s make this happen!
Step 9


– Grab those trusty tweezers or just use your fingers to gently lift off the battery connector cover. You’re almost there!
Step 10


To get that connector back in action, just line it up with the socket and give one side a gentle press until you hear a satisfying click! Then, do the same on the other side. It might take a couple of attempts to get it just right—no need to force it!
– Gently slide the flat end of your trusty spudger under the top edge of the battery press connector, and give it a little nudge upwards to disconnect it. Easy peasy!
Tools Used
Step 11
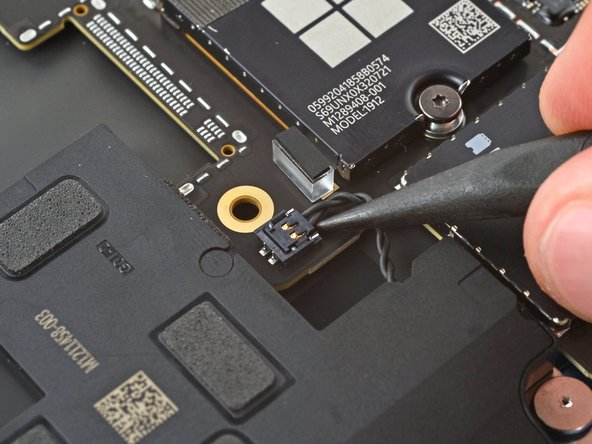

Be gentle with those cables! Pulling on them directly might just ruin your day.
The left speaker will be on your right-hand side, but only because your laptop is upside down. Don’t worry, it’s all part of the process!
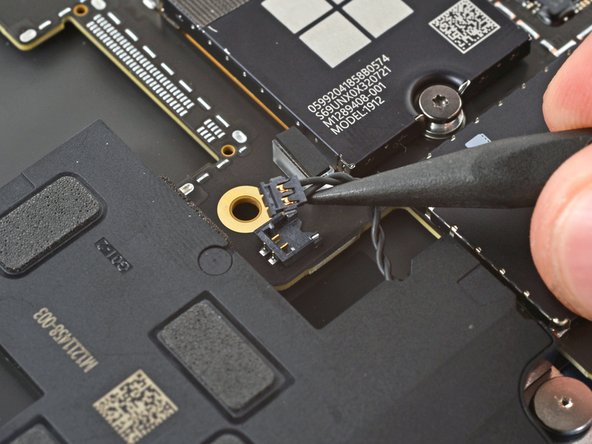
– Gently slide the tip of a spudger under the left speaker connector and lift it straight up with care—out it comes from the socket, just like magic!
– When it’s time to put things back together, hover that connector over its socket and give it a gentle press down with the flat end of the spudger until you hear a satisfying click. If it’s playing hard to get, don’t force it! Just reposition and give it another go. If you find yourself in a pickle, remember, you can always schedule a repair.
Tools Used
Step 12

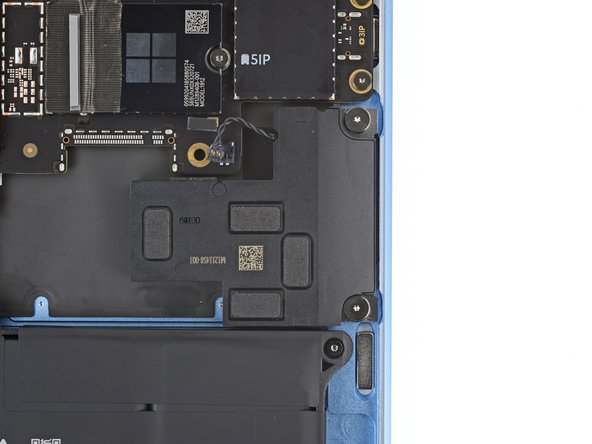
– Grab your trusty Torx Plus 3IP screwdriver and carefully unscrew those two 3.2 mm-long screws holding the left speaker in place. You’ve got this!
Step 13


– First up, let’s get that speaker out of the way. Easy peasy! Just remove it carefully.
– Now, when you’re putting everything back together, make sure to position the speaker on the frame so that those grommets on the right edge fit snugly over their screw posts. You’ve got this!
Step 14


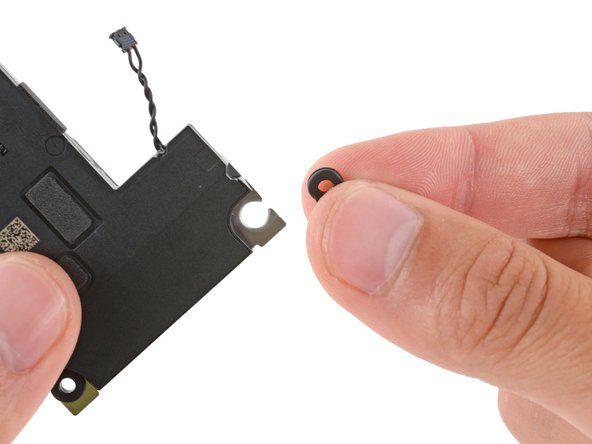
Getting these in place can be a bit of a puzzle. Gently pinch the grommet with your fingers and guide it into its slot like a pro.
– Put your device back together by reversing the steps in this guide.
– Recycle your old electronics responsibly with an R2 or e-Stewards certified recycler.
– If the repair didn’t go as expected, try some basic troubleshooting or get help from our Answers community.
– Cancel: Didn’t finish the guide? No worries!
– If you need help, you can always schedule a repair
Success!