DIY Guide: How to Replace Lenovo IdeaTab A2109 Digital Board
Duration: 45 minutes
Steps: 6 Steps
Follow this guide to swap out your digital board.
Step 1
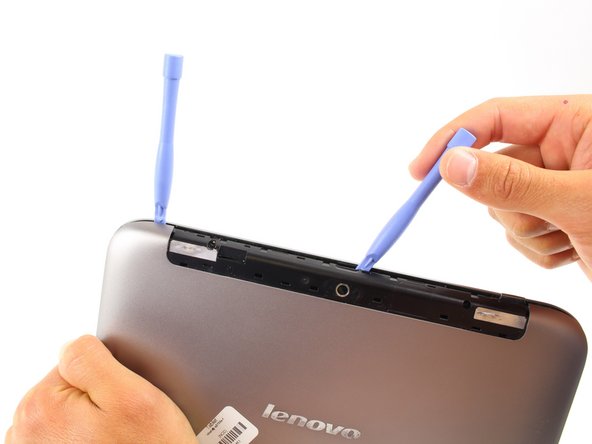
– Flip your tablet over and check out the back to find those sneaky speakers hiding at the top of the rear cover.
– You’ll notice a smaller plastic cover stretching across the top of the device—let’s get ready to tackle that!
– Grab your trusty blue opening tool and gently slide it under the center of that cover. Give it a little push upwards, and voilà! The cover should pop right off.
Step 2
– Time to get those screws out! Grab your trusty screwdriver and tackle these two screws:
– M3.0 x 3.0 mm #00 phillips screws (black)
Step 3
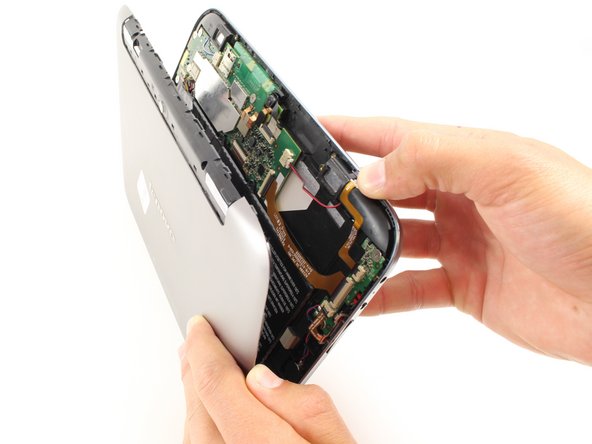
– Once you’ve got those screws out, it’s time to pop off the rear cover!
– Grab your trusty blue opening tool and gently pry it apart.
– Lift that cover up—it’s ready to come off!
– You might need to give it a bit of oomph, but don’t worry, with a little push, it’ll pop right off!
– Slide the tool into one corner, then grab another tool and slide it into the opposite corner for a smooth opening.
Step 4
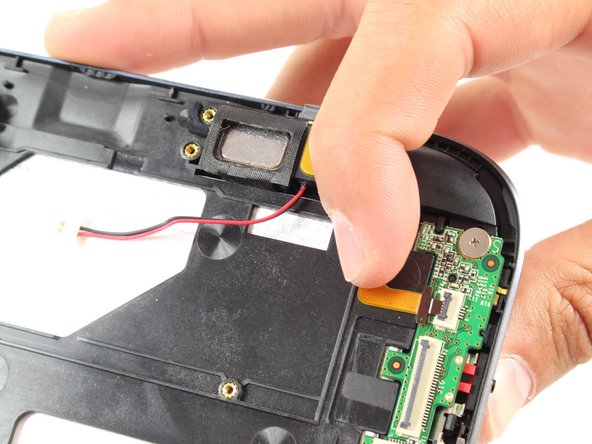
– Grab your trusty tweezer tool and carefully pop up those three tiny plastic locks holding the digital board in place—take your time, no rush!
– Once those locks are up, gently slide the newly revealed ribbons right out like a pro.
Step 5
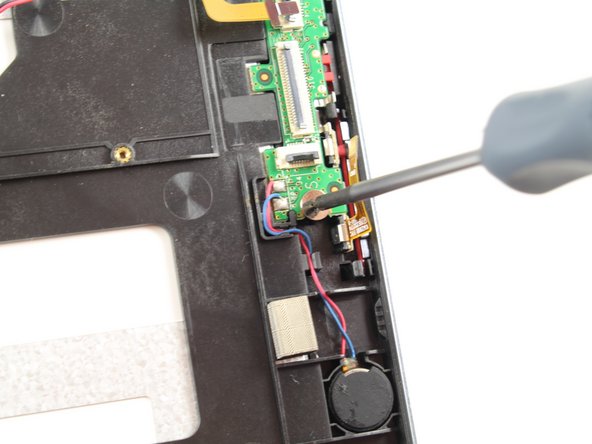
– Alright, let’s get this party started! First up, we need to say goodbye to those pesky screws. Grab your trusty screwdriver and remove these two little guys:
– M5.3 x 1.75 mm #00 Phillips screws (silver)
Step 6
– After you’ve unscrewed it, grab your trusty tweezers and gently pull the digital board straight out. You’ve got this!
Success!


