
Microsoft Surface Duo Teardown
Duration: 45 minutes
Steps: 13 Steps
Microsoft has been working on the Surface Duo for about six years. We might finish taking it apart faster than that, but with a new design, there are no guarantees. Let’s hope it’s as repair-friendly as the Surface Laptop 3 or Surface Pro X, or we might be in for a bit of a challenge. But hey, let’s dive in and see! For more behind-the-scenes teardown fun, follow us on Twitter for quick updates, Instagram for awesome pics, and Facebook for all the juicy details. If you need the full lowdown on what we’re doing, feel free to schedule a repair with us anytime!
Step 1

– The Surface Duo is finally here! For $1,400, you get two ultra-thin, foldable screens that you can slide into your pocket… kind of. We’re pretty curious about what’s inside, and here’s what we know so far:
– Two 5.6” AMOLED displays (each 1800×1350, 401 PPI)
– Two batteries working together, giving you a total of 3577 mAh of power
– A Qualcomm Snapdragon 855 SoC with 6 GB of DRAM
– 128 GB or 256 GB of internal flash storage
– A single 11 MP f/2.0 camera, optimized for both front and rear use
– WiFi-5, Bluetooth 5.0, 4×4 MIMO LTE, and USB-C 3.1 for all your connectivity needs
– 360° hinges for all the folding possibilities you can imagine
Step 2


– Unfolded, this device is impressively thin—just 4.9 mm! To put it in perspective, the iPhone 6 Plus, known for its slim design, measures 7.1 mm.
– When folded, the Duo beats Samsung’s original Fold by 7 mm (9.8 mm thick versus the Fold’s 17 mm)—super slim, although not as pocket-friendly as the Moto Razr.
– The excitement fades quickly when we try to load a webpage with the glitchy software. Crashes, flickering screens, and some wild flashes!
– Luckily, Microsoft has promised three years of software updates for the Duo—plenty of time to work out the kinks. But will this ultra-thin, all-glass beauty survive that long in your hands?
– While it’s not technically a phone, the Duo does have a removable SIM like other Surface devices. (Though, no fancy hidden doors here!)
Many folks are used to dealing with quirky software glitches on their devices—sometimes even the repair process itself can be a bit finicky. If you’re running into similar issues, don’t worry, you’re not alone. We’ve got your back with straightforward steps to get your device back in shape. Remember, if things get a bit tricky along the way, you can always schedule a repair with Salvation Repair for expert help.
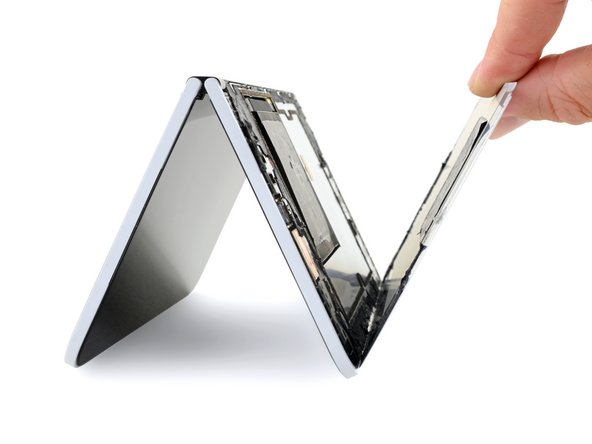
Step 3


– Get ready for a sneak peek you won’t find anywhere else, unless you have an X-ray machine lying around! While we’re just diving into this teardown, the other team has already wrapped theirs up.
– The left side of the Duo is like a mini iPad’s twin—big ol’ battery vibes, with a neat little circuit board curling around the right side.
– Now, over on the right side, we’ve got something totally unique. It’s like a solid fortress of circuit board, featuring a small window in the center for the second battery.
Step 4


– Slip an opening pick into the gap between the chassis—no heat gun or suction cups needed at this point! Feels almost too easy, right?
– Plot twist: sticky adhesive quickly brings the fun to a halt, so bust out the heat gun.
– To keep things interesting, the rear panels are loaded with surprises. Both batteries are glued tight to their panels and connected to the phone with delicate cables.
– Take your time slicing through graphene cooling sheets and stubborn adhesive strips—almost lost a part along the way, but made it through.
– Okay, that was a lot trickier than it looked at first. Starting to wonder if we were supposed to remove the screens instead…
– Came dangerously close to damaging a tiny flex cable that runs some LED indicators and links the earpiece speaker to the board nearby. Handle with extra care!
Tools Used

Step 5


Looks like the ‘Duo’ name comes from its dual screens. If they ever switch to a single foldable display, would it become the… Solo? Just a thought!
– On the flip side, there’s an easy-access spot under a speaker grille—the cutout is built into the case rather than a thin part of the screen, making the glass a bit less likely to crack when you get your pick in there.
– That said, this screen-first approach isn’t exactly a walk in the park. Expect some serious heat, tricky cables that might try to trip you up, and displays that are unprotected beneath the glass—definitely a challenging process.
– Choosing to skip those newfangled foldable screens and go for a dual-screen setup was a bold move, but it could mean double the work if both screens crack. Double the trouble, double the fun!
– Like some other specs in this device, the displays are still pretty solid by 2019 standards, but don’t expect high-refresh rates here. You’re looking at two reliable 60 Hz AMOLED panels from LG Display—nothing flashy, but dependable.
Step 6

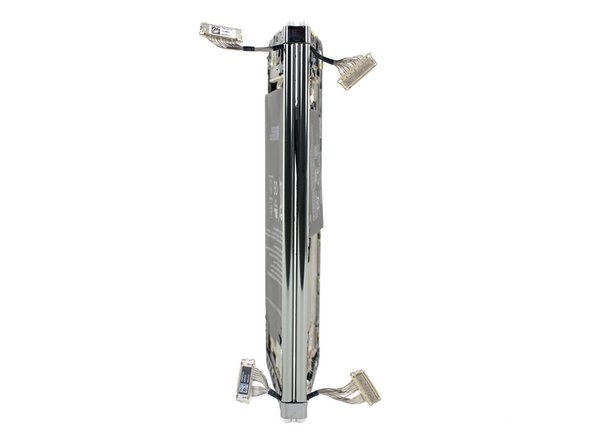
– First, off comes the glass, and bam—we’re greeted with the Duo’s dual batteries. Each half packs its own power source, which is becoming the norm for foldables. But, here’s the twist: the bigger battery in the Duo is massive, easily double the size of its counterpart. Talk about power!
– The two halves of the Duo are held together by a couple of multi-strand interconnect cables running through the hinges. These cables remind us more of those old-school MacBook display cables than the flat ribbon cables we typically see in other hinges.
– We’re keeping our fingers crossed that these cables can stand up to the test of time and some wear and tear—ribbon cables can be a little hit or miss when it comes to durability.
Step 7


While it’s not quite on the level of the Galaxy Fold or Huawei Mate Xs (16.87 Wh and 17.32 Wh, respectively), it’s still a decent upgrade over the smaller foldables like the Galaxy Z Flip’s 12.74 Wh and the Moto Razr’s 9.7 Wh.
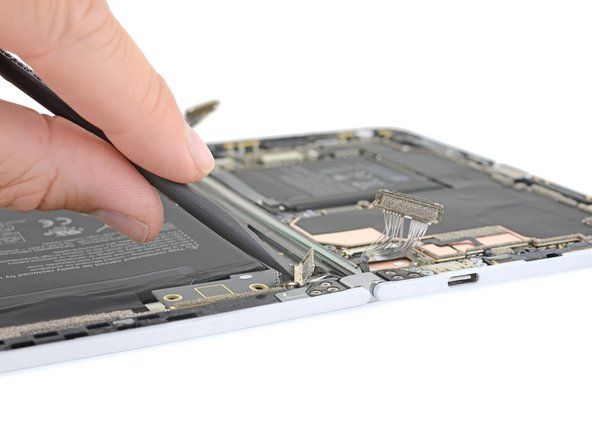
– Let’s walk through replacing the battery. First up: watch out for glue—there’s plenty of it! Next, those tiny tri-point screws can be a real headache. And one of the batteries has a connector tucked underneath the motherboard, so you’ll need some patience. It’s clear that Microsoft didn’t make battery swaps straightforward—at $1400, it’s a hefty price to pay for a device with a built-in expiration date. The larger battery packs a punch at 10.37 Wh, while the smaller one adds 2.89 Wh, totaling 13.26 Wh of power. As with many Microsoft devices, removing power often means taking out the entire motherboard—making any repair a potential short circuit waiting to happen. Both batteries are labeled ‘This component cannot be easily replaced by user,’ but hey, if you’re feeling confident, you can give it a shot. If you need help, you can always schedule a repair.
Step 8


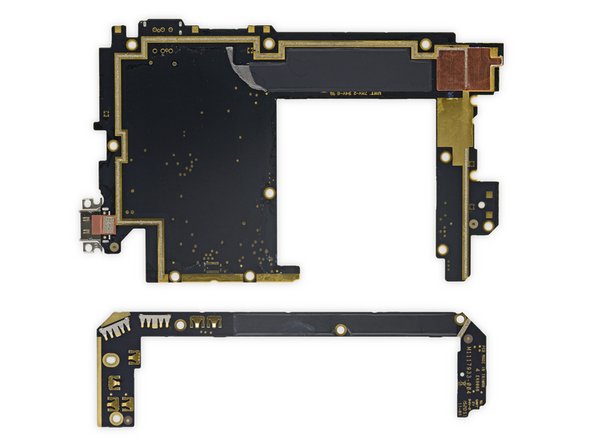
– Alright, folks, let’s dive into the star of the show: the chips! While some of these might be last year’s tech, they’re still totally worth a shout-out:
– Qualcomm Snapdragon 855, sitting pretty under 6 GB of SK hynix DRAM
– 128 GB Toshiba UFS 3.0 storage to keep your data speedy
– Qorvo 78052 RF Fusion MHB front-end module for that sweet connectivity
– Microsoft X904163 display driver to bring your visuals to life
– Qualcomm SDR8150 LTE Transceiver, because who doesn’t love smooth connections?
– Qualcomm WCD9340 audio codec for crystal-clear sound
– Qualcomm PM8150 power management ICs to keep everything running smoothly
Step 9

– Get ready to explore some interesting components lurking inside your device! After checking out those last chips, you won’t believe what else we’ve uncovered: a Qualcomm QDM4670 front end module, a Qualcomm QDM4620 front end module, possibly a Qualcomm QPM4621 power amplifier module, a Qualcomm QET5100 envelope tracker, a Qualcomm Atheros WCN3998 802.11 WiFi transceiver, likely some Murata K29 front end modules, and an ON Semiconductor FSA4480UCX USB-C analog switch. These little guys are key players in your device’s performance—so take your time and enjoy discovering them. If you feel like these steps are a bit tricky, you can always schedule a repair with Salvation Repair for expert help.
Step 10

– Round three, on us:
– NXP Semiconductor NX3DV642 – a 3-lane high-speed MIPI compatible switch, designed to make things run smoothly.
– Qualcomm WSA8815 – this 4 W, Class D smart speaker amplifier will boost your sound experience. Get ready to feel the music!
– Qualcomm SMB1381 – a quick charger that powers up your battery in no time. Say goodbye to long charging waits.
– Nexperia 74LVC1G332GV-Q100 – a 3-input OR gate, helping all your connections stay in sync and work like magic.
– Nexperia 74HC1G08GW-Q100 – a 2-input AND gate, ensuring that your circuits are always working exactly as they should.
– STMicroelectronics LSM6DSO – a 6 DoF inertial measurement unit that adds precision and accuracy to your device, perfect for all your motion-sensing needs.
Step 11


– Underneath the power button, you’ll find a small indentation that hides the sneaky, modular fingerprint sensor. It’s easily accessible at this point in the disassembly process—getting to it later, though? Not so much.
– Next, we’re going to take care of a bunch of tiny Torx screws holding the spine and hinges together. It’s not as intense as dealing with the original Surface Pro’s ninety screws, but it’ll still get your hands moving.
– Once you’re done with the final disassembly, the two big wings will be free to break away from the central spine.
These frames are like the skeleton of your device—giving it strength and helping the two halves open smoothly. They also serve as handy mounting spots for the internal parts, so everything stays put without sticking all over the displays or back cover. As for Surface devices, most rely on Windows Hello for biometric login (though some have fingerprint readers). The tech behind Hello was probably too bulky to squeeze into this sleek design, but don’t worry—everything else is designed for easy access and repair. If you need help, you can always schedule a repair.
Step 12


Just because it’s simple doesn’t mean it’s a walk in the park. Microsoft clearly put some serious thought into these folding hinges, and it paid off—the Duo is seriously fun to flip open and shut.
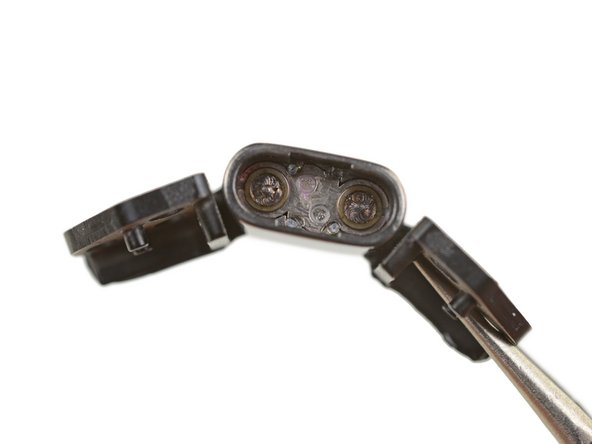
– Two clever hinges hold the line, gripping each side’s stabilizer bars with a trio of trusty screws.
– The board interconnect cables gracefully slide into each hinge housing as they make their way to the opposite side, keeping them safe from pinching while the Duo shows off its folding skills.
– This results in a refreshingly straightforward hinge design, especially when compared to other foldables we’ve encountered. Think of it as a mini 360° laptop hinge, complete with smooth cable routing!
Step 13


– Let’s close up the toolkit and take a moment to look back. What did we discover along the way?
– While Samsung and Motorola went all out with fancy hinges, mini displays, and dust guards, the Duo keeps things elegantly simple.
– Like previous first-gen Microsoft gadgets, this ultra-thin, premium Duo isn’t exactly designed for home repairs—maybe not even by Microsoft’s own crew.
– Recent Surface models have made big strides in repairability, so fingers crossed this is just the beginning for the Duo.
– Alright, let’s get to the scoring. Here’s a hint: it’s called the Duo for a reason.
– It’s a gutsy move and a cool concept, even if it was a bit of an adventure to open up. If you need help, you can always schedule a repair.