How to Replace the Motherboard on Samsung Galaxy Tab 3 8.0
Duration: 45 minutes
Steps: 9 Steps
Ready to dive into the world of tablet repairs? This guide will walk you through the fun and easy steps to take out and swap in a new motherboard for your Samsung Galaxy Tab 3 8.0. Let’s get started and give your device a fresh start!
Step 1


Handle the screen with care—being a bit clumsy could lead to some unwanted damage!
– Grab the bigger plastic opening tool and gently work it between the screen and the back cover. Wiggle it around and pop them apart like a pro.
Step 2


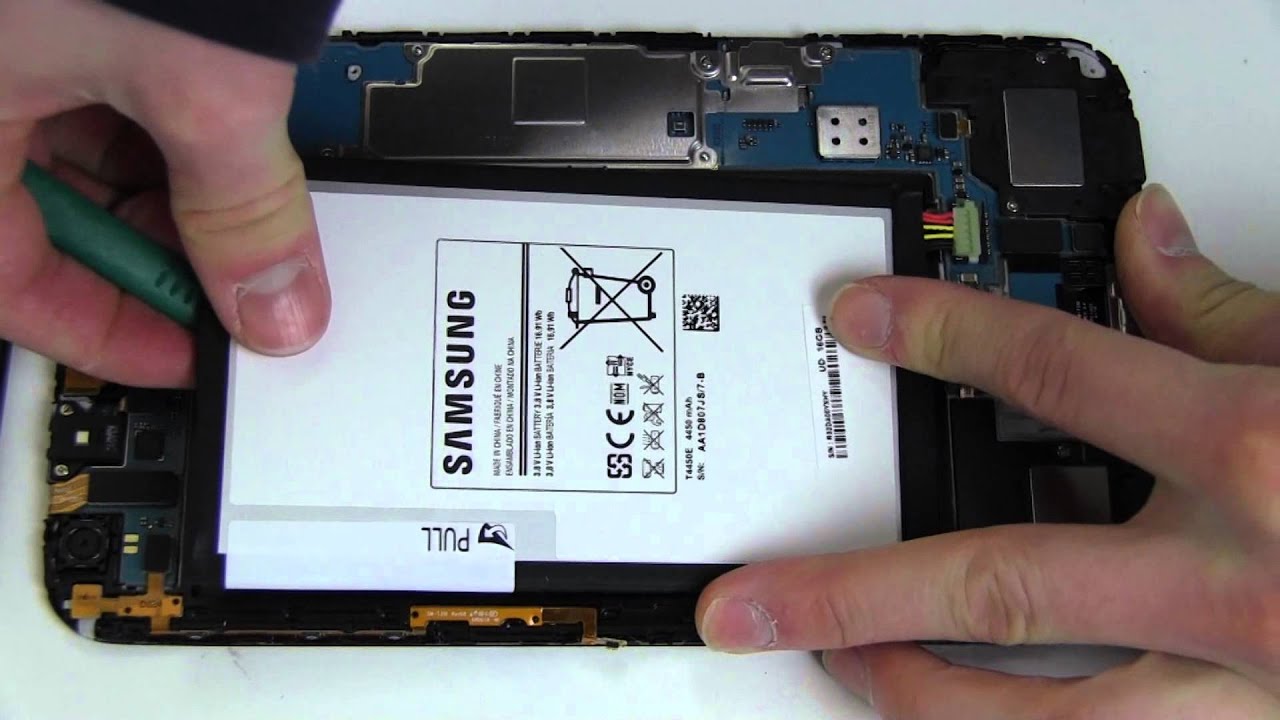
– Once you’ve successfully separated every section of the screen from the back cover, give it a gentle tug and it should pop right off with your hands! You’re almost there!


Step 5

– Unplug the relays that are connected to the motherboard. Let’s keep things tidy and make sure everything is ready for the next steps!
Step 6


– Grab your trusty Phillips head #000 screwdriver and unscrew those 2.9mm screws from the speakers. Once they’re free, gently lift the speakers out of the device like you’re unveiling a surprise gift!
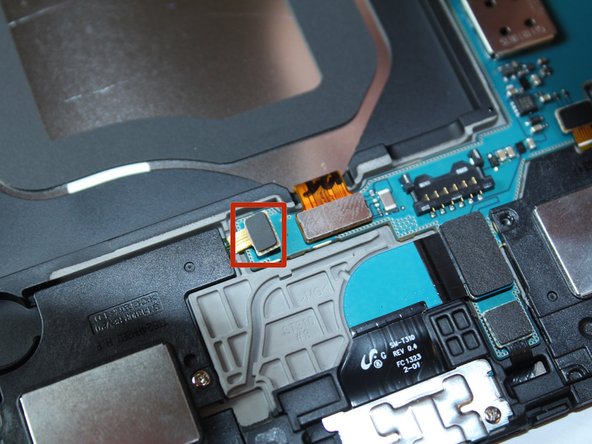
Step 7


– Grab that plastic remover tool and gently pop off the four rectangular electric leads from the board. They’re all different sizes: the first one’s a big guy, the second one’s medium, and the last two are on the smaller side.
– Use the plastic remover tool to carefully detach the square electric lead (the one marked in orange) from the board.
– With that trusty plastic remover tool, delicately unseat the small square lead and the two rectangular electric leads (highlighted in yellow) from the board.


Step 9


– To put your device back together, just reverse the steps you followed—easy peasy!
– Didn’t finish? No worries, you can always revisit this guide when you’re ready.
– If things get tricky, you can always schedule a repair for some extra help.