How to Replace Samsung Galaxy Tab 2 10.1 Motherboard
Duration: 45 minutes
Steps: 19 Steps
Is your Samsung Galaxy Tab 2 10.1 stuck in a frustrating reboot loop? Your motherboard might be the culprit. Heads-up: In some images, you’ll see steps using a metal spudger, but you should use the heavy-duty spudger to avoid any circuit damage. For more details on connectors, check out this page.
Step 1
Heads up! Your plastic opening tool might snap during this step—no biggie! Just grab the heavy-duty spudger and keep going strong.
– Slide that plastic opening tool right between the glass screen and the back cover, ensuring the curved end is snuggly under the glass. Gently nudge the back cover away from the glass screen, like you’re giving it a little hug!
– Make sure you’re lifting the whole display from the body, not just the glass from the display. You might need to reach a bit deeper for a proper separation, like you’re fishing for treasure!
– Keep gliding that plastic opening tool around the device’s screen until the back cover is fully liberated from the glass screen. Let’s give it a clean break!
Step 2
If the screen is being stubborn and won’t separate from the back cover, don’t worry! Just go back to step 1 and give it another try.
– Carefully lift the screen up using your finger, like you’re unveiling a surprise!
Step 3
– Gently peel away the green tape that’s keeping the battery connector snug as a bug. You’ve got this!
Step 4
– Gently slide the flat end of your trusty heavy-duty spudger between the wires and under the battery connector. With a careful touch, lift the black battery connector upwards to gracefully disconnect it from the motherboard.
Tools Used
Step 5
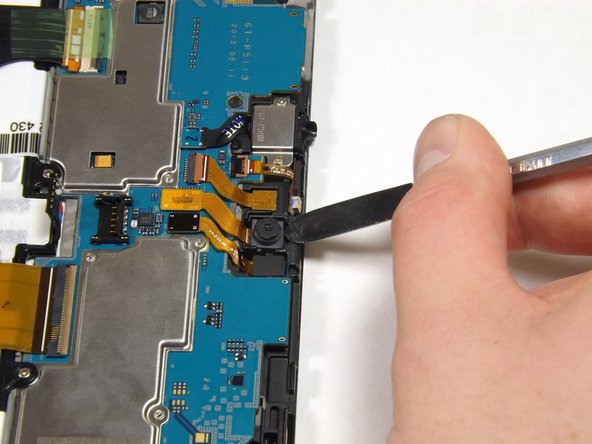
– Carefully pop the camera out of its socket using the flat end of the heavy-duty spudger.
Tools Used
Step 6
– Carefully lift the gold cable connector using the flat end of the heavy-duty spudger, and gently disconnect it from the device.
Tools Used
Step 7
– The charging port cable is the black one hanging out with the charging port. Gently use your fingers to peel off the green tape that’s covering the charging port cable connector. Easy does it!
Step 8
– Grab your flat-end heavy-duty spudger and gently lift the black tab securing the charger port cable.
– Slide that cable out like a pro!
Tools Used
Step 9
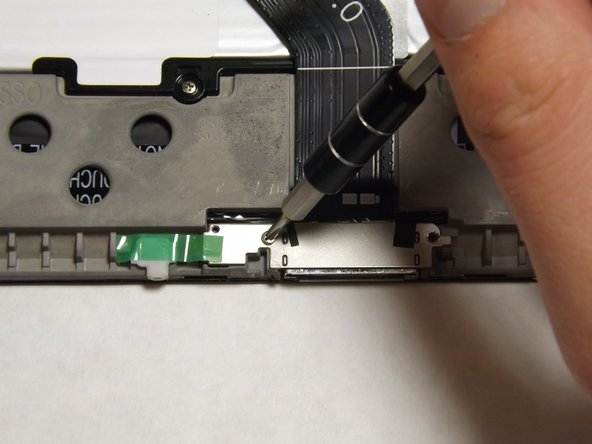
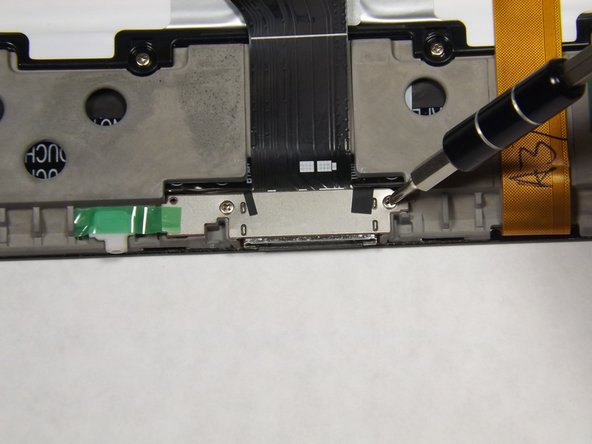
– Grab your Phillips 000 screwdriver and pop out the two 3mm screws keeping the charger port snug in place.
Step 10
– Grab the flat side of that trusty heavy-duty spudger and gently nudge the white microphone piece out of its socket like a pro. Take it slow and steady until it pops right out!
Tools Used
Step 11
Remember to slide that spudger right under the charger port, not inside it! We’re all about keeping things safe and sound, so let’s avoid any mishaps with the component.
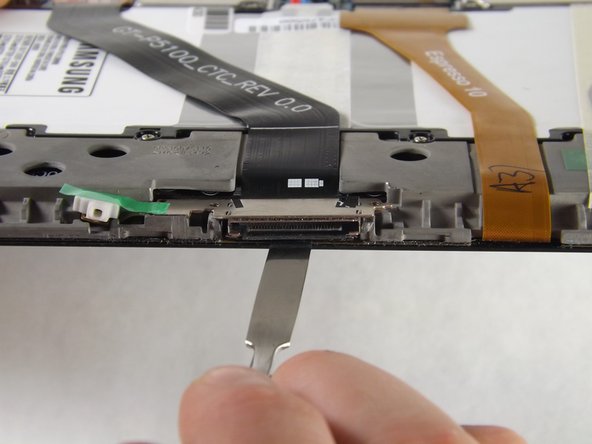
– Gently slide the flat end of that trusty heavy-duty spudger right under the charger port.
– Make sure the spudger reaches all the way to the back of the cavity, then glide it horizontally across the bottom to break that stubborn adhesive free.
Tools Used
Step 12
– Gently lift the charger port using the flat end of the heavy-duty spudger, then carefully remove it from the device.
Tools Used
Step 13
– With a gentle touch, peel away the green tape that’s keeping those three ribbon cables snug and secure.
– Grab your trusty heavy-duty spudger and, with care, lift the black tab that’s holding the leftmost black ribbon cable in place. Don’t forget to give the gold ribbon cable and the other black ribbon cable the same treatment!
– Now, using your fingers, delicately slide each of the three cables straight out of their connectors. Easy peasy!
Tools Used
Step 14
– Grab your trusty Phillips #000 screwdriver and get ready for some action! Let’s tackle those ten 3mm screws that are keeping the battery snug as a bug. Unscrew them with care and watch that battery loosen up like a dance floor at a party!
Tools Used
Step 16
– Grab the flat end of your trusty heavy-duty spudger and lift up that black ribbon lock right next to the headphone jack. You’ve got this!
– Now that you’ve lifted the lock, slide that spudger underneath the gold ribbon and give it a little wiggle to disconnect it. Smooth moves!
Tools Used
Step 17
The rear camera might just decide to take a little vacation and pop out. Don’t worry, it’s a common little quirk!
– With the flat end of the heavy-duty spudger, gently pop up the ribbon lock just above the one you worked on before, coming at it from the brown side.
– Once you’ve lifted the lock, use the heavy-duty spudger to slide out the gold ribbon, just like you did earlier.
Tools Used
Step 18
– Grab that heavy-duty spudger and gently ease off all the connectors snugly attached to the motherboard. You’ve got this! Just take your time and enjoy the process.
Tools Used
Step 19
You might find yourself doing this a couple of times. The motherboard can be a bit of a stubborn buddy to get out.
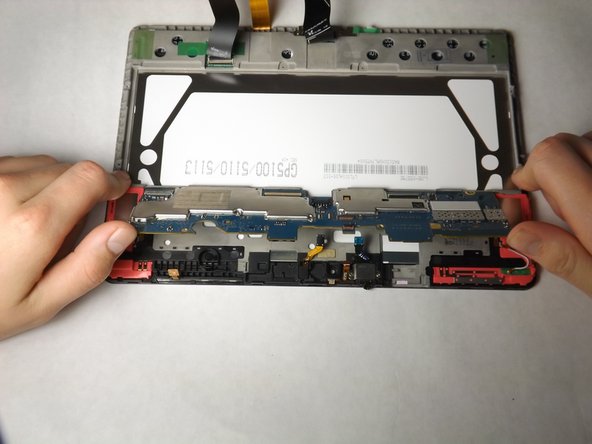
– Once you’ve unplugged all the connectors, give the motherboard a gentle nudge upwards with your thumbs to pop it free from the tabs holding it down. Then, carefully lift it out of the device like you’re handling a delicate treasure.
Success!


