How to Replace the Samsung Galaxy Tab 2 7.0 Motherboard: DIY Guide
Duration: 45 minutes
Steps: 10 Steps
Ready to get your hands dirty? We’re about to tackle removing that pesky motherboard from your device. Stick with me and we’ll have this sorted in no time.
Step 1
– Shut down your device completely. It’s time for a quick nap!
– Pop out the SD card from its slot. You’ve got this!
Step 2
Make sure to unclip all the clips on the back panel, or you might find it a bit tricky to get it off, and we wouldn’t want to risk any damage to your tablet!
– Grab your trusty prying tool and gently work it under the screen edge. Slide it around the device like you’re giving it a little spa treatment, separating the front and rear panels with care.
Step 4
– Grab your Phillips precision screwdriver and take out the six 4 mm screws holding the battery in place. Don’t worry, it’s a quick job!
– Once the battery is loose, carefully lift it out as shown. You’re doing great!
Step 5
– Using the Phillips #00 precision screwdriver, remove the 12 4mm screws holding in the motherboard.
Step 6
– Carefully detach all the flex cable connections in the lower part of the motherboard. You’ve got this!
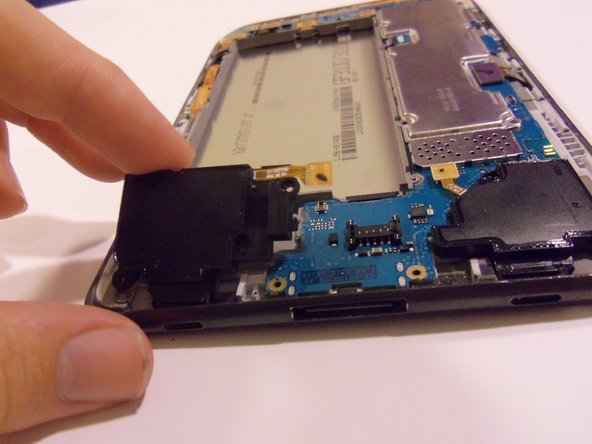
– Grab your trusty plastic pry tool and gently unhook the connections for both loudspeakers. Easy peasy!
– Once everything’s unplugged, softly lift the loudspeakers out of your device. You’re doing great!
Step 7
– Let’s get started by releasing all the flex cables on the right side of the device motherboard – it’s easier than you think, and we’ll guide you through it!
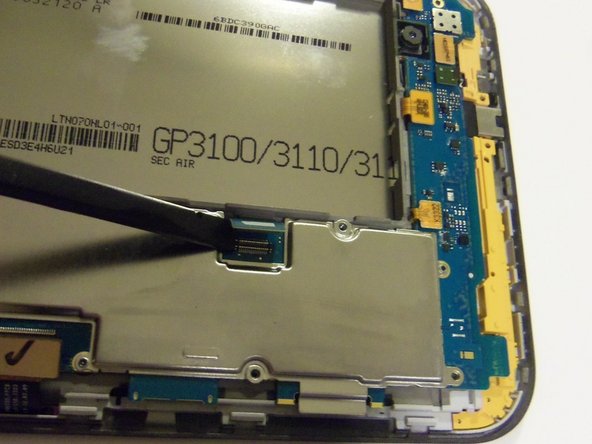
– Next, use your trusty plastic pry tool to gently release the touch screen flex cable from its socket. You’re doing great!
– Now, use the same tool to release the LCD screen flex cable from its socket. You’re making fantastic progress – keep it up!
Step 8
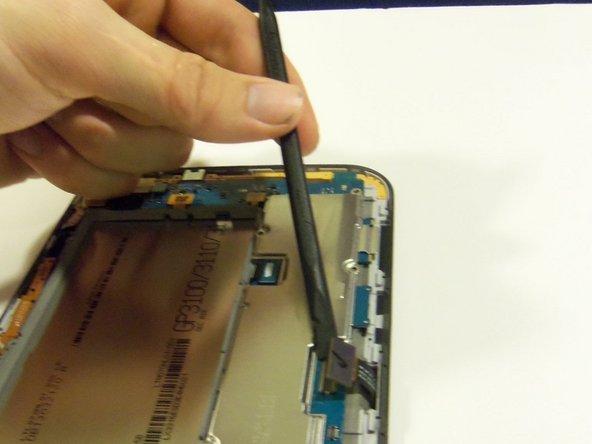
– Let’s start by gently releasing all those flex cables from the upper part of the motherboard.
– Grab your trusty plastic pry tool and carefully pop the sensor flex cable out of its cozy socket.
– Now, with that same tool, let’s free the camera flex cable from its snug home.
– Don’t forget to release the front camera flex cable as well; it’s ready to stretch its legs!
– Lastly, give the side button’s flex cable a little nudge to set it free from its socket.
Step 9
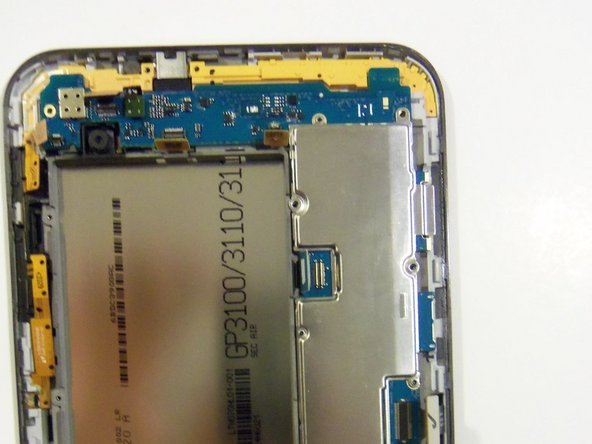
– Alright, one more Flex cable to go! It’s right next to the front camera connector (check out the previous pic with the yellow box). This baby hooks up the top mic and headphone jack.
Step 10
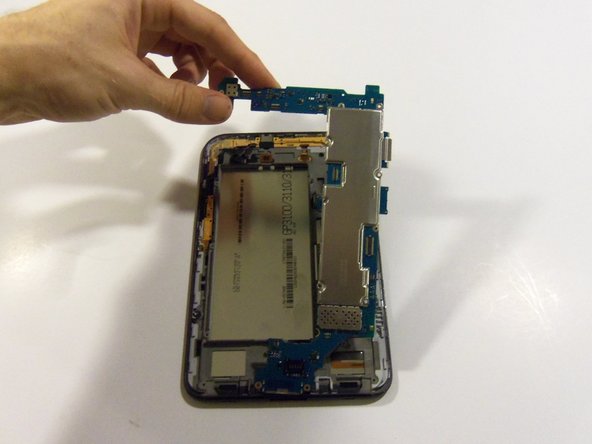
Make sure those flex cables don’t get tangled up with the motherboard while you’re taking it out, or they might end up with a little damage. Keep it smooth and easy!
Starting to lift the motherboard from the top is a breeze compared to the bottom. Trust us, your fingers will thank you!
– Now just follow these steps in reverse to put everything back together, and your device should be good as new!
– Not quite there yet? No worries! If you ran into any roadblocks, feel free to schedule a repair with our team.
– And hey, if you’ve tackled this, you’re a pro! Keep up the great work!
Success!


