How to Replace Lenovo ThinkPad T400 Motherboard: Step-by-Step Guide
Duration: 45 minutes
Steps: 7 Steps
Step-by-step instructions to take apart the logic board, along with some handy pictures to guide you through the rest of the process. And hey, if you’re removing or replacing the fan assembly on the processor and GPU, don’t forget to slather on some fresh thermal compound!
Step 1

– It’s a great idea to print out a picture of the back of your laptop and use it as a handy template for placing those pesky screws. Trust us, they come in all shapes and sizes!
– Now, go ahead and remove all the screws from the bottom and place them on your printed template. You’ve got this!
Step 2


– First up, let’s get that DVD drive out of there! Flip the ‘play triangle’ switch to extend the tab, then give it a gentle pull to release the DVD drive. Easy peasy!
– Next, it’s time to say goodbye to the hard drive. Just remove it and you’re one step closer to your repair victory!
Step 3

– Gently unclip the left and right sides of the touchpad.
– Carefully lift the touchpad and disconnect it from its connectors.
Step 4


– Time to get started! Gently pull the keyboard towards you, and then lift it up until the flex cable is visible – easy does it!
– Now, use your trusty spudger to carefully disconnect the connector for the keyboard. You’re doing great!
Tools Used

Step 5

– The rest of this guide is packed with super helpful pictures to guide you along!
– Let’s get that WLAN module out of there!
– Gently unplug the two RF connectors from the WLAN module using a spudger.
– Next, remove the two screws that are holding the WLAN module in place.
– Now, lift the module at a 45-degree angle and pull it outwards with care.
Tools Used
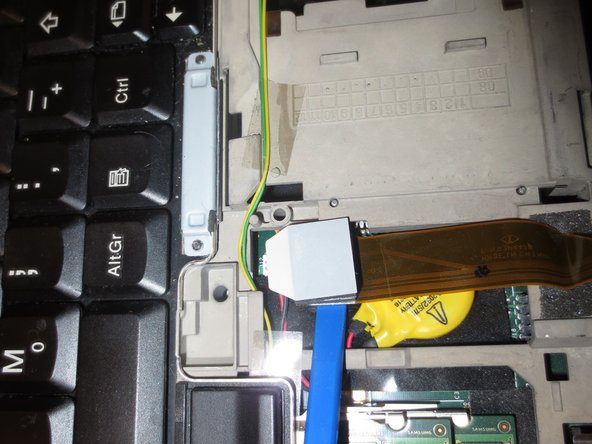
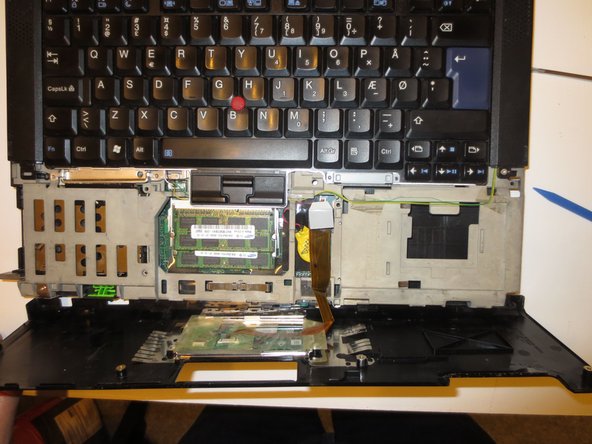
Step 6


– Check out some handy images that showcase most of the main assembly.
– If you’re planning to take out the entire logic board, removing the RAM modules can be super helpful.
– Now, it’s time to unscrew everything! Just be sure to keep track of where each screw goes. A magnetic mat and a little note-taking can work wonders!
Step 7

– Here’s one more pic to guide you along.