DIY PlayStation 2 Lens Cleaning Guide: Step-by-Step Repair
Duration: 45 minutes
Steps: 6 Steps
Dealing with a ‘Disc Read Error’? It’s one of those pesky, common hiccups that can really test your patience. The culprit? Usually just a bit of dust or debris on the lens. The good news? It’s a breeze to fix! Follow these quick and easy steps, and you’ll have everything back in working order in no time!
Step 1


– Alright, let’s get this PlayStation 2 flipped over so the bottom is facing up, just like a turtle on its back!
– Grab your trusty metal spudger and gently pry out those eight flat screw covers. They’re just waiting to be freed!
– Now, it’s time to tackle the screws holding the top cover to the bottom case. Here’s what you need to remove:
– Four Philips screws, each measuring 55.4 mm – they’re the longer ones!
– And don’t forget the four shorter Philips screws at 18.0 mm – they’re just as important!
Tools Used

Step 2

– Keep in mind that some models might have a unique mix of screws and feet. So, let’s get those feet and screws off the bottom of the case—time to make it nice and clean!
– For the model with 10 screws, you’ll find 6 in the lower section and 4 hanging out in the upper tray. Easy peasy!
Step 3

Gently heat it up to loosen things, and slide it off cleanly without waking the VOID.
– Time to get started! Begin by carefully peeling off the warranty sticker, located next to the main power switch, straight away from the case.
Step 4


To make it easier, start by prying open the side near the power switch and gently rock the top cover toward the front of the bottom case.
– Flip that PlayStation 2 back to its original upside-down glory. It’s time to get this repair party started!
– Gently lift the top cover off the bottom case like you’re opening a treasure chest. Smooth and steady wins the race.
– Carefully disconnect the power cord assembly that links the top and bottom halves. Treat it like it’s a fragile handshake between old friends, and you’ll be good to go!
Step 5


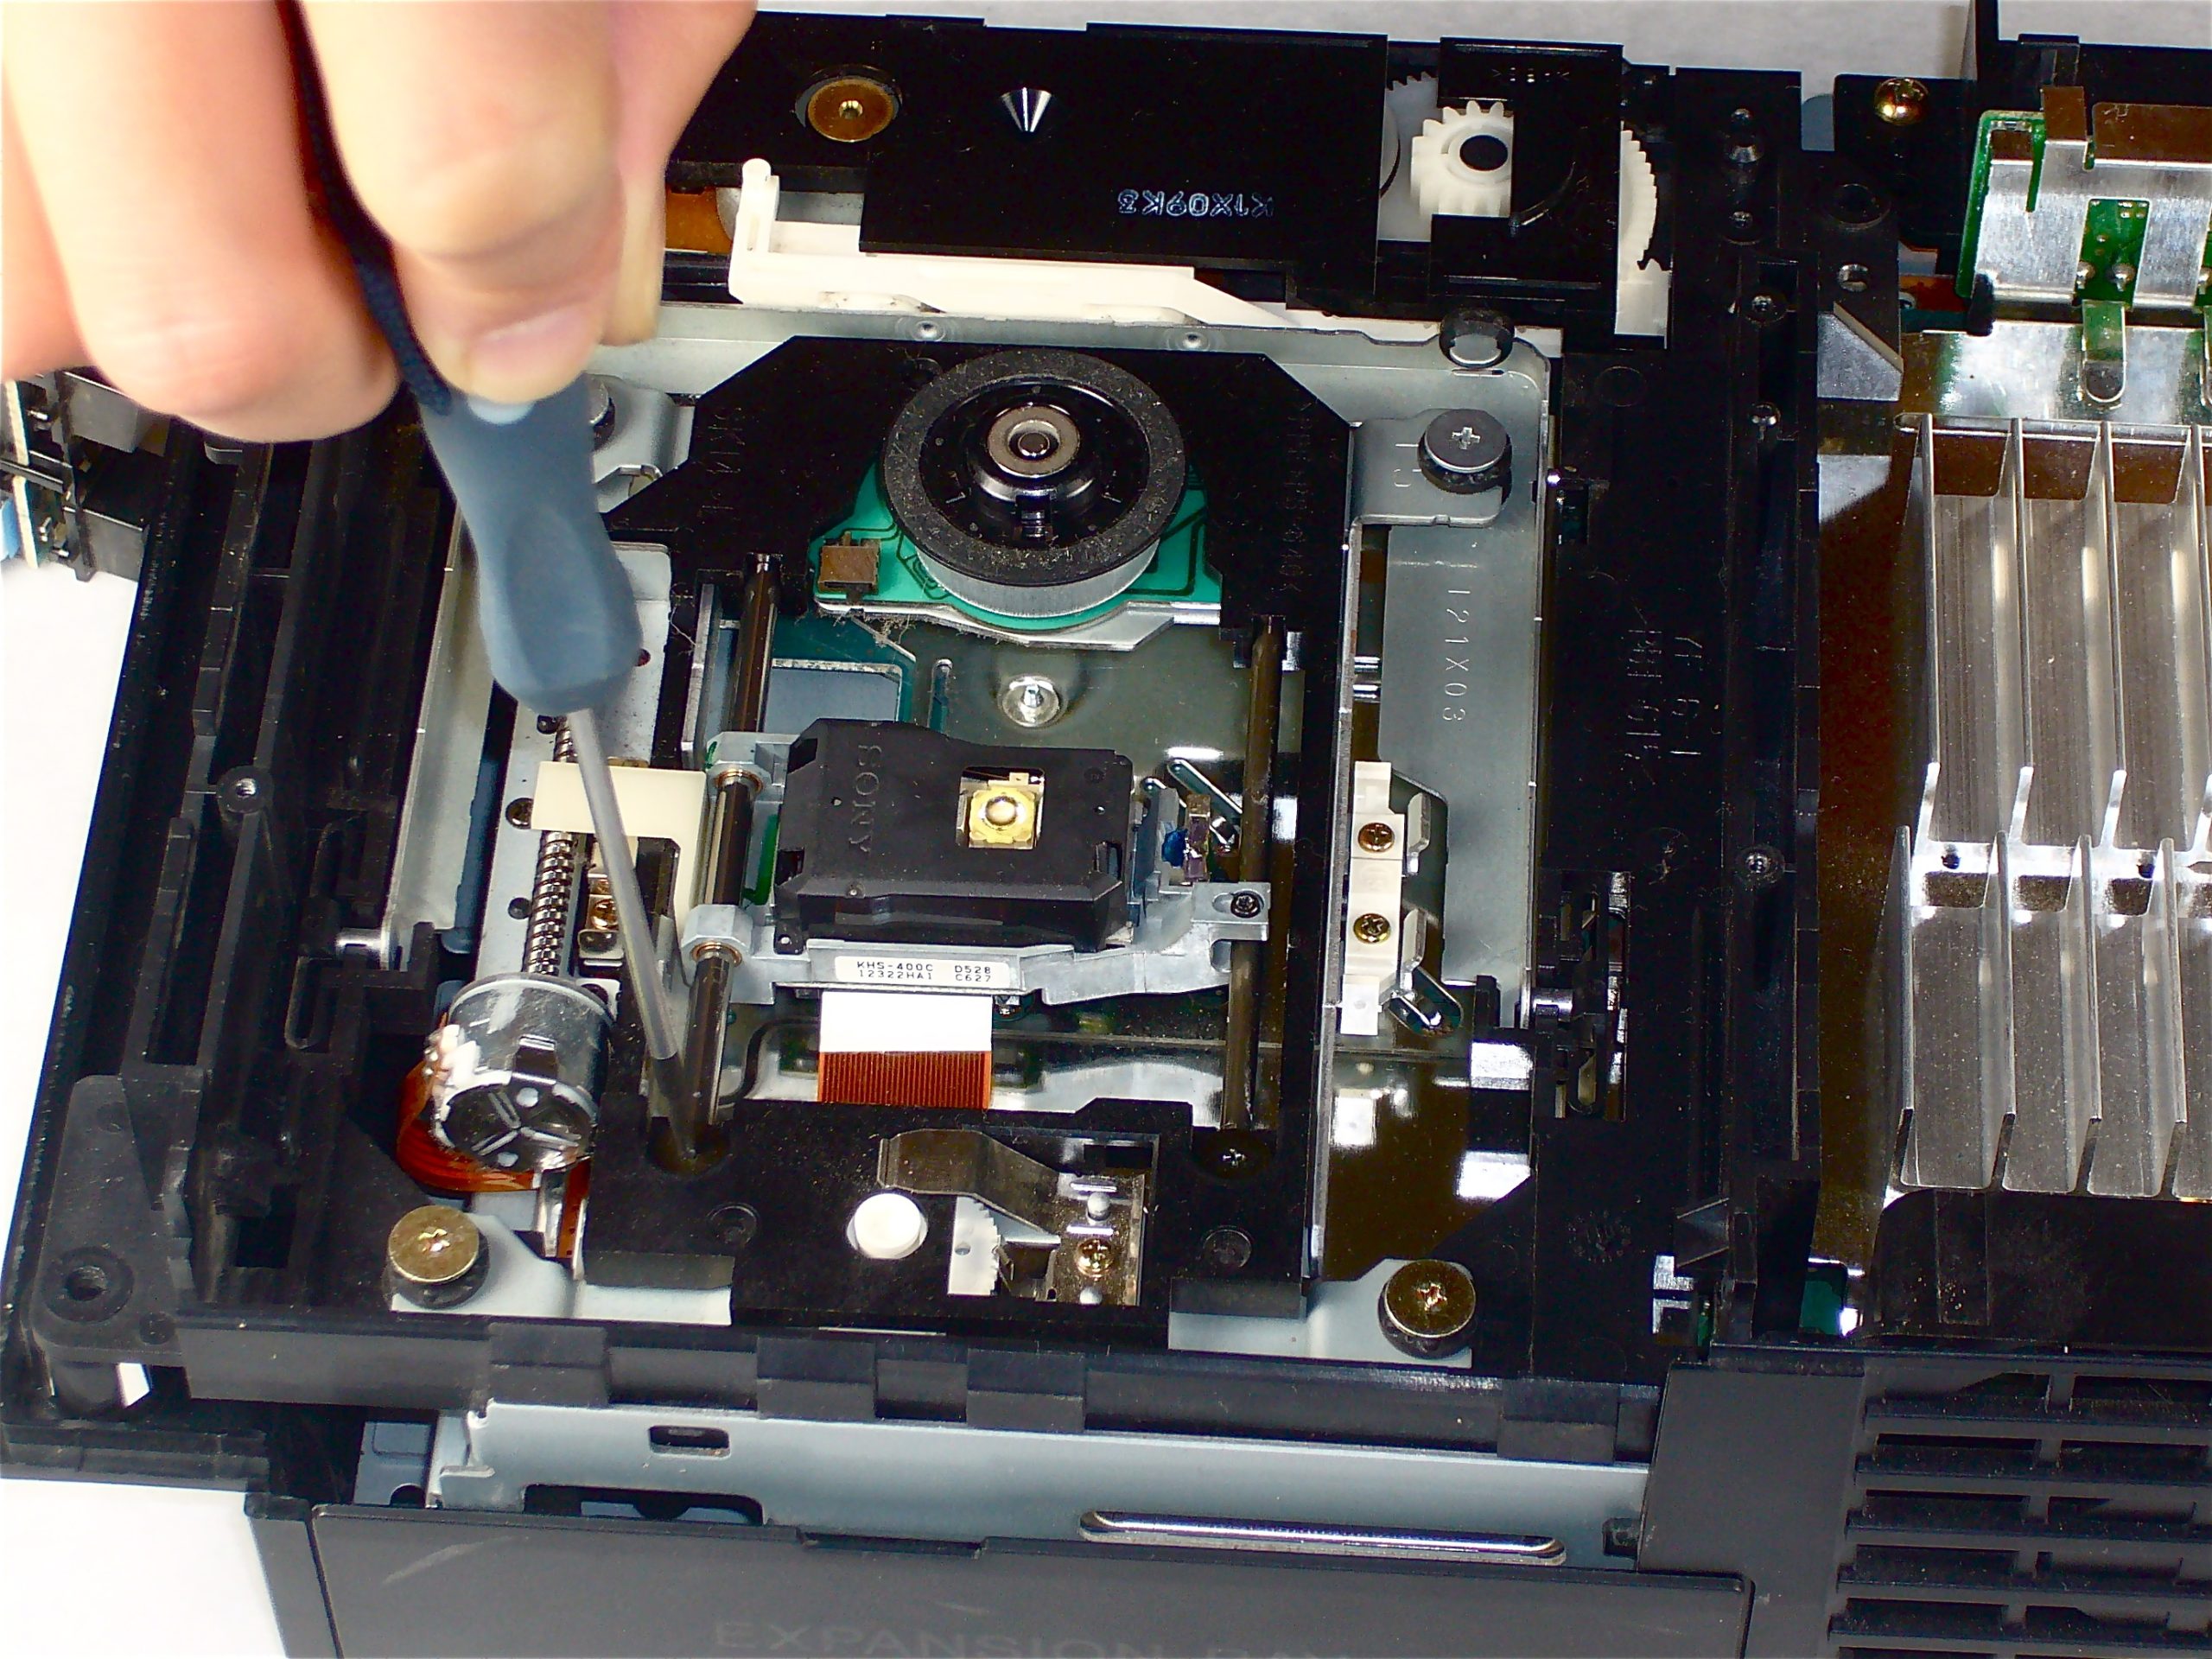
– Take out the four 6.4 mm Phillips screws holding the top lid of the optical disc drive in place. They’re small but mighty, so keep them safe!
– Gently lift off the lid from the optical disc drive like you’re revealing a surprise gift. Easy does it!
Step 6

Keep the Q-Tip just lightly damp with rubbing alcohol, no need to go overboard!
– Gently clean the lens in a circular motion with a Q-Tip dampened with rubbing alcohol.
– Give it a few minutes to let the rubbing alcohol evaporate.