Nintendo Wii U GamePad Analog Stick Replacement
Duration: 45 minutes
Steps: 9 Steps
Ready to tackle a joystick swap on your Nintendo Wii U GamePad? This guide walks you through replacing the analog stick with clarity and ease. Let’s get your GamePad back in action!
Step 1


– Flip the GamePad so it’s facing down, and unscrew the two 4.7 mm Phillips #00 screws holding the battery cover in place. Time to show that battery cover who’s boss!
– Gently lift up and slide off the battery cover. Voila! Access granted.
Step 2


– Gently place your finger on the battery connector and give it a little tug down towards the base of the GamePad to disconnect it. You’re doing great!
– Now, lift the battery up from the bottom and watch it pop right out. Easy peasy!
Step 3


The back plate is still connected to the motherboard by a sneaky little cable.
– Start by unscrewing the ten 8.9mm Tri-wing Y1 screws tucked away under those little square stickers. Don’t worry, they won’t bite!
– Once the screws are out, gently lift the back plate off. It should come right up, no need to force it!
Step 4


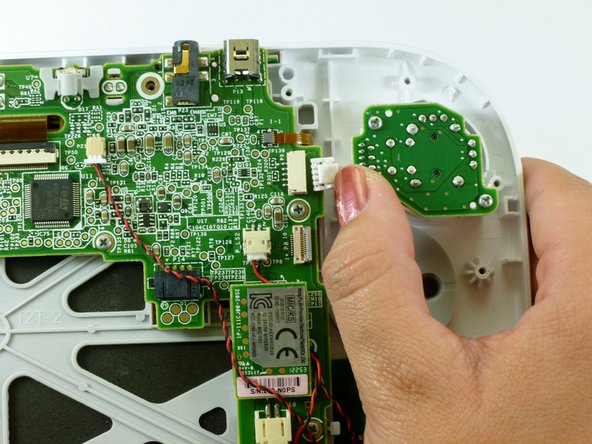
– Gently disconnect the cable that links the back plate to the motherboard. It’s like giving your device a little break!
– Carefully take off the back panel. Think of it as peeling an orange, but way cooler!
Step 5


– Pop off the left and right shoulder buttons in the upper corners.
– Lift up and slide out the ZR and ZL trigger buttons.
Step 6


– Let’s get started! First, carefully pull off the top rubber cover to expose one of the mounting screws – it’s like a little door to the inside of your device.
– Next, grab your trusty screwdriver and remove the four 5.2mm Phillips #0 screws. Easy does it!
Step 7


– Grab a trusty spudger and pop up that tab to free the blue ribbon cable—it’s like setting it free from a tiny ribbon prison!
– Gently take out the analog stick and button cover. Easy does it, like you’re handling a delicate piece of art!
Step 8
– Use your thumb to nudge the connector toward the rightmost edge and pop that analog stick cable connector free. Easy peasy!
Step 9


– Take out the two 9.0mm Tri-wing Y0 screws—yep, those little guys holding things together.
– Gently lift out the analog stick like you’re picking up a tiny treasure.