
Nintendo 3DS XL Circle Pad Replacement
Duration: 45 minutes
Steps: 11 Steps
Bummer! Broke your circle pad? No sweat! It’s totally replaceable, so you’ll be back to gaming in no time!
Step 1


The screws come with nifty locking washers that keep them snugly attached to the back cover. No need to mess with those washers—just leave them on the screws and keep cruising through this repair guide like a pro!
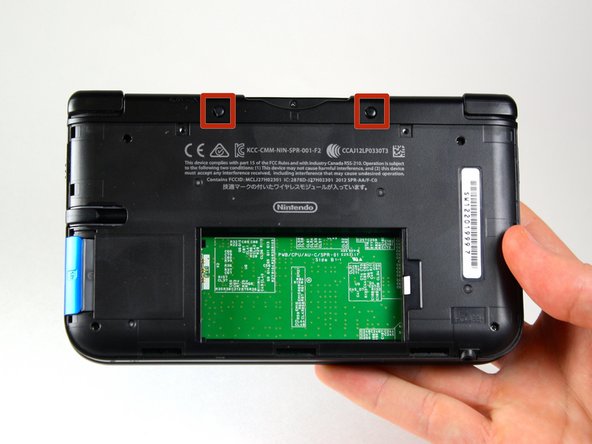
– Grab your trusty #00 Phillips screwdriver and gently unfasten those two 4.2 mm-length screws hanging out at the top of the back cover. They’re just itching to be freed!
Step 2


– Position the device so the cover is facing upwards. It’s like giving it a little sunbath!
– Grab a plastic opening tool, and gently pry off the cover. Start at the top right corner – that’s the sweet spot.
– Carefully remove the device’s cover and set it aside. We don’t want any surprise reattachments!
– Keep a hold on the edge of the cover. Just to make sure it behaves.
– Spot the small section below the stylus compartment? If the cover’s still hanging on there, give it a gentle pry at that point. If you need help, you can always schedule a repair
Step 3


– Start by gently sliding the plastic opening tool into the little gap on the right side of the battery. We’re just getting started!
– Now, give the battery a little nudge and pry it away from the lower casing. Easy does it!
– Finally, lift that battery out of its cozy home and set it aside. You’ve got this!
Step 4

– Let’s get started! Use tweezers to carefully pull out the rubber bumpers located at the top of the device, on either side of the game cartridge compartment. It’s an easy first step, and you’re off to a great start!
Tools Used

Step 5


– Using a Phillips #00 screwdriver, carefully unscrew the six 6.2 mm screws and set them aside. You’ve got this!
Tools Used

Step 6

– Unscrew the 2.3 mm screw that’s hanging out above the game cartridge slot using a trusty Phillips #00 screwdriver. You’ve got this!
Tools Used
Step 7


– Alright, let’s get that SD card outta there! Grab your trusty plastic opening tool and gently pry off the lower case. Start at the bottom edge and work your way around, like you’re freeing it from a plastic prison.
– Whoa there, slow down! Two ribbon cables are still connecting the case to the circuit board. Be gentle, don’t yank it like you’re starting a lawnmower, or you might rip those delicate cables. If you need help, you can always schedule a repair
Step 8


– Gently lift the ribbon cables tucked away under the left and right bumpers using a trusty plastic opening tool. They’re just waiting to be freed!
– Now, let’s get that lower case off the device completely and set it aside. You’re doing great!
Step 9


– Get your device ready by placing it so the game cartridge slot is at the top – easy peasy!
– Now, take a look at the right side of your device and find that circle pad – it’s time to get started!
– Carefully remove the two 7.5 mm screws located at the upper left and bottom right corners – you’re making great progress!
Step 10


There’s a loose washer chilling between the circle pad joystick and the circle pad. Handle with care and don’t let this piece disappear on you.
– Grab your plastic opening tool and gently pop off the circle pad joystick. No need to rush, take it easy!
– Remember, no Hulk strength needed here. The joystick is connected to the motherboard by a ribbon, so it’ll stay attached – just a light touch is all you need!
Step 11


– Grab your trusty spudger and use the flat head side to gently pop up the retaining flap that connects the circle pad ribbon to the motherboard. Be cool, take it slow—no need to rush!
– Once that ribbon is free, carefully remove it along with the circle pad joystick. Boom, you’re making progress!
