Microsoft Surface Laptop 3 Screen Replacement Guide
Duration: 45 minutes
Steps: 24 Steps
Follow this guide to replace the screen assembly on a Microsoft Surface Laptop 3 (15″). Pro tip: Ensure your replacement screen comes with the metal shell and hinges. If you’ve only got the panel, use this guide. And hey, don’t forget to follow general electrostatic discharge (ESD) safety procedures while you tinker with your device.
Step 1


– Time to get started! First, power down your laptop and unplug all cables to ensure your safety while repairing.
– Next, close the laptop lid to prepare it for the repair process.
Step 2


– Turn your laptop upside down and set it on your work surface, with the feet facing up.


Step 4


The two rear feet are lightly held in place with a bit of adhesive—nothing too tricky to handle!
Step 5


The two front feet are held in place with plastic clips and a smidge of light adhesive.
Step 6


– As you put everything back together:
– Keep in mind that the front and rear feet are not the same.
– Remember that the front feet have a specific orientation and only fit in one way.
Step 7


– Instead of sticking with those old, worn-out feet, grab some 8mm rubber furniture pads – they’re a solid replacement.
– Peel a pad off its backing, line it up with the foot cavity, and give it a good press to lock it in place.
Step 8

While you’re working on this repair, keep track of every screw and ensure it goes back exactly where it came from to keep your laptop in top shape.
– Get your screw game on! Use a T5 Torx driver to remove the four 3mm screws hiding in the foot cavities – they’re holding the upper case in place.
– When you’re putting everything back together, be gentle with these screws. They can strip easily, so don’t over-tighten them.
Step 9


– Turn the device upside down, nice and steady.
– Open the screen all the way—it’s time to get things rolling!
Step 10


Don’t get ahead of yourself – the upper case is still connected, so hold off on removing it just yet!
Double-check that the upper case fits snugly around the entire edge. If there are gaps near the display, you could be in for a world of trouble when you close it up – it might damage the display, and that’s no fun!
The upper case is cleverly held in place by some pretty strong magnets, making it easy to remove and replace when you need to.
– Grab the top edge of the upper case right above the keyboard and gently lift it straight up to pop it off.
– Carefully lift the front edge of the upper case away from the laptop, making sure not to put any stress on the keyboard and touchpad ribbon cable hiding underneath.
– When it’s time to put everything back together, lower the upper case onto the lower case until those magnets click into place and it sits nice and flat.
Step 11


The keyboard and touchpad ribbon cable are held in place with a nifty magnet connector.
On certain models, you might find this connector wrapped up with black tape—just peel it back gently to get access!
– Slide the flat end of a spudger under one side of the ribbon cable connector, and give it a gentle lift to pop it loose.
– Disconnect the ribbon cable from the motherboard.
Tools Used
Step 12


Make sure the ribbon cable is nice and flat, without any twists or stress on it.
– Let’s kick things off by taking off the upper case. You got this!
– Now, gently flip that upper case over and place it on a clean surface, keyboard-side down. You’re doing great!
Step 13

Taking out the SSD doubles as a battery disconnect and is a must-do before any major repair.
– Grab your trusty T5 Torx driver and unscrew that 2.7 mm screw holding the SSD in place. You’ve got this!
Step 14


Once you’ve taken out the SSD screw, watch as the SSD gracefully lifts up at a slight angle, ready for its next adventure!
– Grab the end of the SSD and gently pull it away from the board connector to remove it.
– When putting it back together, slide the SSD at a shallow angle into the board connector, then secure it horizontally with the SSD screw.
Step 15


Careful now—try to keep the shield in good shape, since you’ll need to pop it back on during reassembly!
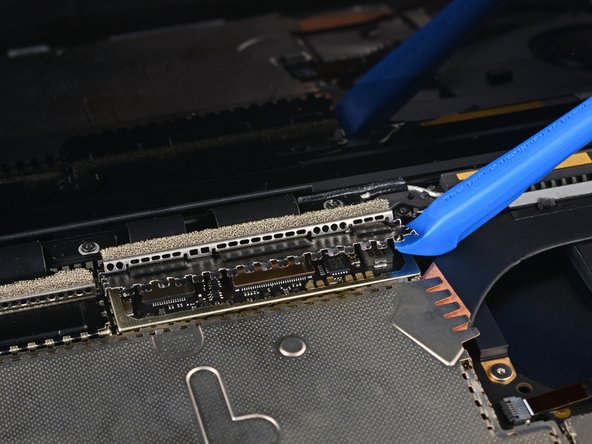
– Grab your trusty opening tool and gently nudge the black shield that’s hiding the right bank of display connectors.
– Keep working your way around the shield, giving it a little love until it starts to loosen up.
– Once it’s feeling free, carefully lift off the shield.
Step 16
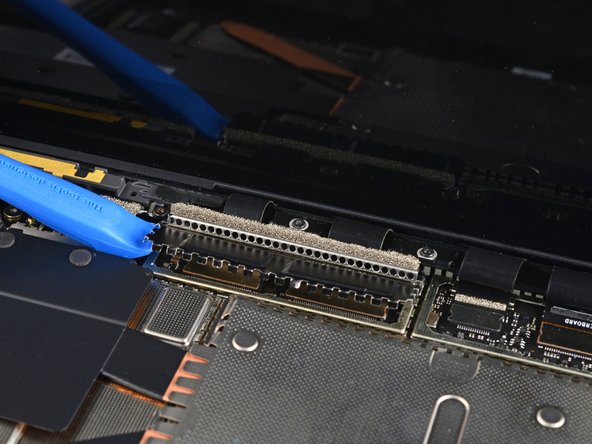

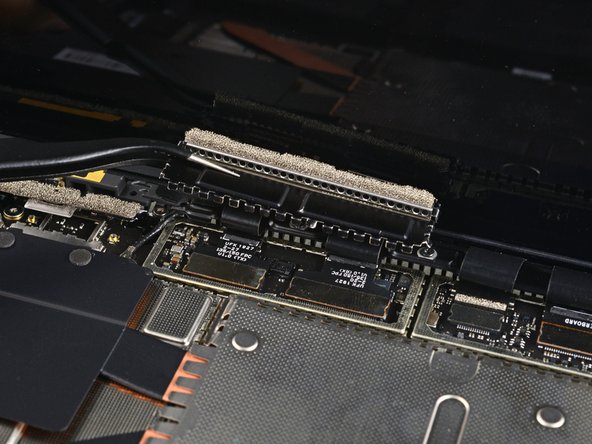
– Alright, time to repeat the last move! Carefully remove the other shield from the left side of the display connectors. You’ve got this!
Step 17


– Grab your flat spudger and pop that first display cable up and out of its socket on the motherboard. You’re halfway there!
Tools Used
Step 18

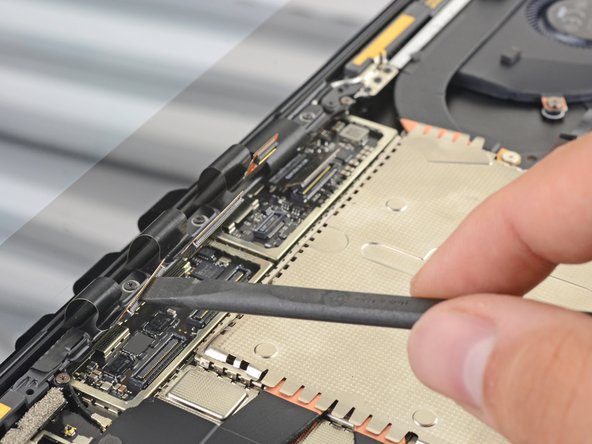
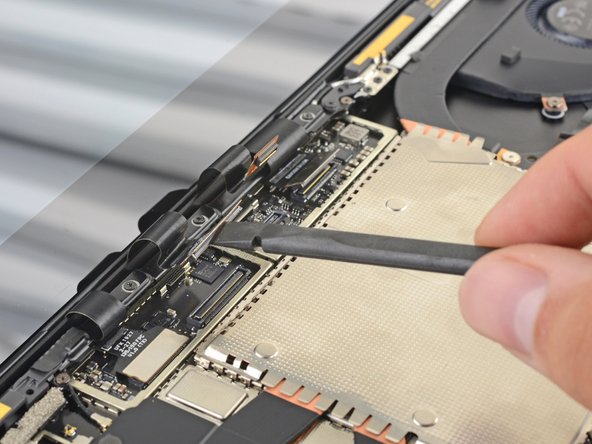
– Carefully unplug those last three display connectors—you’re almost there!


Step 20

– Gently open the screen to its maximum angle, giving it the freedom to stretch out.
Step 21
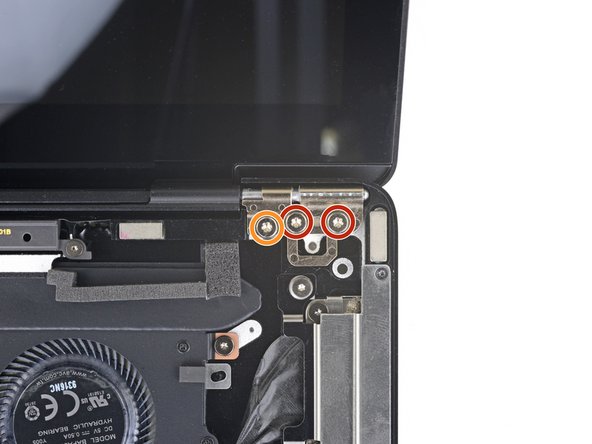
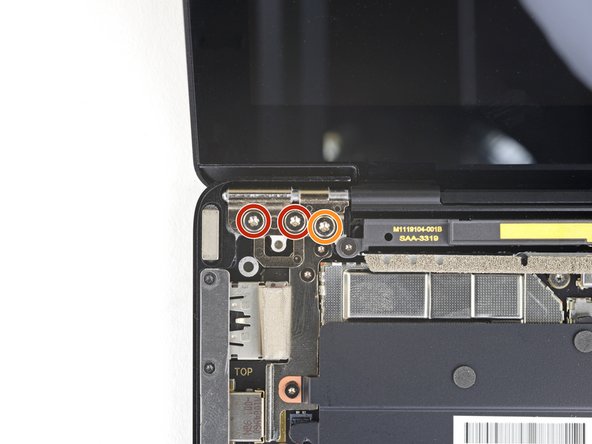

As you start unscrewing the hinge screws, keep a steady hand on the screen—those hinges are loosening up with every turn, so make sure it doesn’t surprise you!

Step 23


Now that you’ve tackled those last two screws, the screen is ready to break free from the rest of the device—just keep it steady, champ!
If your screen is standing tall and proud at a perfect right angle to the lower case, watch out! The screwdriver handle might just want to say hello to the display while you’re removing it. If things get tricky, give the screen a gentle tilt back to make some room for the driver.
Step 24


– You made it! Compare your new replacement part to the original one to make sure everything is in order. You might need to transfer some components or remove any adhesive backings from the new part before installing it.
– To put everything back together, just follow these steps in reverse. Easy peasy!
– Now, be kind to the planet and take your e-waste to a certified recycler.
– If things didn’t quite go as planned, don’t worry! Try some basic troubleshooting or check out our Answers community for help.
– If you’re still stuck, don’t worry – we’ve got your back! If you need help, you can always schedule a repair with Salvation Repair.
–