DIY: Replace Samsung Galaxy Tab 7.0 Audio Jack (Guide)
Duration: 45 minutes
Steps: 10 Steps
Ready to bring back that sweet sound? In this guide, you’ll learn how to swap out the audio jack on your Samsung Galaxy Tab 7.0 Sprint. Heads up—this means taking apart some other components to get to the jack, but don’t worry, it’s a straightforward process!
Step 1

– Time to get this repair started! Switch that device off completely.
– Now, let’s get it disconnected – gently pull out any plugs, cables or accessories like chargers or headphones that are attached to your device.
– Place your device on a nice, flat and stable surface where it can chill for a bit while you work on it.
Step 2


– Pop off the plastic tabs at the bottom of your device using the metal spudger—check out those pics for a visual assist.
– Keep those tiny parts in a safe, easy-to-reach spot. Trust us, you don’t want them sneaking off into the void!
Tools Used

Step 3


– Grab your trusty Tri-Point YO Screwdriver and gently unscrew those two 4.1mm Tri-Wing screws. You’ve got this!
– Now, find a cozy spot for those screws, just like you did with the pads you took off earlier. Keep everything organized and in its place!
Step 4


Don’t get discouraged! Apply gentle pressure to the screen, increasing it slowly and steadily. Rushing it can lead to a cracked screen. If you need help, you can always schedule a repair.
– Grab your trusty plastic opening tool and slide it between the front and back panels at the bottom right corner—like you’re cracking open a secret treasure chest.
– Gently work the tool down to create a tiny gap between the two panels. No rush—slow and steady wins the race!
– Once you’ve got a little wiggle room, keep the tool steady and glide it along the bottom edge of the device from right to left. This’ll help widen that gap and get you closer to popping it open.
Step 5


Some of those tools you just used might decide to dance their way out. No worries! Just pop them back in their cozy spots and keep on going.
– Keep that trusty tool snugly in the device—it’s doing a great job!
– Now, grab another plastic opening tool and slide it into the bottom of the left side, just like the picture shows.
– Following the same groove as before, glide the tool along the side to gently widen the gap between the front and back panels. This time, start from the bottom and work your way up.
– Time to give the right side some love! Repeat the process, starting at the bottom of the right side.
Step 6


Take your time when peeling off the front panel—slow and steady wins the race! We want to keep everything intact and avoid any accidental breakage.
– With a steady grip on the bottom of your device, gently lift the front panel away from the back panel like you’re unveiling a surprise!
Step 7

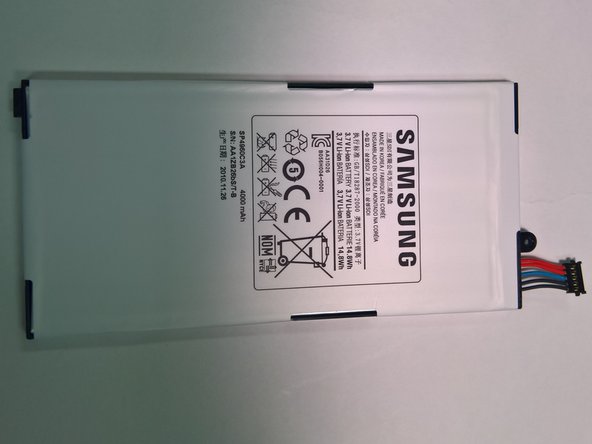
– Lay the front panel on the table like you’re setting down a priceless piece of artwork, with the battery side facing up.
– Spot that tiny screw holding the battery to the motherboard? Grab your Phillips #00 Screwdriver and gently twist it out. Easy peasy!
– Keep that little guy safe! Pop it in a dish, a magnetized tray, or wherever you won’t lose it—it’ll be your VIP when it’s time to reassemble your device.
Tools Used

Step 8
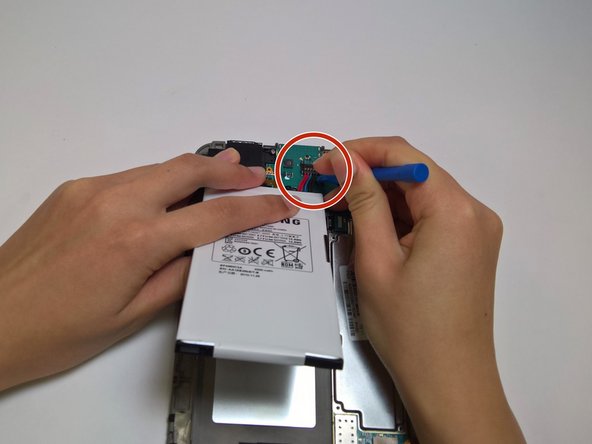

Hey there, steer clear of jabbing the battery with tools like screwdrivers or openers. Let’s keep things safe and smooth!
– Gently lift the bottom of the battery like you’re flipping the first pancake of the day.
– Grab a trusty plastic opening tool and carefully pop the battery connector straight up from the motherboard. No need to rush—steady hands win the game!
Step 9
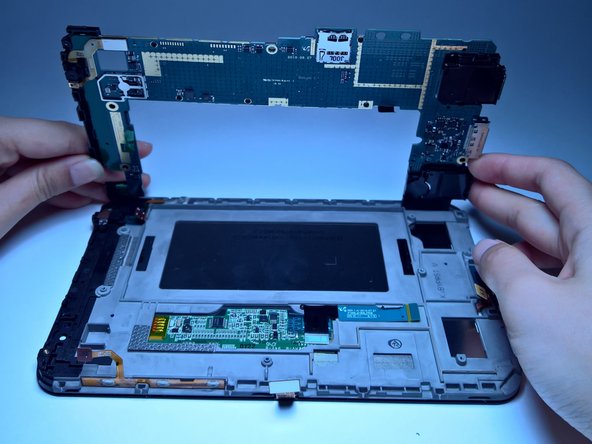

– Alright, grab your trusty plastic opening tool and gently pop off the following 5 connections like a pro:
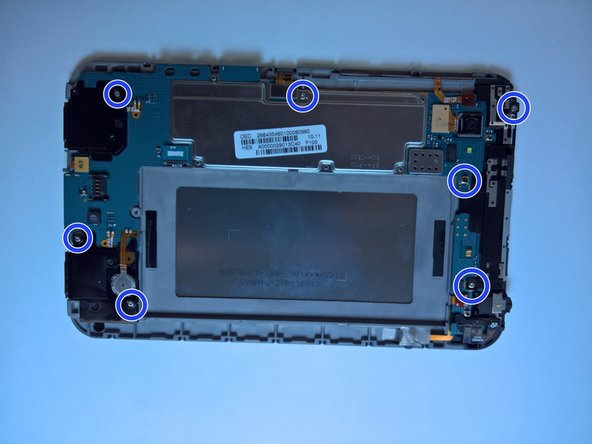
– Next up, grab your Phillips #00 screwdriver and unscrew the seven little guys keeping the motherboard locked in place.
– Now, with some delicate finesse, lift the motherboard out of the rear panel. You’ve got this!
– Here’s the lineup of connectors you’ll be dealing with:
– – Headphone jack/microphone cable
– – Volume control cable
– – Touchscreen cable
– – Control button LED cable
– – Display data cable
Tools Used
Step 10
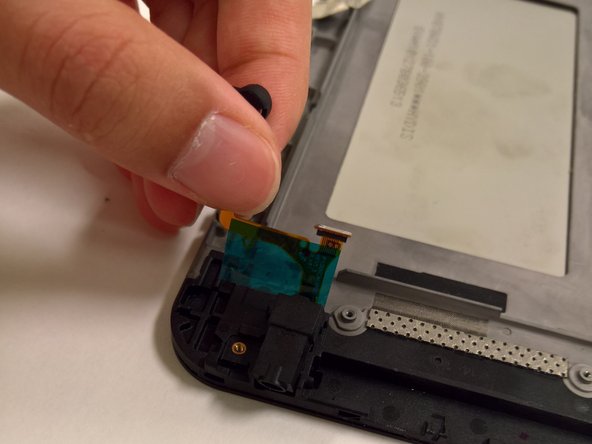
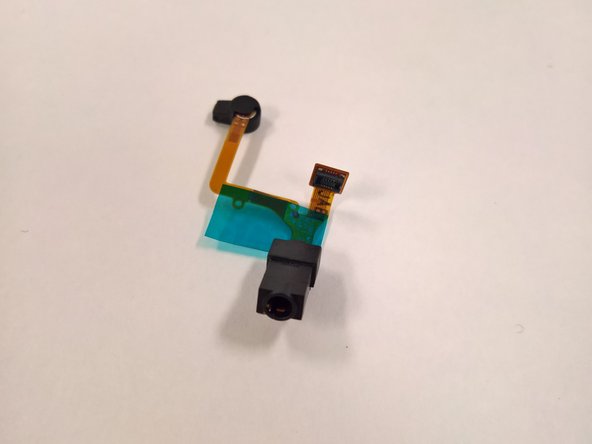

– Grab your Phillips #00 screwdriver and unscrew the screws holding the audio jack panel to the back. It’s like opening a tiny treasure chest—easy does it!
– Carefully peel the audio jack off the adhesive, like you’re lifting a sticker. Then, gently remove it from the device. Boom, you’re done with this step!
Tools Used
Success!