How to Replace Samsung Galaxy Watch Battery: Step-by-Step Guide
Duration: 45 minutes
Steps: 13 Steps
Make sure your battery is chillin’ below 25% before diving in!
Ready to give your Galaxy Watch a little power boost? Follow this guide to swap out that tired or lifeless battery! If you notice a bulge, let’s be cautious and take the right steps. For your safety, make sure to drain that battery below 25% before diving in. This simple step helps prevent any unexpected surprises if the battery gets a little too adventurous during the repair. Let’s get started!
Step 1
– Let’s get started with the repair! First, carefully remove the four Tri-point #00 screws (4.2 mm length) from the backside of the watch. Make sure to keep them safe, we don’t want any tiny screws getting lost!
Step 2
Hold on, don’t yank off that back cover just yet! There’s a flex cable running to the core assembly inside, so let’s keep things chill and careful.
– Grab an opening tool and gently wedge it between the watch’s back cover and its metal body.
– With a bit of care, pry open that plastic back cover. You’ve got this!
Step 3
– Gently lay the watch face-down and pop off the back cover to unveil the sensor connector lounging on the motherboard.
Step 4
– Grab your trusty spudger and gently pry apart the sensor flex cable from the motherboard. You’ve got this!
Tools Used
Step 5
– Pop off the back cover like a pro—it’s easier than it sounds!
– When sealing the watch back up, double-check that the rubber gasket is in top shape. If it’s looking rough, swap it out with a fresh one to keep things snug and secure.
Step 6
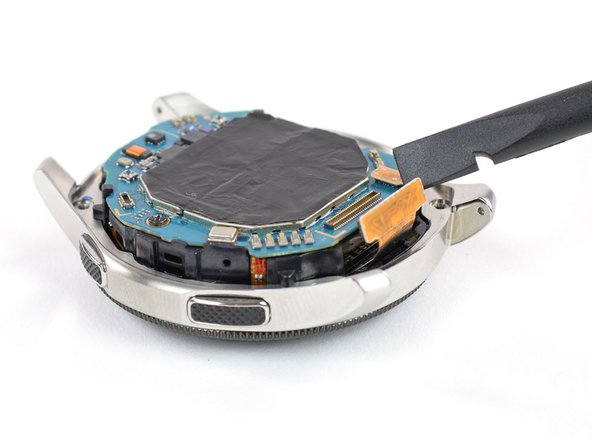
– Grab your trusty spudger and gently pop that display flex cable off the motherboard. Easy does it!
Tools Used
Step 7
Gently guide the display flex cable through the gap in the core’s plastic frame—steady hands, smooth moves!
The core’s plastic frame is snugly nestled inside the housing, ready to be coaxed out.
– Gently lift the core unit out of its cozy housing.
Step 10
– Take out the lone Phillips #00 screw (3.4 mm long)—it’s just chillin’ there, waiting for you to unscrew it.
Step 11
– Gently slide a spudger into the tiny gap beneath the motherboard where the plastic frame has a little cutout.
– Carefully lift the motherboard by giving the spudger a little twist.
– Now, smoothly slide the motherboard out from beneath the plastic tab.
Tools Used
Step 13
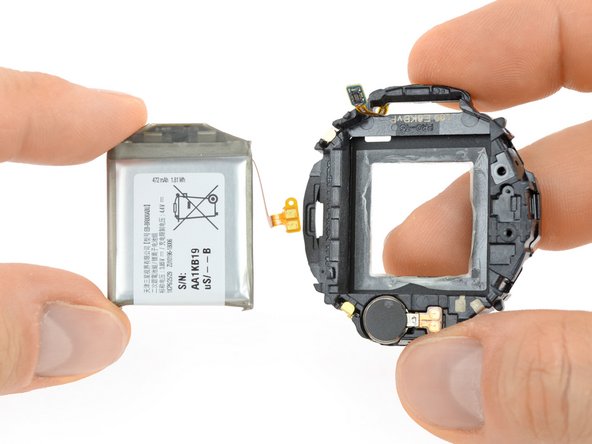
– If possible, power up your device and give your repair a test run before locking it down with new adhesive. Secure that fresh battery with pre-cut adhesive or double-sided tape. Just remember to place the new adhesive in the same spots as the old stuff—not directly on the battery itself.
– Now, to put everything back together, simply follow these steps in reverse order.
– For top-notch performance, let’s get that new battery calibrated: Charge it to 100% and then keep it charging for at least 2 more hours. Use your device until it powers down from low battery, then charge it uninterrupted back to 100%.
– Did things not go as smoothly as planned? No worries! Try some basic troubleshooting or reach out to our Answers community for a helping hand.
– And don’t forget, when you’re done, take your e-waste to an R2 or e-Stewards certified recycler.
– If you didn’t finish this guide, just hit cancel.
– Need some extra support? You can always schedule a repair.
Success!


