Replace PlayStation 5 Slim Storage
Duration: 45 minutes
Steps: 8 Steps
Hey there, champ! Before you start this repair, make sure you’re ready to rock and roll. We’ve got your back, so don’t be shy to ask if you need a hand!
Ready to supercharge your PlayStation 5 Slim with a shiny new M.2 SSD? This guide will walk you through installing it in the expandable storage slot, giving you the space to store all those awesome games, movies, and tunes you love. But hold on, before you dive in, let’s make sure your M.2 SSD is compatible with your PlayStation. Remember, M.2 SATA SSDs are a no-go. Your SSD should also have a little heat-dissipating friend, like a heatsink or thermal pad, to keep things cool. And if your SSD has seen some action and still has data on it, back it up first. We don’t want any surprises during the formatting process! It’s going to wipe that drive clean! If you run into any trouble, you can always schedule a repair.
Step 1
Alright, champ! Before we dive into this repair, let’s make sure you’re ready to rock and roll.
– Power down your console and disconnect all the cables and accessories.
– Remove any stands supporting your device and lay it down flat.
Step 2
– Give your PlayStation a little rest on its side, with the right side panels facing you. You’ve got this!
Step 3
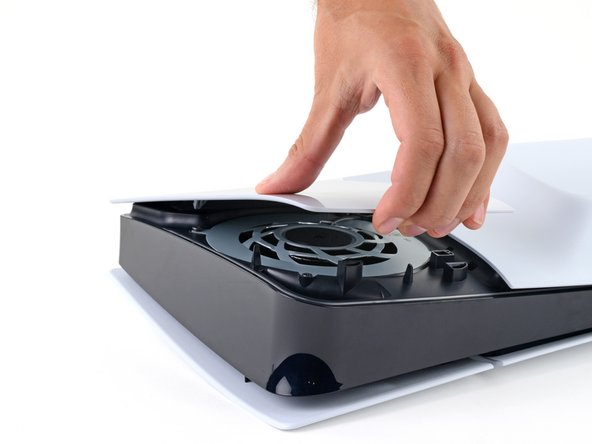
The cover is held in place with some nifty hooks on the back edge and clips dancing along the front edge.
Get ready for a little symphony of ‘pops’ as the clips pop right out.
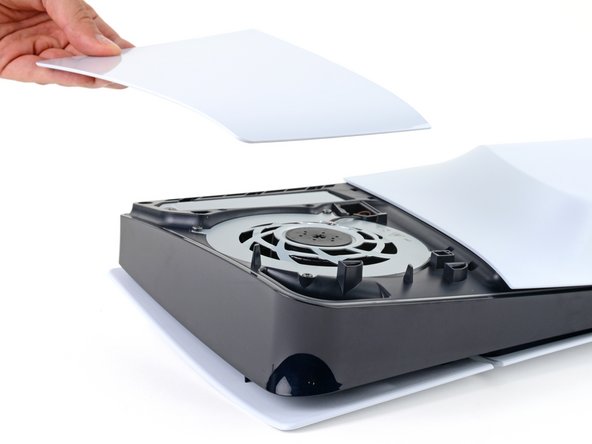
– Let’s get started! Gently pry up the front edge of the smaller, upper cover to release the clips – it’s like opening a little door.
– Now, carefully remove the cover, taking your time to avoid any damage.
– To put everything back together, align the hooks with their cutouts along the rear edge, then firmly press the front edge of the cover into place until you hear the clips snap back in. Easy peasy!
Step 4
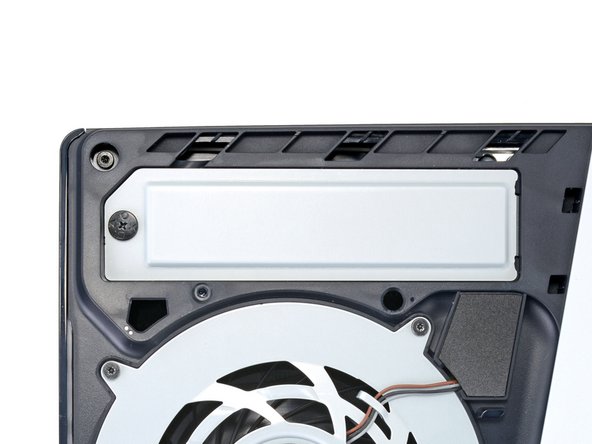
– Grab your trusty Phillips screwdriver and pop out that 17.1 mm screw holding the expansion slot cover in place.
Step 5
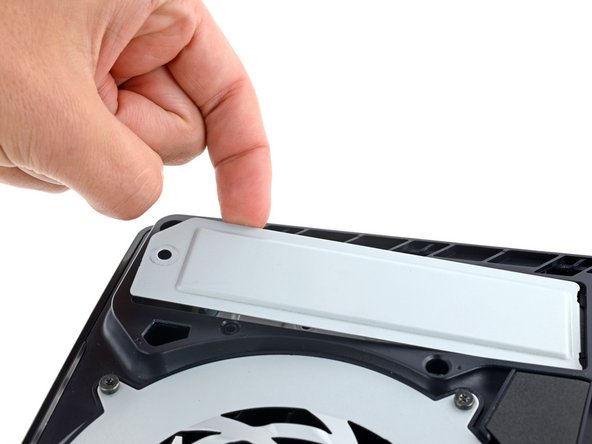
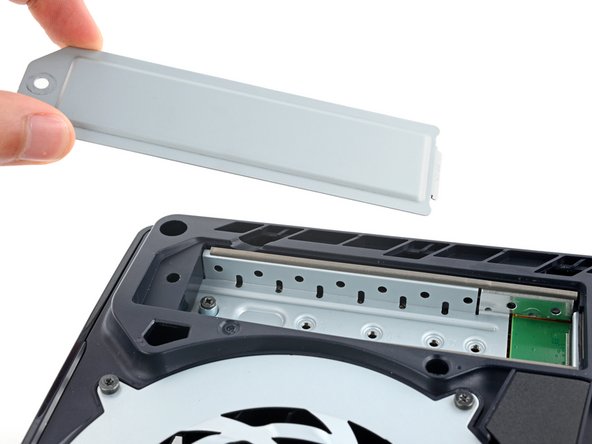
– Give that expansion slot cover a little lift with your fingers near the notch by the screw hole. It’s like a little party for the cover! Let’s get it out of there.
Step 6
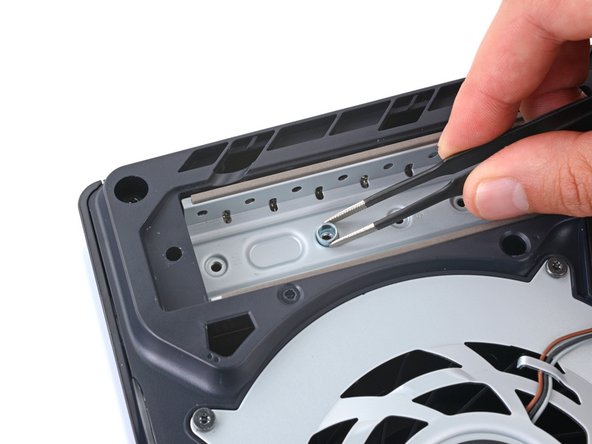
– Grab your trusty Phillips screwdriver and remove that 10.9mm-long SSD screw holding the spacer in place. Easy peasy!
Step 7
Remember to install the spacer, it’s like a little friend for your SSD. No spacer, no SSD party! 😉
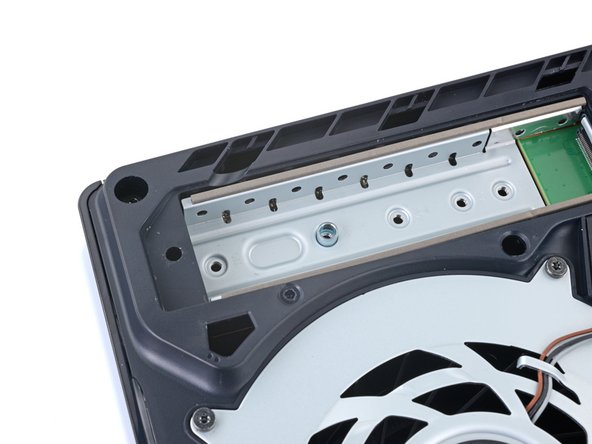
Don’t worry, you’ve got this! The expansion slot has multiple indents to make sure your SSD fits just right. Each indent is clearly labeled with the corresponding size. You’re a pro!
– Grab those tweezers or use your fingers to nudge the spacer into the right spot based on your SSD size.
Step 8
Keep it chill with this screw, over-torquing it might mess up the SSD.
Ensure your SSD is PlayStation-friendly and has a buddy system in place, like a heatsink or thermal pad to keep it cool.
The SSD and M.2 socket come with a unique puzzle piece design – there’s only one way to fit the SSD in, so don’t force it!
Don’t worry if your SSD is looking a little tilted before you secure it; it’s just getting comfortable before settling in.
– Ready to put your device back together? Just follow these steps in reverse, starting with that expansion slot cover!
– If this is your first time installing an SSD with your PlayStation, remember to format it after you put it in.
– Moving games over to your shiny new SSD? Check out Sony’s guide for the best tips.
– Got some e-waste lying around? Do the planet a favor and take it to an R2 or e-Stewards certified recycler.
– Things didn’t go quite as planned? No worries! Give some basic troubleshooting a shot or reach out to our awesome Answers community for some guidance.
– Change your mind? No stress – just cancel that operation.
– You’ve got this! If you need a hand, we’re here to support you.
Success!


