Replace USB-C Board PlayStation 5 Slim: Step-by-Step Guide
Duration: 45 minutes
Steps: 34 Steps
Ready to tackle that USB-C board replacement on your PlayStation 5 Slim? Let’s dive in! The USB-C board houses your ports and power button. If you find yourself struggling to connect your controllers via USB-C, dealing with a loose USB-C connection, or facing a sticky power button, it’s probably time for a swap. Follow this guide to get things sorted and bring your console back to life.
Step 1


Before you dive in:
– Power off your console and disconnect all cables and accessories.
– Take off any stands holding up your device and lay it down flat.
Step 2


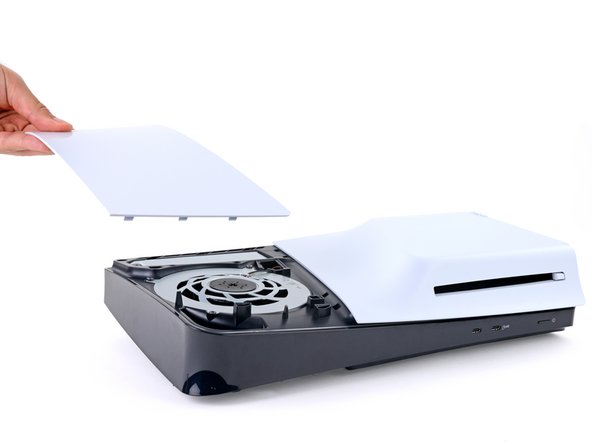
Each console cover is held in place by hooks along the rear edge and clips along the front edge.
You’ll hear satisfying pops as the clips release.
– Let’s get this cover off! Give it a good tug on the front edge to release the clips.
– Time to remove the cover. You’ve got this!
Step 3


– Now that you’ve got one cover removed, use the same steps to take off the other three – it’s a breeze!
– To put a cover back on, simply align the hooks with their cutouts on the rear edge, then press the front edge firmly until the clips click back into place.
Step 4
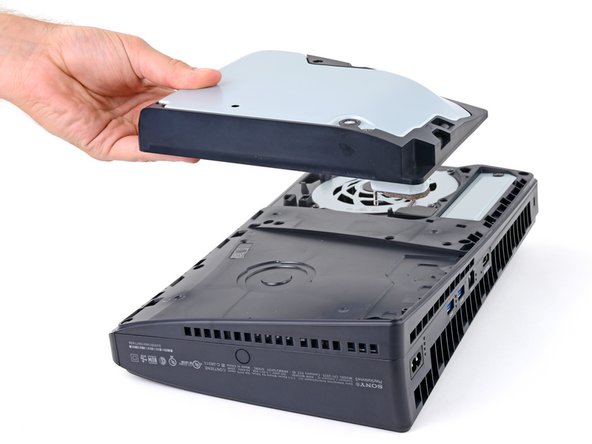


If your PlayStation is disc-drive-less, you can skip ahead to the next step – we’ve got you covered!
– Find the cutout on the bottom right of the disc drive. Lift the right edge up and disconnect it.
– Slide out the disc drive and remove it.
– When you’re putting it back together, hook the left side of the drive into its cutouts, then press down on the right edge to lock the connector in place.
Step 5


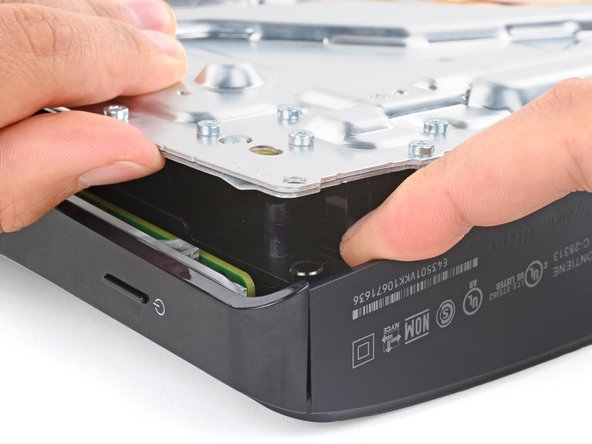
During this repair, remember to keep track of every screw. They all need to go back exactly where they came from.
– Let’s get started! Use a trusty Phillips screwdriver to carefully remove the 17.1mm-long screw that’s holding the expansion slot cover in place.
Step 6


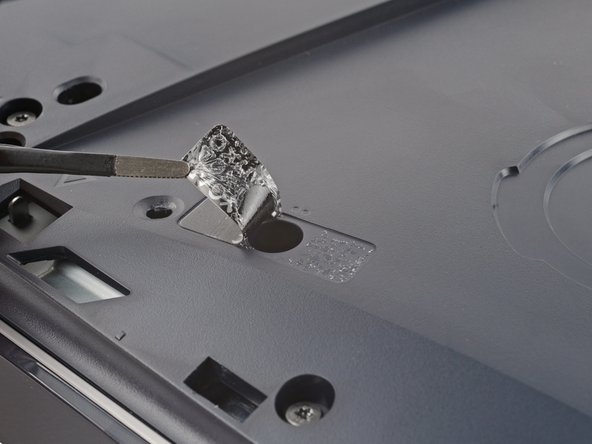
– Gently coax the expansion slot cover away from its cozy home near the notch by the screw hole—your fingers are the magic wands here!
Step 7


The cover is stuck down with a bit of adhesive, but don’t worry, it’s easy to remove!
– Gently pry off the plastic cover that’s keeping your fan cables cozy and out of sight. You’re doing great!
– When it’s time to put everything back together, just press that plastic piece down into place to let it snuggle up with the leftover adhesive. If it’s not quite sticking like it should, a couple of strips of double-sided tape will do the trick to keep it nice and secure!


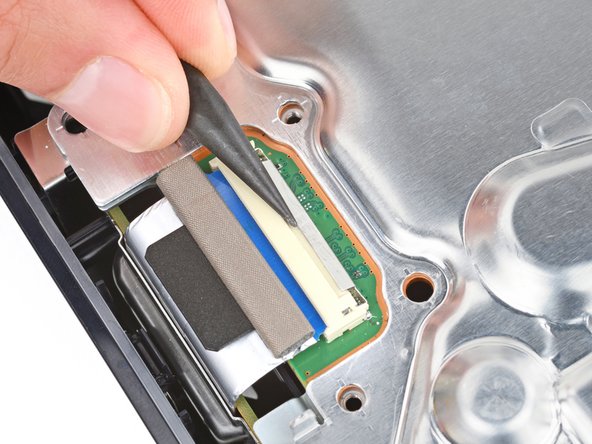
Step 9


Having a bit of a struggle? Try giving the cables a gentle tug just above the connector head. You’ve got this!

Step 10


– Grab your trusty T8 Torx Security screwdriver and get ready to remove the four screws holding the fan in place:
– First, you’ll find one 31.2 mm-long screw – take that out
– Next up, remove two 21.3 mm-long screws – they’re coming out
– Last but not least, take out one 11.6 mm-long screw and you’re good to go
Step 11


Now’s the perfect time to give that fan some love! Grab a fresh cloth and a can of compressed air to blow away any pesky dust or dirt. Your device will thank you!

Step 12

– Time to flip that PlayStation over, like you’re showing off its fancy bottom side!
Step 13

– Alright, grab your trusty T8 Torx Security screwdriver – it’s time to loosen those two 21.3 mm long screws holding the power supply in place. You got this!
Step 14

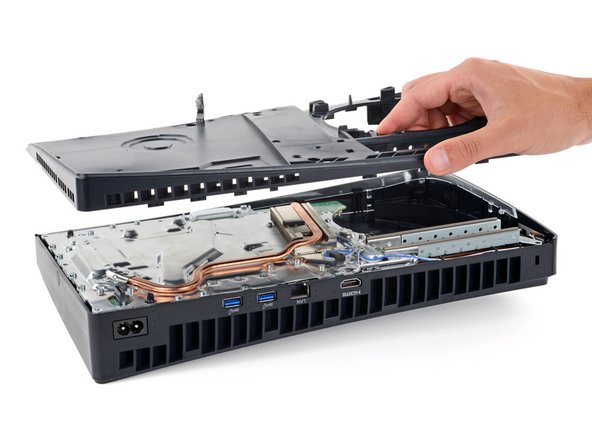
– Time to get this repair started! Flip that PlayStation over and let’s get a look at what we’re working with.
Step 15

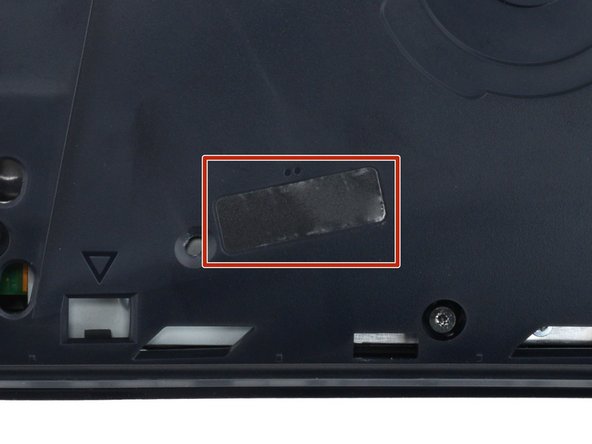
– Check out the tamper-evident sticker on the inner shell’s right side—it’s there for a reason! Give it a gentle tug with tweezers to peel it back and reveal the hidden screw waiting for you.
Don’t worry about those little warranty stickers! They’re just trying to scare you. In the US, you’re protected by the Magnuson–Moss Warranty Act, so go ahead and take those stickers off! If you’re somewhere else, warranty rules are different, but you can still get your tech fixed. Just remember, if you need help, you can always schedule a repair with us.
Step 16


– Grab that T8 Torx Security screwdriver and take out the nine screws holding the right-side inner shell:
– Four 18.9mm-long screws
– One 21.3mm-long screw
– Four 31.2mm-long screws
Step 17

– Time to get that shell off! Carefully lift the right-side inner shell straight up, and voila – it’s removed!
Step 18


– Grab your trusty T8 Torx Security screwdriver and let’s get those four screws out so we can lift the interconnect cable cover:
– One long 28.7 mm screw (it’s a whopper!)
– Three smaller 7.5 mm screws
Step 19

– Let’s get that interconnect cable cover off! Just give it a gentle pull and it should pop right off.
Step 20

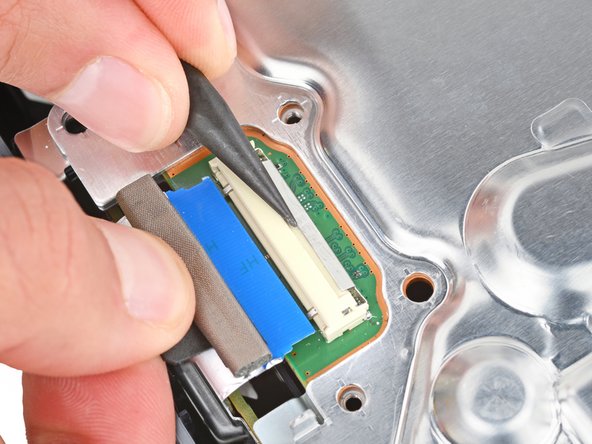
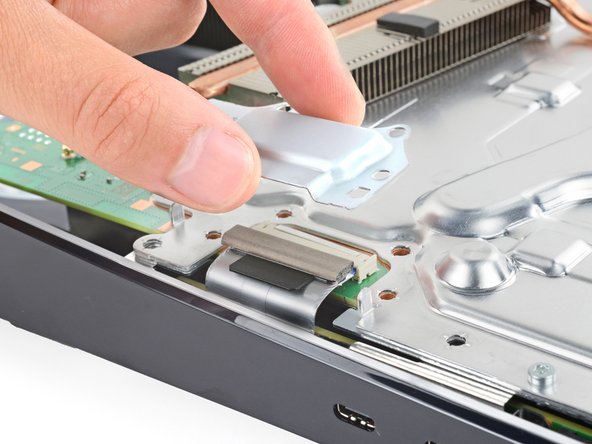
– Grab your trusty spudger and gently nudge the interconnect cable’s metal latch down and away from the connector—it’s like giving it a little hug to unlock it!
– Once the latch is in the unlocked position, carefully pull the interconnect cable straight out of its cozy socket. Easy peasy!
– When it’s time to put everything back together, just push the latch into its unlocked position and slide the cable back into its socket. Then, give that latch a little push back into place to lock everything up snug and secure!
Tools Used
Step 21
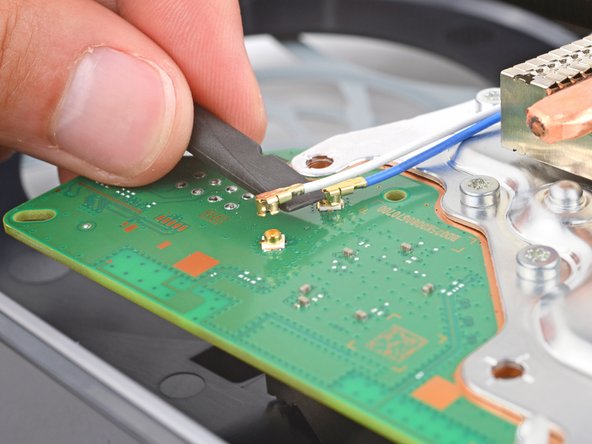

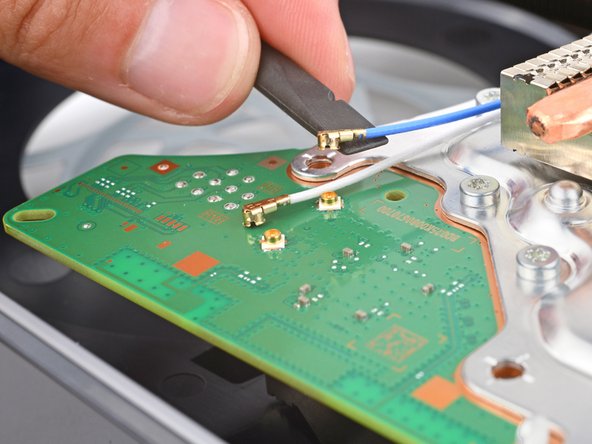
– Time to get started! Use a spudger to carefully pry the metal neck of one of the antenna cable’s coaxial connectors straight up – this will help you disconnect it.
– Now, repeat the same process for the other antenna cable. You got this!
– To reconnect a cable, simply place the metal connector head over its socket, then gently press down with the flat end of a spudger until it clicks into place. Don’t force it – if it’s not fitting, try repositioning and trying again. If you need help, you can always schedule a repair
Tools Used
Step 22

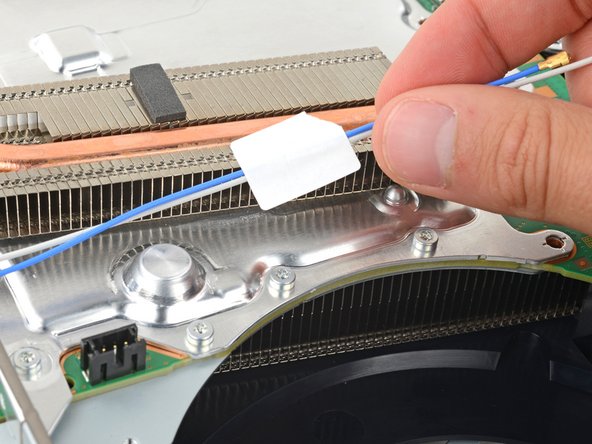
To keep things tidy, a piece of tape and a block of foam are used to secure the antenna cables to the heatsink shield.
– Carefully lift those antenna cables so the tape can say goodbye to the heatsink shield. You’re on your way to greatness!
Step 23
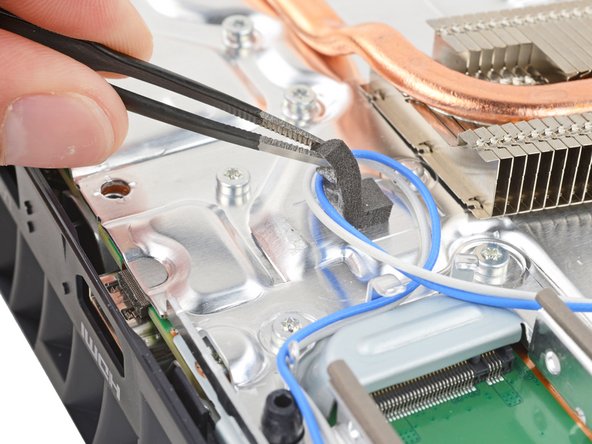

A bit of light adhesive keeps the foam block stuck to the heatsink shield.
If you’re having a tough time, heat an iOpener and hold it against the foam for a minute to soften the adhesive. If you don’t have an iOpener, a hair dryer works just as well.
– Time to get a little gentle – use tweezers to carefully pry up that foam block.
Tools Used


Step 24


– Gently shift those antenna cables to the side of your PlayStation, giving them a comfy little break away from the action.
– When it’s time to put everything back together, take a peek at this photo to ensure those antenna cables find their way home to their original spots.
Step 25

The power supply is snugly connected to the bottom of the main board assembly by some nifty metal prongs that plug into the bottom left corner. It’s a cozy fit!
When lifting up the assembly, don’t be surprised if your PlayStation’s plastic housing has a little give—it’s just flexing its muscles!
– Now, get ready to give that main board assembly a little lift! Gently lift the bottom left corner off its gray plastic post. Keep it lifted for the next step, we’re not done yet!
Step 26

You’ll need to give it a good push to separate the two. It might take a little muscle!
– Get a good grip on the main board assembly with one hand – you’ve got this!
– With your other hand, carefully slip your finger between the assembly and the power supply to get ready for the separation.
– Gently push down on the power supply while lifting the assembly – it’s like a little dance, and they should come apart nicely.
– When you’re putting everything back together, make sure to press down firmly on the bottom left corner of the main board assembly to secure it to the power supply. If you need help, you can always schedule a repair
Step 27

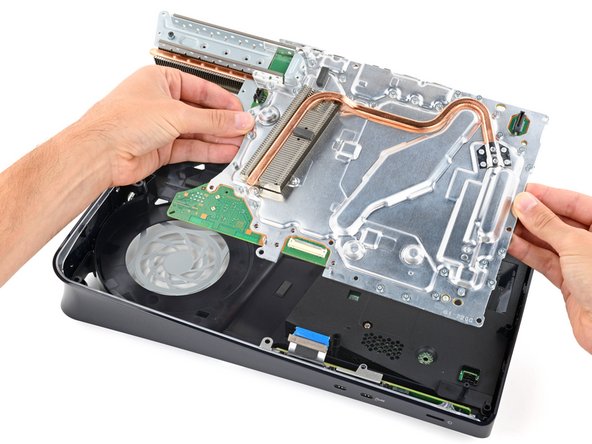

Be gentle with the main board assembly. Those copper heat pipes and fins are pretty delicate and could get hurt. Just sayin’ 😉
Don’t let the interconnect cable get trapped under the main board assembly when you’re lowering it in place.
– Hold onto that plastic housing like it’s the last cookie in the jar with one hand!
– With your other hand, gently grip the top edge of the main board assembly and coax it out of the plastic housing with care.
– Now, when it’s time to put everything back together:
– Lower the assembly into its cozy spot so its prongs fit snugly into their socket on the power supply, and make sure those three cutouts slide right over their alignment posts.
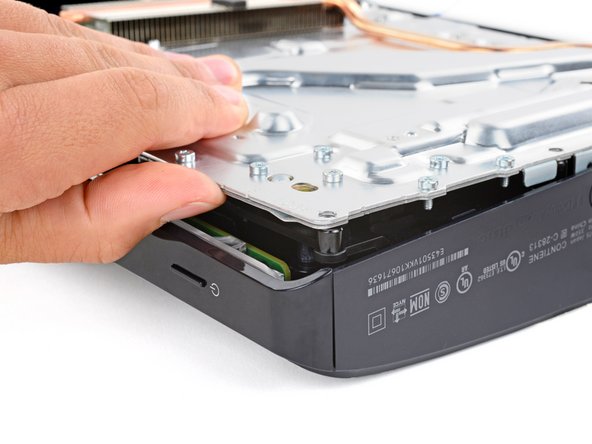
Step 28


– Lift the left edge of the power supply and take it out.
– When putting it back together:
– Fit the power port into its spot on the back of your PlayStation.
– Set the power supply into its place, making sure the cutout on the bottom left corner aligns with its plastic post.
Step 29
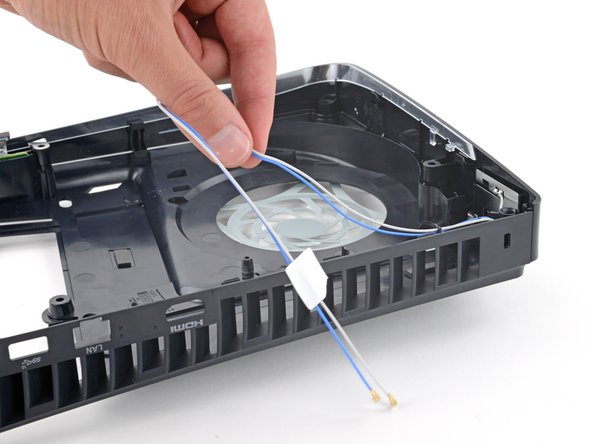

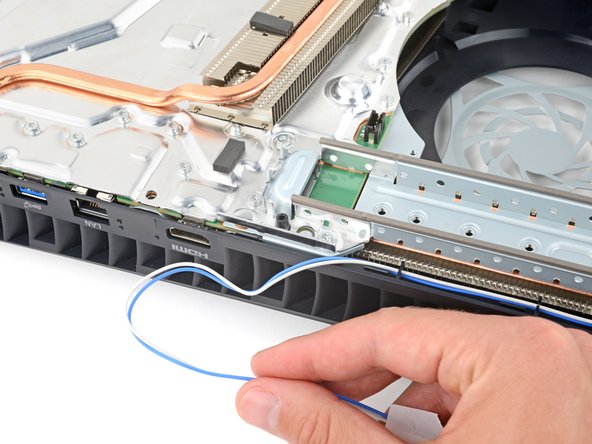
– Lift both antenna cables out of their clips along the rear edge of your PlayStation.
– When reassembling, slide those cables back into their clips on the rear edge of the frame.
Step 30

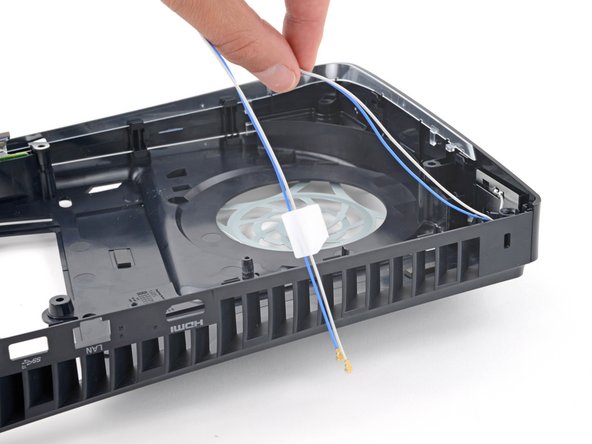
– Gently push both antenna cables downwards and out from under their clip, located at the top right corner of the plastic housing.
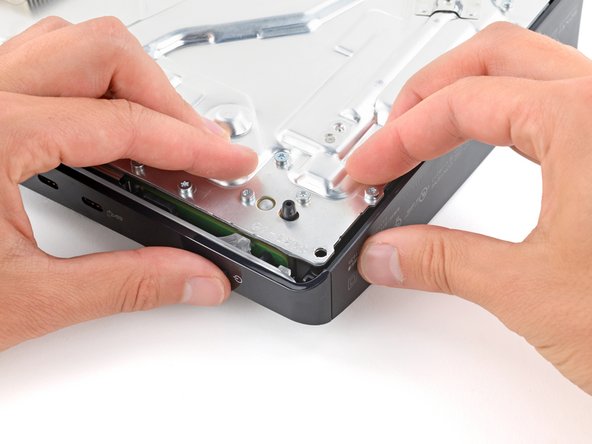
Step 31

– With one hand, get a good grip on the right edge of the plastic housing – you’ve got this!
– Now, use your free hand to carefully lift the top edge of the front trim. You’ll hear those three plastic clips release – nice job!
– Reassembly is a breeze: just push the front trim back onto the frame, and those clips will snap right into place. Easy peasy!
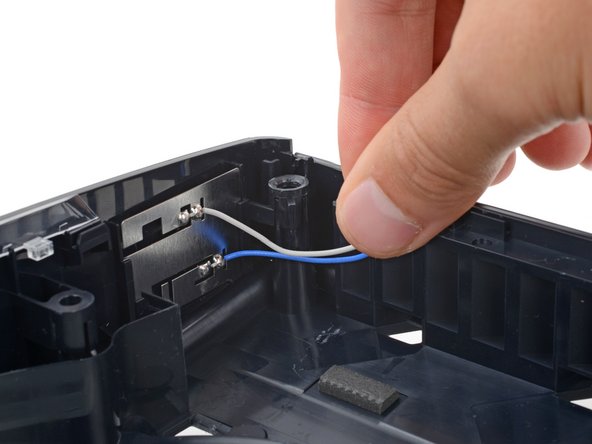
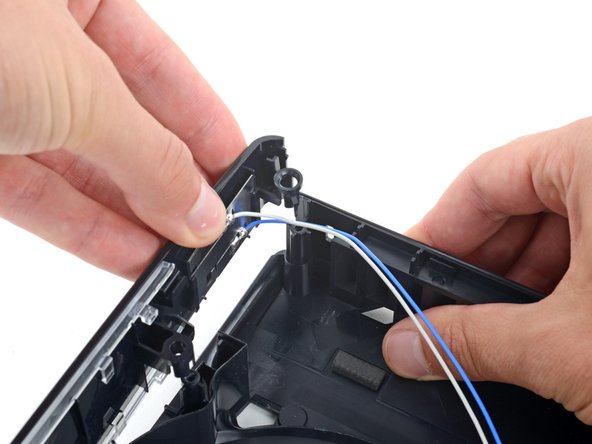
Step 32

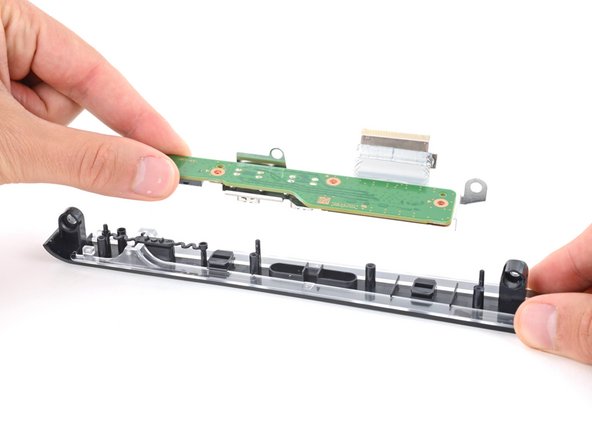
– Gently pull the front trim upwards and take it off with care.
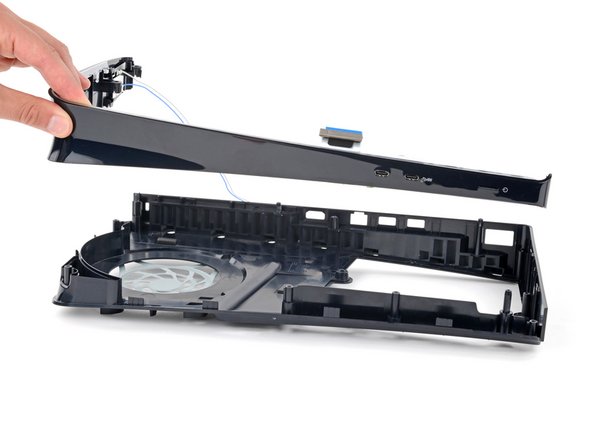
Step 33
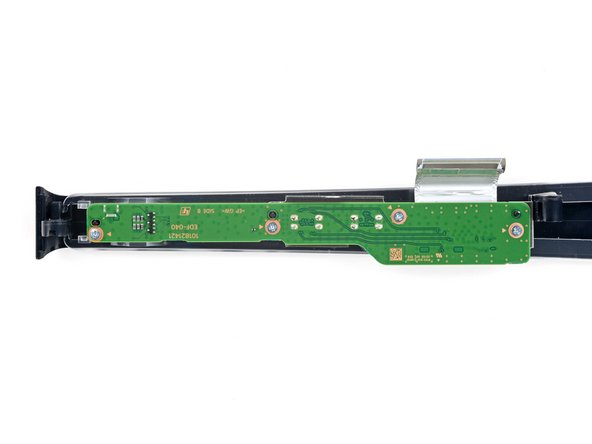
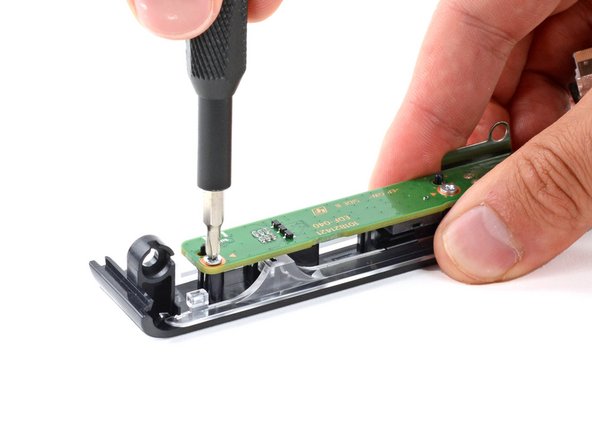

– Get that front trim cozy on your workspace with the USB-C board screws facing up like they’re ready for a photo op!
– Grab your trusty Phillips screwdriver and unscrew those four 6.7mm-long screws holding the board in place. You’ve got this!
Step 34

– Time to put everything back together! Just reverse the steps you took to get here, and you’ll be good to go!
– Make sure to recycle those old parts responsibly! You can find an R2 or e-Stewards certified recycler near you.
– Things not working out as planned? No worries, give some basic troubleshooting a try, or check out our community for help!
– Not feeling like finishing up? No problem, you can always schedule a repair.
–

