
Replace PlayStation 5 Slim Power Supply Guide
Duration: 45 minutes
Steps: 28 Steps
Hey there, PS5 Slim owner! This guide will walk you through swapping out your power supply. If your PlayStation is acting up, like not turning on, or randomly shutting down, then this might be the fix you need. Let’s get this done!
Step 1


Before diving into your repair adventure:
– Time to get started! Shut down your console, then unplug all cables and accessories to give yourself a clean slate.
– Next, carefully remove any stands that are holding up your device and lay it down flat – we’re about to get hands-on!
Step 2


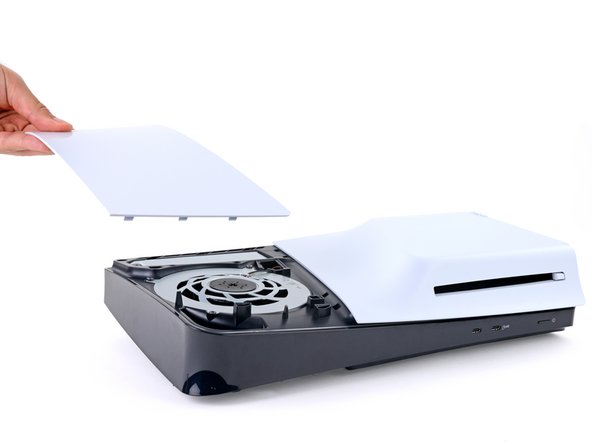
The console cover is held in place by some trusty hooks at the back and a few clips up front. Time to give them a little love!
As you gently release those clips, you might hear some satisfying ‘pops’—that’s just them saying goodbye!
– Time to get started! To remove the cover, simply pull up on the front edge until you hear the clips release – it’s like a little secret door.
– Now, go ahead and take off that cover!
Step 3


– Now, let’s keep the momentum going and remove those three other covers using the same marvelous technique!
– When it’s time to add a cover back on, just align those handy hooks with the cutouts on the rear edge, then give the front a good press to snap those clips back in place. You’re almost there!
Step 4


If your PlayStation doesn’t have a disc drive, you can skip this step and move on to the next one! No worries, we’ve got you covered.
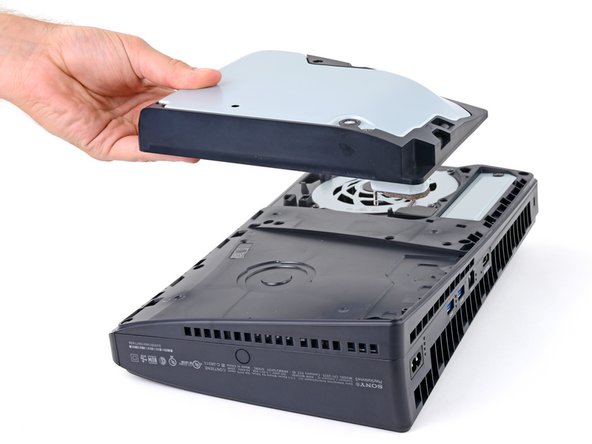
– Let’s get that disc drive out! Start by using the cutout on the bottom right corner of the drive to lift up its right edge and disconnect it.
– Time to remove the disc drive. It’s like giving it a little vacation!
– Alright, let’s put the drive back in! During reassembly, make sure the hooks on the left edge of the drive are lined up with their cutouts. Give it a firm press to make sure the connector on the bottom right corner is in place.
Step 5


During this repair, track every screw and make sure it returns to its original spot.
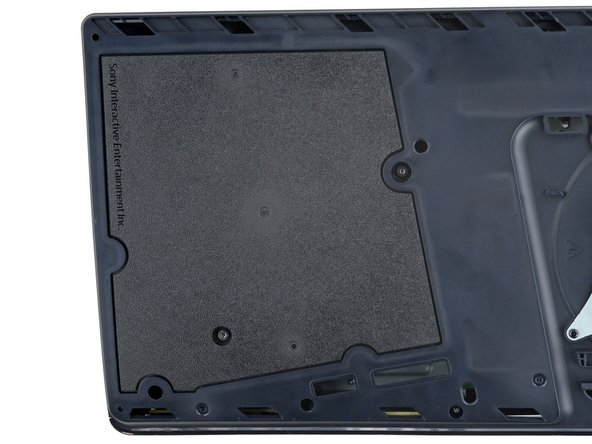
– Grab your trusty Phillips screwdriver and whip out the 17.1mm-long screw holding down the expansion slot cover.
Step 6


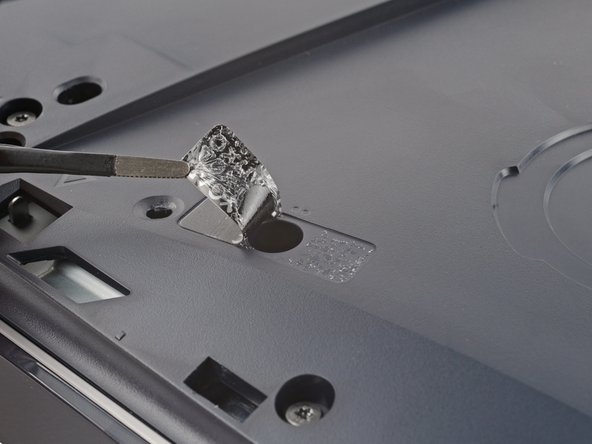
– With your fingers, gently lift the expansion slot cover near the notch by the screw hole and pop it off.
Step 7


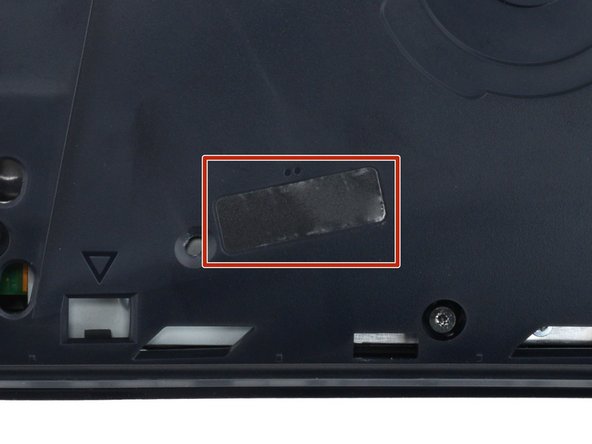
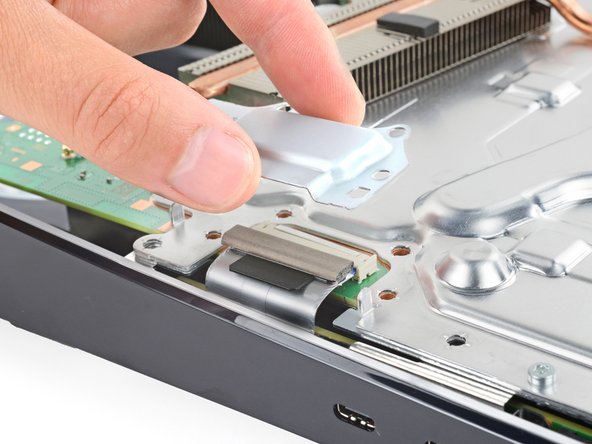
The cover is held in place with a little bit of adhesive magic.
– Gently pry off the plastic cover concealing the fan cable connector using your fingers. It’s like giving your device a little makeover!
– When putting everything back together, just press that plastic piece firmly to secure it with the remaining adhesive. If it’s feeling a bit stubborn and refuses to stick, don’t fret! A few strips of double-sided tape will do the trick to keep it in place.


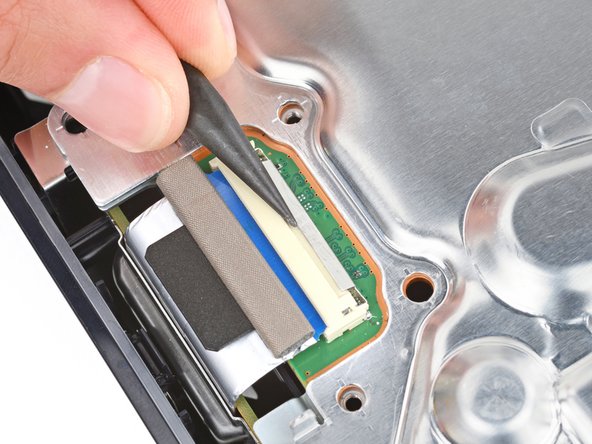
Step 9


If you’re encountering a little hiccup, try giving the cables a gentle tug just above the connector head. You’ve got this!
– Grab the fan cables’ white connector head firmly and gently pull it straight up and out of its socket – easy does it!
– When putting everything back together, align the connector with its socket and use the flat end of a spudger to nudge it into place, applying gentle pressure on the edges until it clicks in.
Tools Used

Step 10


– Grab your trusty T8 Torx Security screwdriver and get ready to remove the four screws holding the fan in place:
– First, you’ll find one 31.2 mm-long screw – take that out
– Next up, remove two 21.3 mm-long screws – easy does it
– Last but not least, take out one 11.6 mm-long screw and you’re good to go
Step 11


It’s a great time to get a little dust-bustin’ action in! Grab a clean cloth and some compressed air to give your fan a good cleanin’. You can use that dust away!

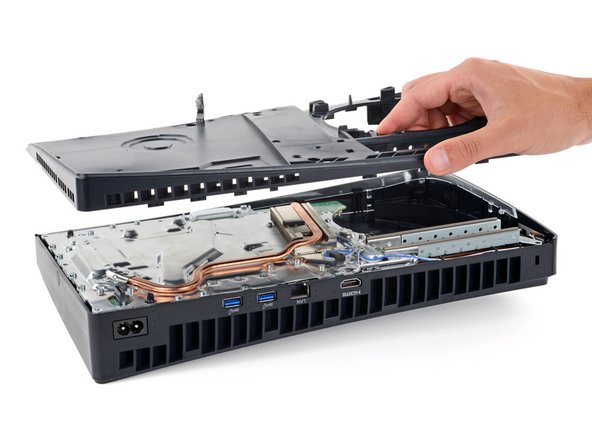
Step 12

– Time to get this repair started! Flip that PlayStation over and let’s get a look at what we’re working with.
Step 13

– Let’s get started by removing the two 21.3mm-long screws that hold the power supply in place. Grab your trusty T8 Torx Security screwdriver and get to work!
Step 14

– Time to get this repair started! Flip that PlayStation over and let’s get a look at what we’re working with.
Step 15

Don’t worry about those pesky warranty stickers! In the U.S., they’re actually illegal thanks to the Magnuson–Moss Warranty Act. So go ahead and crack open that device—no need to be scared! If you’re outside the U.S., warranty stuff varies, but we’re here to help!
– There’s a tamper-evident sticker covering one of the screws on the right side of the inner shell.
– Grab some tweezers and carefully peel up the sticker to get to the screw underneath.
Step 16


– Let’s get started by using a T8 Torx Security screwdriver to remove the nine screws that hold the right-side inner shell in place:
– First, you’ll find four 18.9 mm-long screws – remove those
– Next, locate and remove one 21.3 mm-long screw
– Finally, take out the remaining four 31.2 mm-long screws
Step 17

– Give that right‑side inner shell a little lift, and watch it pop right off!
Step 18


– Let’s get started by using a T8 Torx Security screwdriver to remove the four screws that hold the interconnect cable cover in place:
– First, you’ll find one 28.7 mm-long screw
– Next, locate the three 7.5 mm-long screws
Step 19

– Let’s get started by removing the interconnect cable cover. This is the first step in giving your device a brand new lease on life!
Step 20

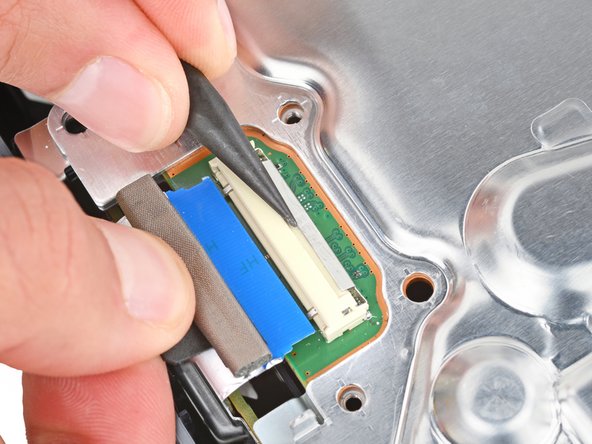
– Time to set that cable free! Use the point of a spudger to gently push the interconnect cable’s metal latch down and away from the connector – this will unlock it and let you get to work.
– Now, keep the latch in its unlocked position and carefully pull the interconnect cable straight out of its socket. Easy does it!
– When you’re putting everything back together, push the latch into its unlocked position and insert the cable into its socket. Then, just push the latch back in place to lock the cable – simple!
Tools Used
Step 21
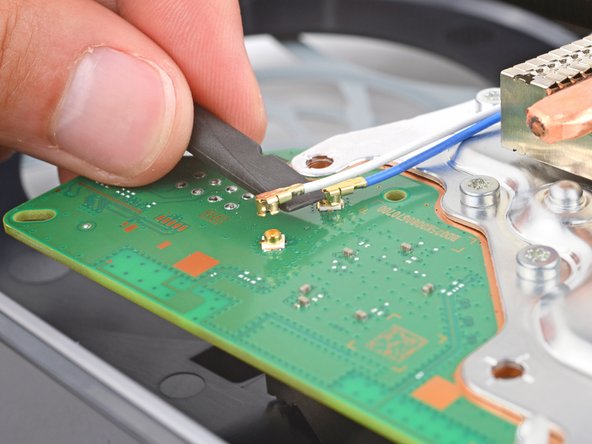

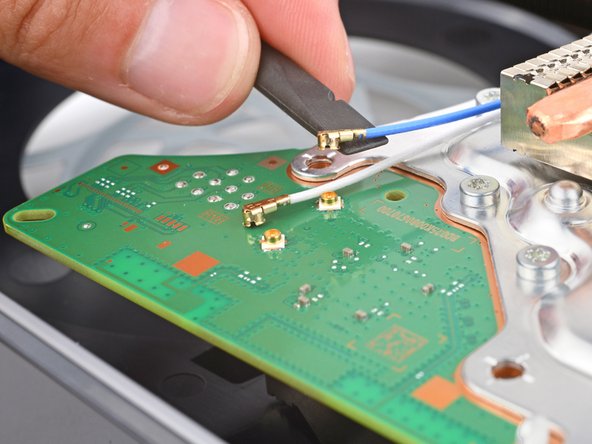
– Time to get started! Use a spudger to carefully pry the metal neck of one of the antenna cable’s coaxial connectors straight up – this will help you disconnect it.
– Now, repeat the process for the other antenna cable. You got this!
– To reconnect a cable, simply hold the metal connector head over its socket, then gently press down with the flat end of a spudger until it clicks into place. Don’t force it – if it’s not cooperating, try repositioning the connector and giving it another shot. If you need help, you can always schedule a repair
Tools Used
Step 22

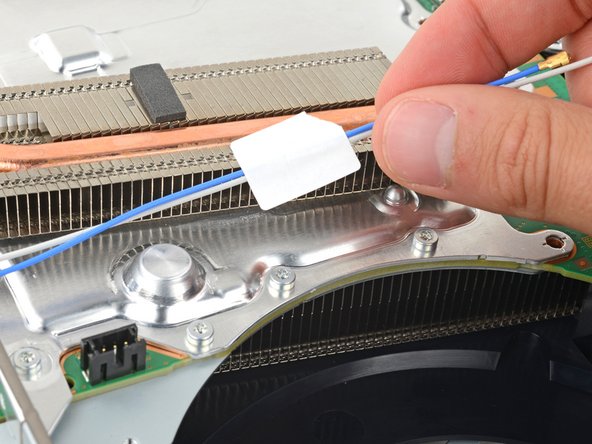
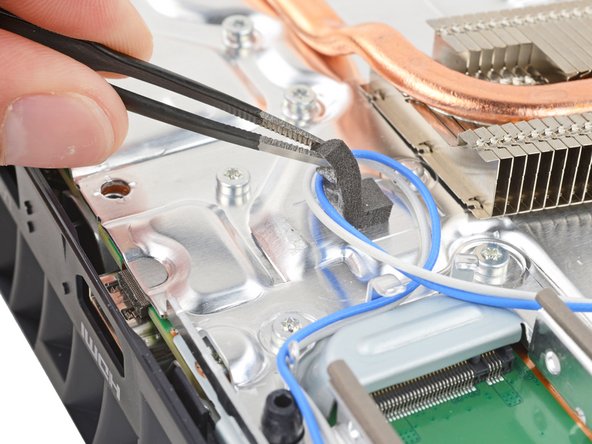
To keep things tidy, a piece of tape and a block of foam are used to secure the antenna cables to the heatsink shield, making sure everything stays in its place.
– Carefully lift both antenna cables to peel away the tape from the heatsink shield. Keep it gentle and steady – you’re doing great!


Step 24
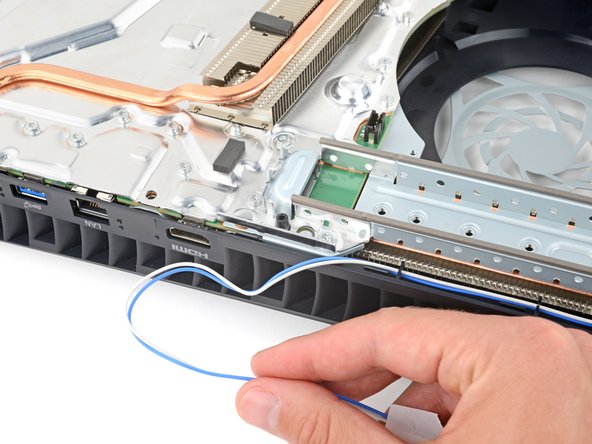


– Let’s get those antenna cables out of the way – gently move them to the side of your PlayStation to keep them from getting tangled up in the repair process.
– When it’s time to put everything back together, use this photo as a reference to ensure the antenna cables end up exactly where they started, making reassembly a breeze.
Step 25
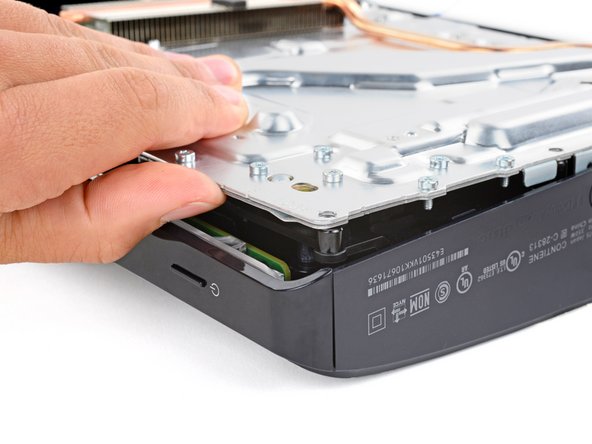

The power supply connects to the main board assembly at the bottom with some metal prongs plugging right into the bottom left corner, making it a snug fit!
As you lift the assembly, don’t be surprised if your PlayStation’s plastic housing has a little bit of flex—it’s just trying to help!
– Gently lift the bottom left corner of the main board assembly off its gray plastic post. Keep that board lifted like a superhero for the next step.
Step 26
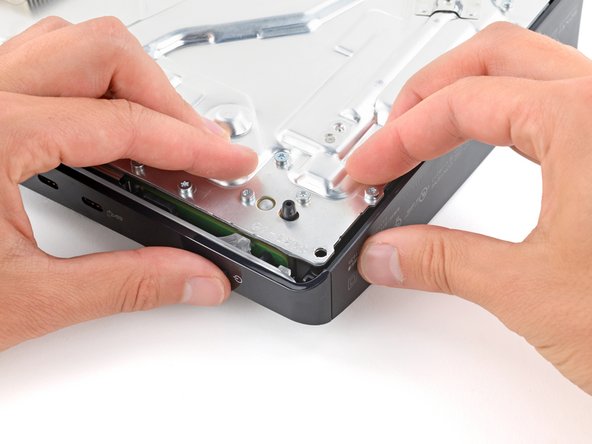
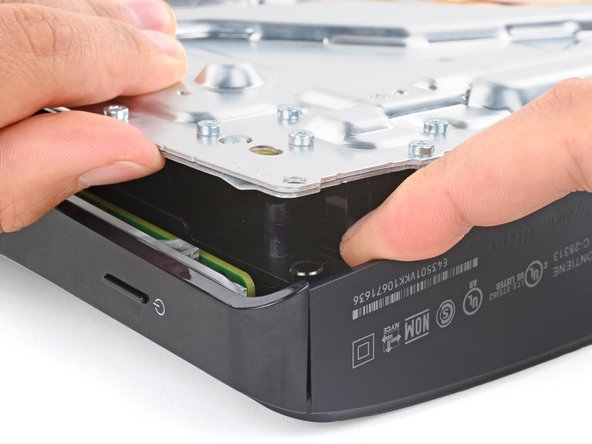

You’ll need to give it a good push to get those two pieces apart. Don’t be shy!
– Hold the main board assembly up high with one hand, like you’re showcasing a trophy.
– With your other hand, gently slide your finger between the assembly and the power supply, like you’re sneaking a snack.
– Apply a little downward pressure on the power supply while lifting the assembly to give them a friendly nudge apart.
– When it’s time to bring it all back together, make sure to press down firmly on the bottom left corner of the main board assembly to lock it back in with the power supply.
Step 27

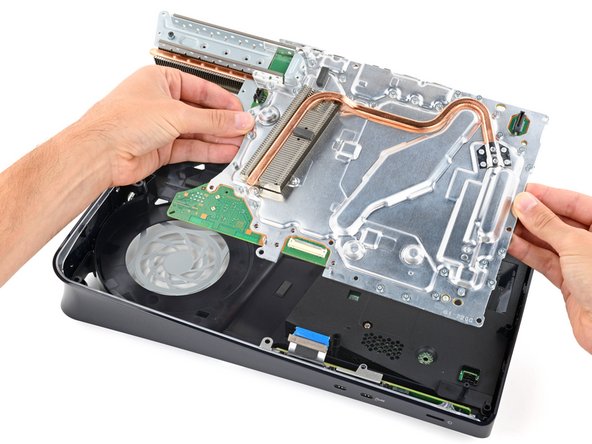

Be gentle with that main board assembly – grabbing it by the copper heat pipes or fins can cause damage, so let’s handle it with care!
Be sure the interconnect cable doesn’t get trapped under the main board assembly while you’re lowering it into place.
– Hold the plastic casing tight with one hand—you’re doing great!
– With your other hand, gently grab the top edge of the main board assembly and lift it out of the plastic housing like a pro.
– When it’s time to put everything back together:
– Carefully lower the assembly back into its spot, making sure those little prongs fit snugly into the power supply socket and those three cutouts sit perfectly over their alignment posts.
Step 28


– To put your device back together, just follow these steps in reverse.
– Recycle your e-waste at an R2 or e-Stewards certified recycler. It’s planet-friendly!
– Ran into issues? Try some basic troubleshooting or get help from our Answers community.
– Cancel: I did not complete this guide.
– If you need help, you can always schedule a repair
