PlayStation 5 Slim Repair Guide
Duration: 45 minutes
Steps: 32 Steps
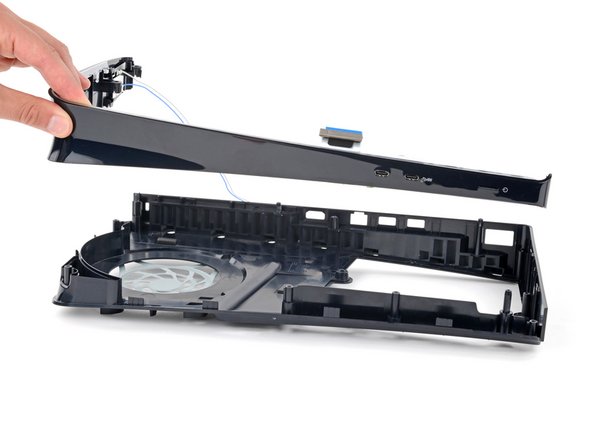
Get ready to tackle the front trim assembly replacement on your PlayStation 5 Slim! This assembly is home to the power button, USB-C board, and antenna—essential components that keep your game time rolling. Let’s dive in and make your console as good as new!
Step 1
Before kicking off your repair adventure:
– Let’s power down your console, unplug all the cables and accessories, and give it a little break.
– Then, gently remove any stands or supports and lay it down for a safe and comfy repair session.
Step 2
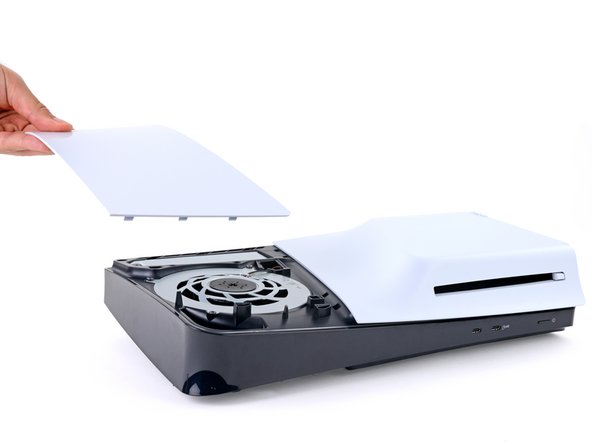
Each console cover is held in place by hooks along the back and clips along the front.
You’ll hear some satisfying clicks as the clips release.
– To pop off the cover, give the front edge a firm pull to unlatch the clips.
– Take the cover off.
Step 3
– Repeat the steps for the remaining three covers. You got this!
– To put the cover back on, line up the hooks on the rear edge of the cover and press the front edge to snap it back in place. It’s like a puzzle!
Step 4
If your PlayStation is a sleek disc-less model, feel free to breeze right past this step!
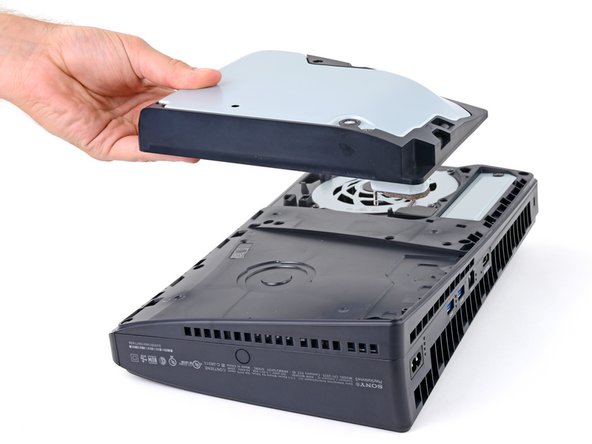
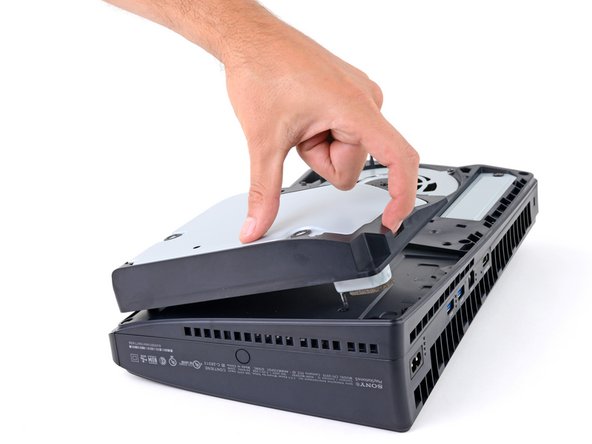
– Let’s get started by using the cutout on the bottom right corner of the disc drive to carefully lift its right edge and disconnect it – you’re making great progress!
– Next, remove the disc drive from its spot. Easy does it!
– During reassembly, take a moment to align the hooks on the left edge of the drive with their cutouts, then firmly press the drive into place. Make sure the connector on the bottom right corner clicks into its socket – you’re almost there! If you need help, you can always schedule a repair
Step 5
As you work through this repair, be sure to keep each screw in its rightful place. Losing them would be like losing the plot!
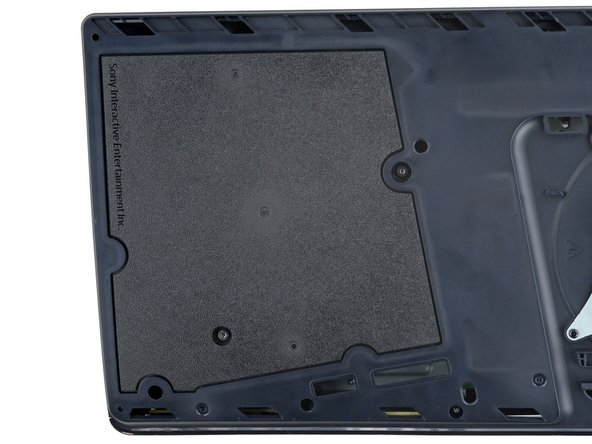
– Grab your trusty Phillips screwdriver and tackle that 17.1 mm-long screw keeping the expansion slot cover in place. You’ve got this!
Step 6
– Gently pop off the expansion slot cover by the notch near the screw hole and set it aside.
Step 7
The cover is stuck down with some light adhesive, but don’t worry, it’s easy to remove!
Step 9
Having a little trouble? No worries—just grab those cables right above the connector head and give them a gentle tug. You’ve got this!
– Grab the fan cables’ white connector head firmly and gently pull it straight up and out of its socket – easy does it!
– When putting everything back together, line up the connector with its socket and use the flat end of a spudger to nudge it into place, applying gentle pressure on the edges until it clicks in.
Tools Used
Step 10
– Let’s get started by using a T8 Torx Security screwdriver to remove the four screws that hold the fan in place:
– First, you’ll find one 31.2 mm-long screw – carefully remove it
– Next, locate two 21.3 mm-long screws and take them out
– Lastly, remove one 11.6 mm-long screw to completely free the fan
Step 11
Time to give that fan a good ol’ scrub! Grab a clean cloth and some compressed air to banish any dust bunnies and dirt. You’ve got this!
Step 12
– Time to get this repair started! Flip that PlayStation over and let’s get a look at what we’re working with.
Step 13
– Grab your trusty T8 Torx Security screwdriver and get ready to tackle those two 21.3 mm-long screws holding the power supply in place. You’ve got this!
Step 14
– Time to get this repair started! Flip that PlayStation over and let’s get a look at what we’re working with.
Step 15
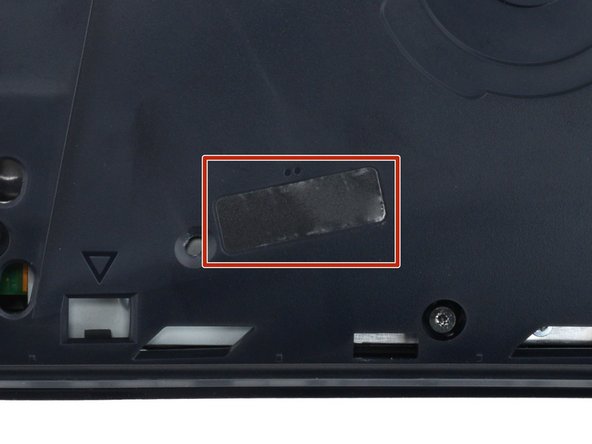
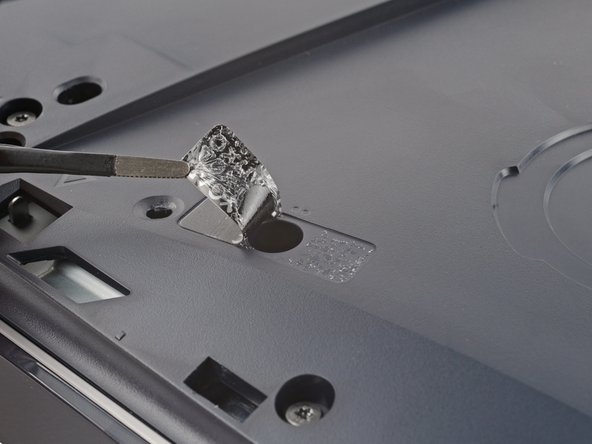
Don’t let those warranty stickers scare you! In the U.S., those stickers are no good thanks to the Magnuson–Moss Warranty Act. If you’re outside the U.S., warranty rules are different. Just chill, we’ve got your back!
– There’s a tamper-evident sticker chilling on the right-side inner shell.
– Grab those tweezers and peel up that sticker until you can get to the screw hiding underneath.
Step 16
– Grab your trusty T8 Torx Security screwdriver and get ready to remove the nine screws holding the right-side inner shell in place:
– Four of these screws are 18.9 mm long – pretty standard stuff
– One screw is a bit longer, coming in at 21.3 mm
– And the last four screws are the longest of the bunch, at 31.2 mm – make sure you’ve got the right screwdriver for the job
Step 17
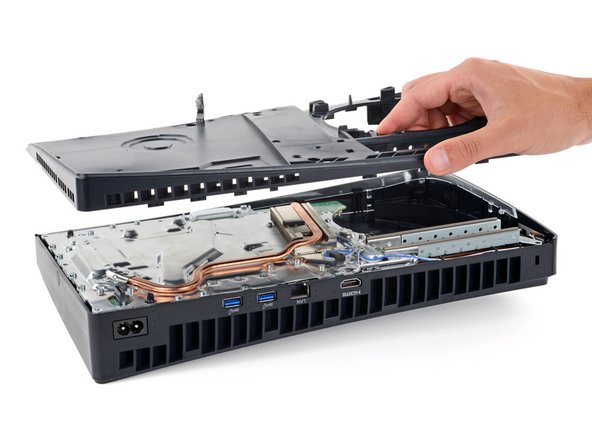
– Carefully lift the right side of the inner shell straight up and give it a little pull to release it. You’re almost there!
Step 18
– Grab your trusty T8 Torx Security screwdriver and let’s tackle those four screws holding down the interconnect cable cover:
– First up, we have that one vivacious 28.7 mm-long screw, waiting for you to give it some attention.
– And then, there are three charming 7.5 mm-long screws, ready to be unscrewed as we progress on this journey together.
Step 19
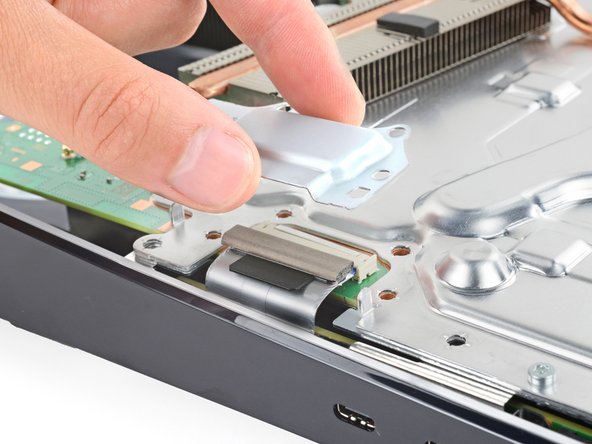
– Take off that interconnect cable cover like a pro!
Step 20
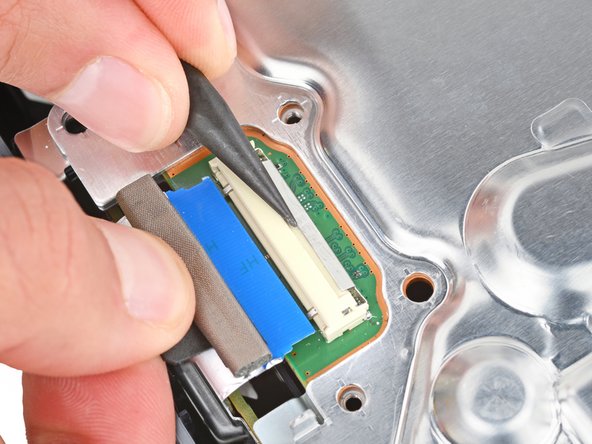
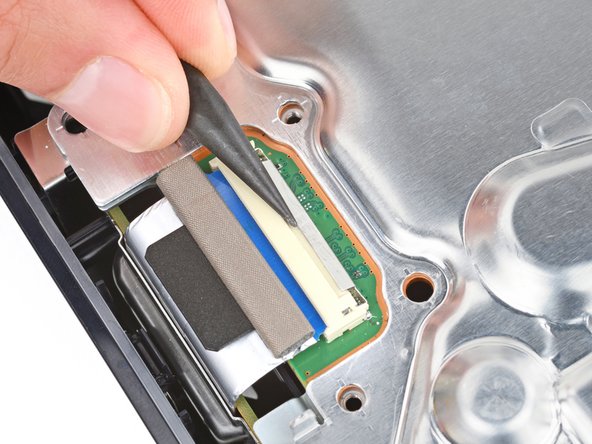
– Grab your spudger and gently push the interconnect cable’s metal latch down and away from the connector to unlock it.
– Keep that latch in its unlocked position and carefully pull the interconnect cable straight out of its socket.
– When putting things back together, make sure the latch is in its unlocked position and slide the cable into its socket. Once it’s in, push the latch back to lock the cable.
Tools Used
Step 21
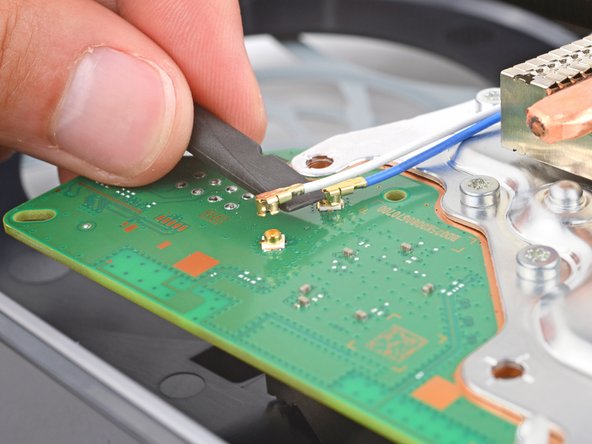
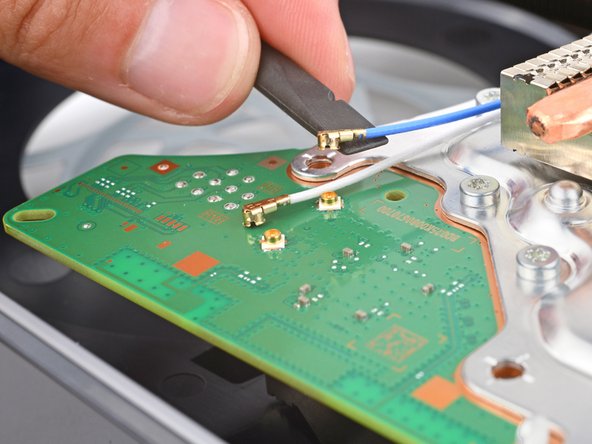
– Ready to give those antenna cables some freedom? Grab your spudger and slide it under the metal neck of one of the connectors. Lift gently – we don’t want to break anything! Now, repeat the same trick for the other cable. To reconnect, hold the metal connector head over its socket and press down with the flat end of the spudger. Think of it like giving it a little high five! If you find yourself struggling, just reposition the connector and try again. You got this!
Tools Used
Step 22
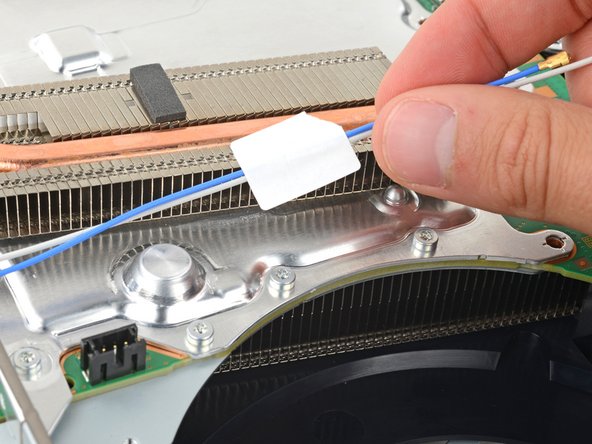
We’ll be using some tape and a block of foam to keep the antenna cables snuggled up against the heatsink shield. Nice and secure, just like we like it!
– Now, with the grace of a ballerina, gently lift both antenna cables to separate the tape from the heatsink shield. You’re doing great!
Step 23
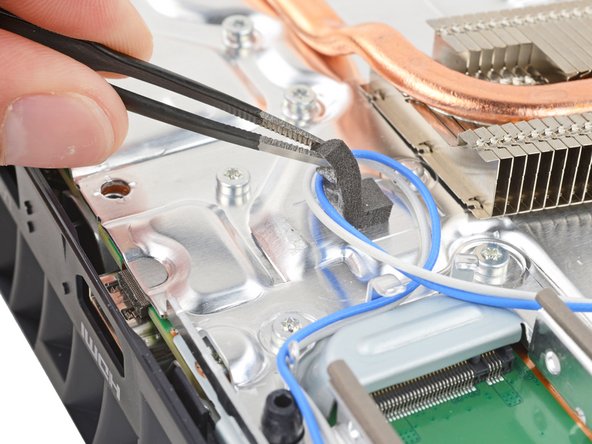
A gentle touch of adhesive holds the foam block snugly against the heatsink shield.
If you’re having a bit of a struggle, warm up an iOpener and let it rest on the foam for a minute to make that adhesive a little more cooperative. No iOpener? No worries! A hair dryer will do the trick just fine.
– Grab your trusty tweezers and gently lift that foam block right off. You got this!
Tools Used
Step 24
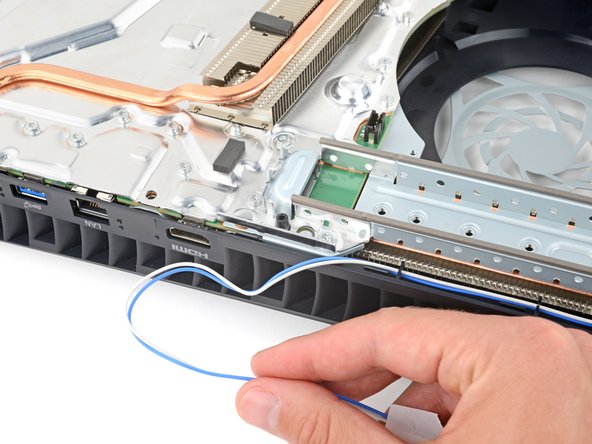
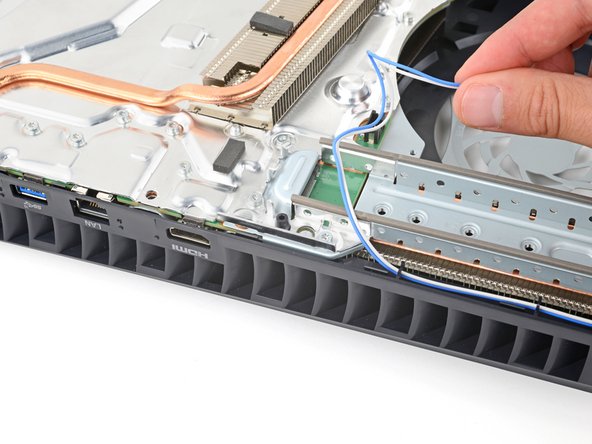
– Let’s get those antenna cables out of the way – gently move them to the side of your PlayStation to keep them from getting tangled up in the repair process.
– When it’s time to put everything back together, use this photo as a reference to ensure the antenna cables end up exactly where they started, making reassembly a breeze.
Step 25
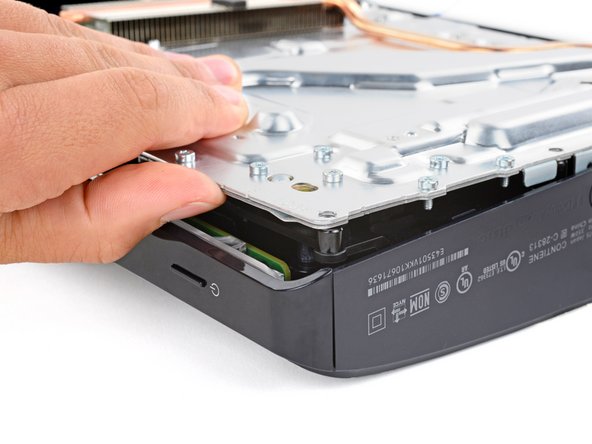
The power supply is hooked up to the main board assembly via metal prongs that plug into the bottom left corner – pretty straightforward!
As you lift the assembly, be prepared for the plastic housing to flex a bit, but don’t worry, it’s all part of the process.
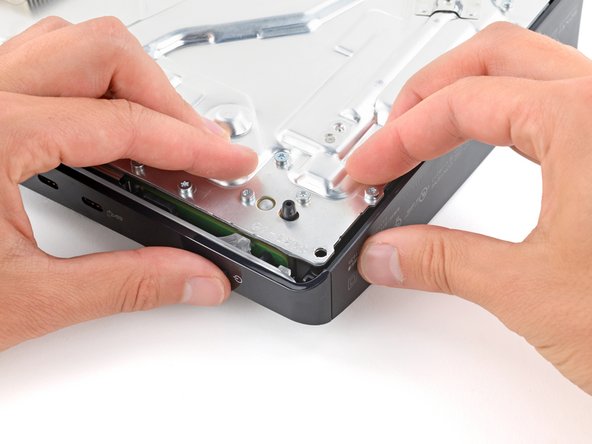
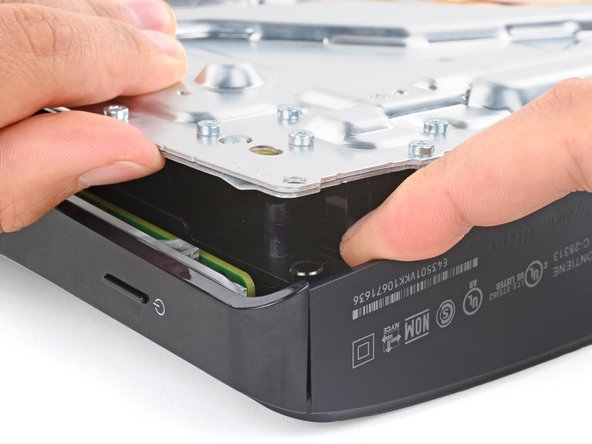
– Gently lift up the bottom left corner of the main board assembly from its snug gray plastic post. Keep it elevated as we move on to the next step.
Step 26
You’ll need a good amount of oomph to pull them apart.
– Hold that main board assembly up high with one hand like a trophy!
– With your other hand, slide your finger in between the assembly and the power supply – it’s like giving a little friendly nudge.
– Gently press down on the power supply while lifting the assembly to separate the two – it’s a little dance!
– When putting it all back together, give a firm press on the bottom left corner of the main board assembly to make sure it clicks nicely with the power supply.
Step 27
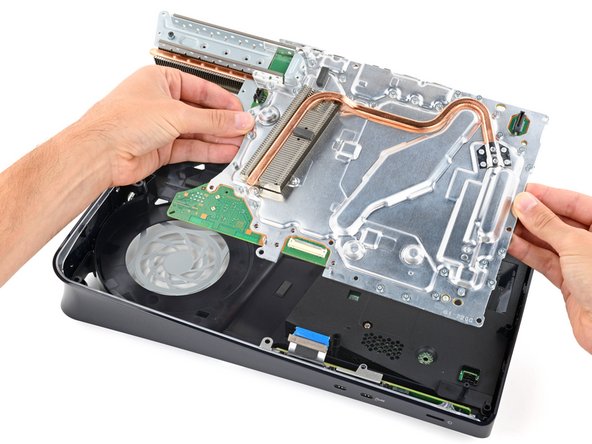
Handle the main board assembly with care – give those copper heat pipes and fins some space! They’re more fragile than they look and can get damaged easily.
Just a friendly reminder: as you gently lower that main board assembly into place, keep an eye on the interconnect cable! We don’t want it playing hide and seek underneath. Let’s get this right!
– Hold the plastic housing steady with one hand like a pro.
– Now, grab the top edge of the main board assembly with your other hand, and gently lift it out of the plastic housing. You’ve got this!
– When you’re ready to put everything back together:
– Carefully lower the assembly into its place, making sure the prongs connect to the power supply socket and the three cutouts align with the posts. Piece of cake!
Step 28
– Gently lift the left side of the power supply—time to set it free!
– Now, as you get ready to put everything back together:
– Slide that power port into its cozy spot at the back of your PlayStation.
– Carefully lower the power supply into its snug little home, making sure that cutout on the bottom left corner rests nicely over its dedicated plastic post.
Step 29
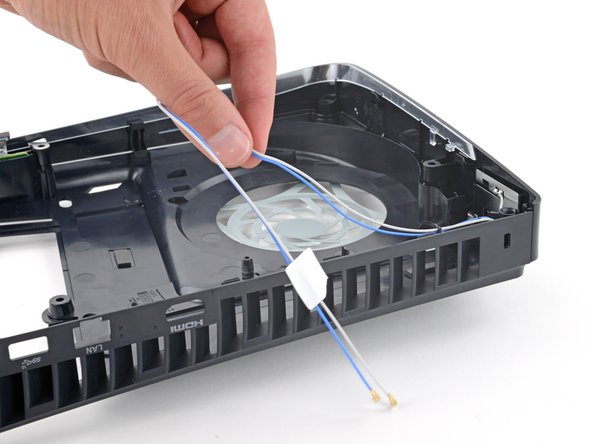
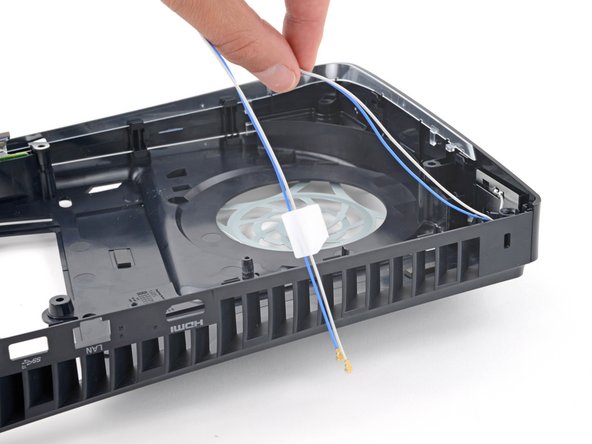
– Gently lift both antenna cables out of their snug little clips on the back edge of your PlayStation. They’re ready for their big moment!
– When it’s time to put everything back together, make sure to tuck those cables back into their cozy clips on the rear edge of the frame. They’ll thank you for it!
Step 30
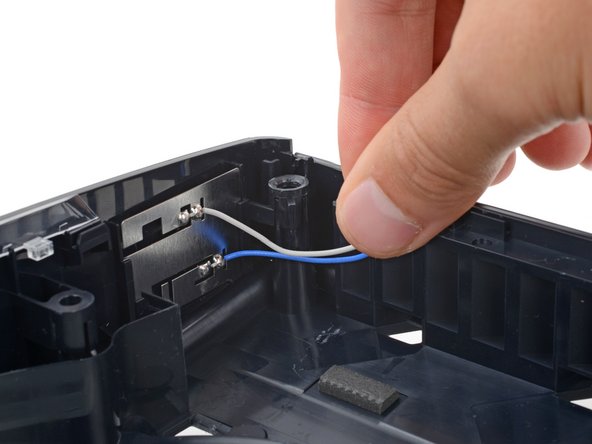
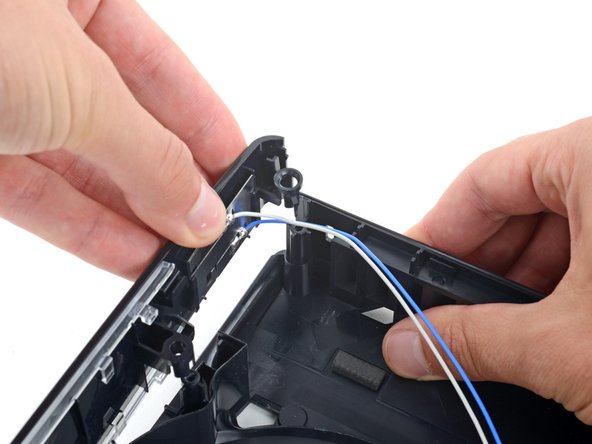
– Gently push both antenna cables downwards and out from under their clip, located at the top right corner of the plastic housing.
Step 31
– Get a grip on the right edge of the plastic housing with one hand – you’ve got this!
– Now, use your free hand to carefully lift the top edge of the front trim. You’ll hear those three plastic clips release – nice job!
– When it’s time to put everything back together, simply push the front trim onto the frame and listen for the clips to snap into place. Easy peasy!
Step 32
– To put everything back together, just follow these steps in reverse – easy peasy!
– Don’t forget to responsibly recycle your e-waste with an R2 or e-Stewards certified recycler.
– Hit a snag? Try some basic troubleshooting or reach out to our community at Salvation Repair for some help.
– If you need help, you can always schedule a repair with our experts.
– You’ve made it to the end! If you’re not satisfied with the result, don’t worry – we’re here to help you get your device up and running.


