Microsoft Kinect Accessory Microphone Replacement Guide
Duration: 45 minutes
Steps: 8 Steps
Ready to tackle the challenge of replacing the Kinect’s microphone panel? If your microphone is playing hard to get and just won’t pick up any sound, it’s time for a little DIY magic! Let’s get that audio back on track and have some fun while we’re at it. Remember, if you hit a snag, you can always schedule a repair for some extra support!
Step 1


Be careful not to overheat your device, as this can cause damage to its internal components. If you’re not comfortable with this step, don’t worry – you can always schedule a repair
– Let’s get those pesky plastic strips off the bottom of the main Kinect housing! Use the sharper side of your trusty metal spudger to give ’em the boot.
– Time to reveal those hidden screws! Peel off those Xbox 360 stickers on the bottom of the case. It’s like a little treasure hunt, but way less dusty.
Tools Used

Step 2

– Let’s get started by removing the six 12mm T10 Torx screws – simply unscrew them to begin the process.
Step 3


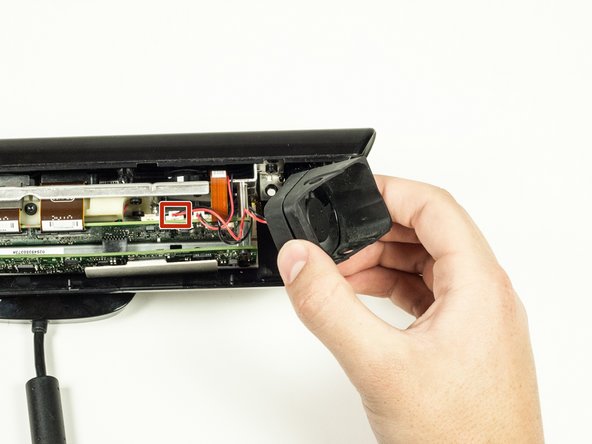
When it’s time to unplug the fan, remember to gently pull on the white connector at the end of the wire. This will help you avoid any accidental breaks, and you’ll be back to repairing in no time!
– Let’s get started by carefully removing the top portion of the case from the rest of the body – it’s the first step to fixing your device!
– Next, gently detach the side portions of the case from the body. Take your time and make sure everything comes apart smoothly.
– Now it’s time to tackle the fan piece. Remove it from the side of the body and don’t forget to unplug it from the logic board to fully remove it. You’re making great progress!
Step 4

Removing the bottom of the case can be a bit tricky if there’s some stubborn adhesive hanging around. If you find yourself wrestling with it, don’t hesitate to apply a little gentle heat and give it a wiggle to help it along. You’ve got this! Remember, if you need a hand, you can always schedule a repair.
– Gently slide the bottom part of the case out from beneath the device to set it free.
Step 5

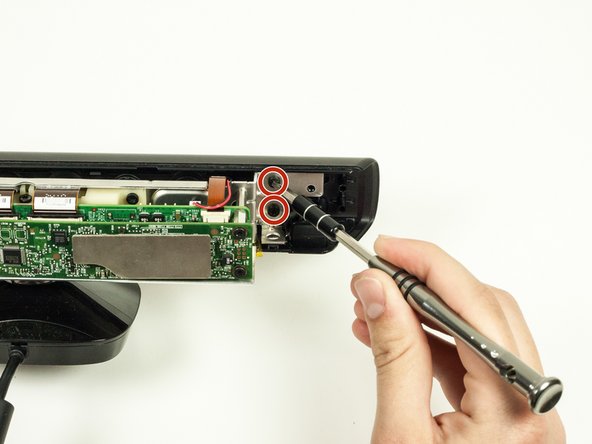
– Let’s get started by removing the four 7mm T10 Torx screws – you’ll find two on each side of the metal body, so take your time and get them all out.
Step 6


– First, carefully remove the front part of the case that houses the camera lenses – it’s time to get up close and personal with your device’s inner workings!
– Next, locate the LED component, which is attached to the front portion of the case. To set it free, simply pull it out of its plastic connector – easy peasy!
Step 7

– Time to get started! Begin by carefully unplugging the microphone from the motherboard.
Step 8

Gently wiggle that cable out like you’re dancing at a party—just be careful not to pull too hard and cause any damage!
– To put everything back together, just work your way through these steps in reverse – easy peasy!
– If you didn’t quite get it done, no worries – you can always schedule a repair and let the pros handle it.
– You’re almost done! Take a deep breath, and you’ll be back up and running in no time.
