Xbox 360 Wheel Fix: DIY Guide
Duration: 45 minutes
Steps: 8 Steps
Hey there, racer! Is your Xbox 360 Wireless Racing Wheel acting up? Feeling a little jumpy, like it’s got the jitters? That’s a common problem, and we can fix it! It sounds like your wheel’s variable resistance pot (potentiometer) needs a little love. This little guy helps the wheel communicate with your console. If it’s getting dirty or acting up, it can cause all sorts of wonky steering. No worries though, we’ll get it back in tip-top shape!
Step 1

– Let’s get started by removing 8 screws from the base – don’t forget the two hidden under the sticker! You’ll need a trusty TX10 security screwdriver, the one with the security hole at the top, to get the job done.
Step 2

– Time to tackle those pesky 8 screws at the back of the wheel assembly! Grab your trusty TX10 security screwdriver and twist them out like a pro. It’s easier than it sounds, and you’ve got this!
Step 3

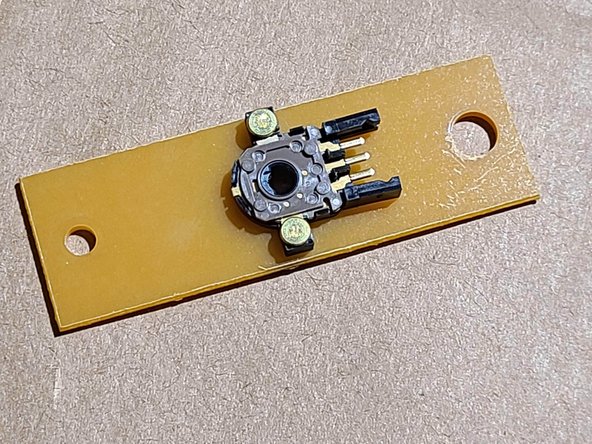

– First up, check out that small beige panel with the little pot. Position the steering wheel right in the center and take a note of how that pot is sitting (the flat area of the white guide should be facing left, just so you know!).
– Next, let’s unplug it—time to disconnect that plug!
– Grab your TX10 screwdriver and unscrew that panel with finesse, then gently place it on your workbench. You’re doing great!
Step 4
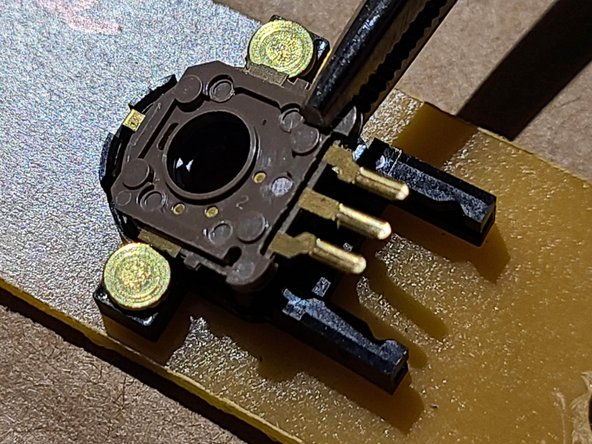

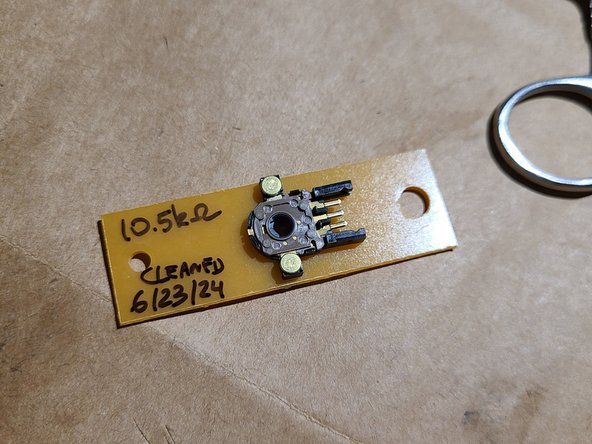
– First, let’s talk about the potentiometer – it’s a 10 k-ohm, and we know it can be tough to find a replacement. But before you start searching, try giving it a good cleaning – it might just need a little TLC.
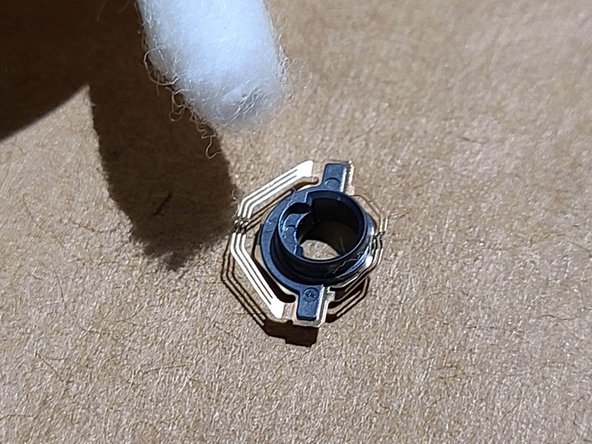
– Now, let’s get the cover off. Be careful, as the rivets might get in the way. Use the side with the most clearance and grab two trusty jewelers screwdrivers. Gently lift one corner and bend the tab – just enough to let the cover slide past.
– Once you’ve cleared the tab, use a small pair of pliers to carefully pull out the top portion of the pot. Easy does it!
– Finally, place the pot’s cover upside-down on your workbench. You’re making great progress! If you need help, you can always schedule a repair
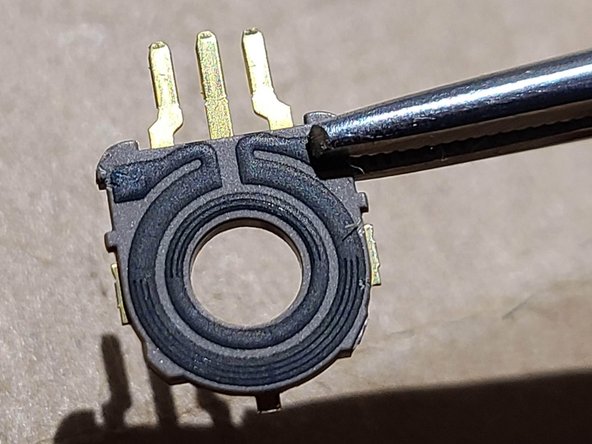
Step 5

– Time to get cleaning! Use a cotton swab dipped in alcohol to gently wipe away any grime on the pot top cover. Take a look at that swab – you should start to see some grey residue coming off, which means you’re on the right track!
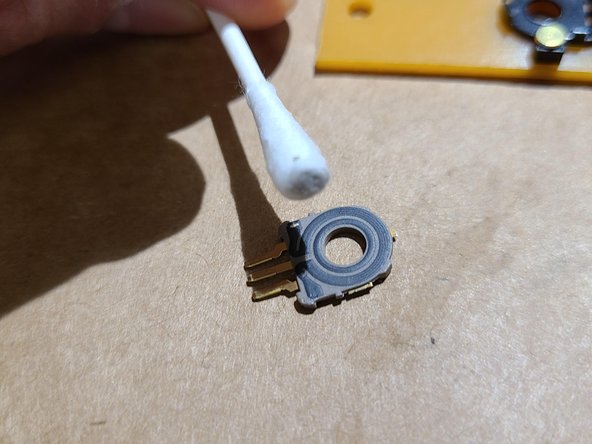
Step 6

– Alright, let’s get that wiper outta there! It’s a little tiny thing, so be gentle, okay? You got this.
– Now that it’s on your workbench, grab a clean swab, soak it in some alcohol, and give those wiper contacts a little cleaning. Don’t press too hard – we don’t want to mess with the shape of those wipers.
Step 7


– Grab your screwdriver and use it to keep things lined up in the middle of the board while you carefully put the wiper back in place.
– Now, let’s get that pot cover back on! Line it up with the grooves on the back (the side opposite the connector), and gently press down until you hear a satisfying click. You might find that the metal parts of the pot cover bump into the rivets a little – if that happens, just use your screwdriver to gently nudge things past them.
Step 8
– Time to put that pot board back in place using those 2 TX10 screws! Easy peasy.
– Now, don’t forget to reconnect the connector. It’s like giving it a high-five.
– Finally, let’s get everything cozy again by reassembling the bottom cover and base. You got this!