Replace Xbox Original DVD Drive
Duration: 45 minutes
Steps: 15 Steps
Step 1

– Get your Xbox ready for a safe and stable repair – make sure it’s unplugged and lying flat on a sturdy surface.
Step 2

Flip your Xbox over and say hello to the four rubber feet on the bottom – it’s time to get started!
– Grab your trusty metal spudger and gently nudge off those four rubber feet. You’ve got this!
Tools Used

Step 3


– Hey there! You might find two sneaky screws hiding under the labels at the bottom of the case. No worries though! You can totally remove the labels or simply poke around to feel for the screw holes. If you’re feeling adventurous, just cut or punch a little hole right through them to get to those screws!
Step 4

– Unscrew those six T20 Torx screws holding the top cover in place! It’s like unlocking a treasure chest—just a little twist, and you’re on your way!
Step 5


– Alright, you’re almost there! With the top and bottom separated, gently flip your Xbox right-side-up. Now, lift and remove that top cover. You got this!
Step 6


The screw on the lower left corner of the disk drive might look like it’s in one hole, but it’s actually sitting pretty in a different one, closer to the corner. Take a closer look to make sure you’ve got it in the right spot.
– Let’s liberate that hard drive! Grab your T10 screwdriver and release the three 3mm screws holding it captive in your Xbox.
– One of these sneaky screws is hiding on the rear left side of the hard drive. You might need to gently lift the IDE ribbon cable to spot it. The other two are hanging out on the front right and left sides of the hard drive.
Step 7


– Gently detach the hard drive power cable from the carrier, giving it enough wiggle room to lift out the hard drive with ease.
– Carefully lift the plastic hard drive carrier out of the Xbox case like a pro.
Step 8


– Let’s get started by removing the four 3.4 mm T15 Torx screws from the plastic hard drive carrier – two screws on each side, nice and easy.
– Now it’s time to carefully coax the hard drive out of its plastic carrier. A little gentle rocking motion should do the trick, and it’ll come out smoothly.
Step 9


Be gentle when removing them, as they might be stuck in place. Remember to handle the wires with care – pulling too hard can damage the cable assembly, and that’s not what we’re going for here.
– Let’s disconnect that hard drive, shall we? Carefully pull the data ribbon cable and the power cable straight up from the drive.
Step 10

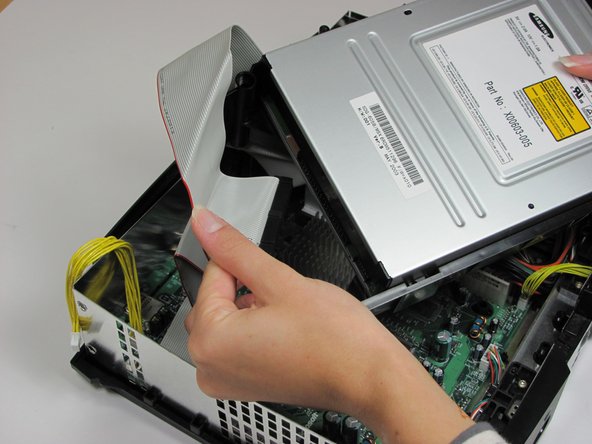

– Take out the disk drive—it should slide right out without a fuss!
– Disconnect the ribbon cable and the yellow cables from the back of the disk drive. Easy peasy!
Step 11

Taking your disk drive out to get to the motherboard? No need to remove the plastic housing!
– Let’s pop that disk drive out! Gently bend back the black plastic tabs holding it in place. Once it’s free, put it off to the side.
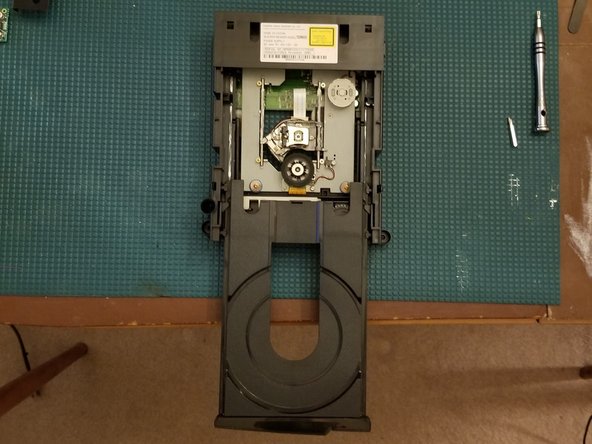
Step 12


– Let’s get started – remove those two #1 PH screws
– Next up, carefully take off the upper metal housing
– Now it’s time for the T10 Screws – remove two of them
– Almost there, remove the lower metal housing and you’re making great progress
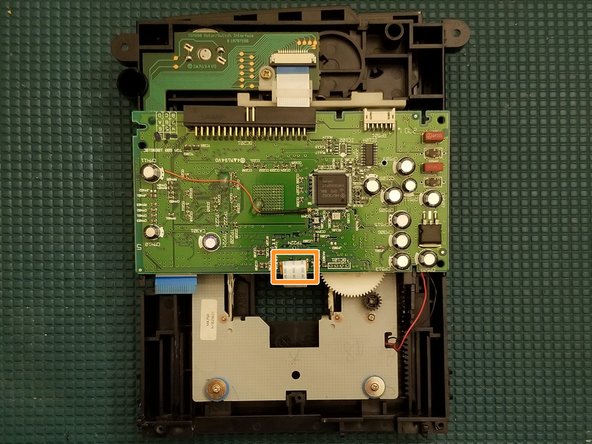
Step 13

Only dive into the orange and yellow steps if you’re planning to pull out the whole PCB. No need to stress!
If your drive seems to have checked out for good, I recommend swapping out those electrolytic capacitors. There are 12 of them hanging out on the Thomson drive, waiting for some TLC!
– Let’s get started! Remove those two PH1 screws to begin the process.
– Now, gently pull up on the ribbon retaining tab – remember, don’t pull on the ribbon itself. It’ll come out easily in a later step.
– Next, gently pull up on the ribbon retaining tab again. The ribbon is stuck to the underside of the PCB with a sticky pad, so carefully pull it away from the pad.
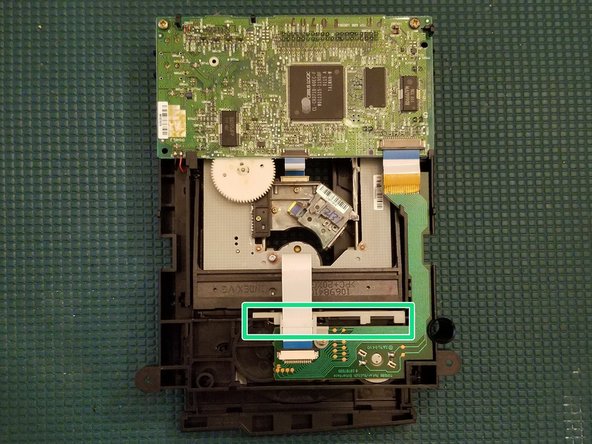
– Time to get out the soldering iron! Desolder both points, making sure to keep track of which is which – red is on the left, and black is on the right.
– Almost there! Gently press up on the PCB where you removed the two PH1 screws, and then rotate the board upside down. If you need help, you can always schedule a repair.
Step 14

The drive door will pop out about a half inch, just enough to give you a good grip.
– Alright, let’s get started! Turn that drive upside down and gently nudge the white lever to the right.
– Now, flip it over and carefully slide the door out as if you’re revealing a surprise.
– And remember, during the grand finale of reassembly, don’t forget to move the white lever back to the left!
Step 15


These drives have seen a lot of action! Model 1.0 Xboxes debuted way back in 2001, making them almost 20 years young. A little love goes a long way, so remember to re-lubricate anywhere there’s movement or friction to keep things running smoothly.
And hey, don’t overlook that tooth track highlighted in yellow from the previous step—it’s important for everything to mesh together perfectly!
– To put everything back together, just follow these steps in reverse – easy peasy!
– If you didn’t quite get it done, no worries! You can always schedule a repair and let the pros at Salvation Repair help you out.
– You’re all done! Pat yourself on the back, you’ve successfully completed this repair guide from Salvation Repair.
Success!