Replace Xbox Original DVD Drive
Duration: 45 minutes
Steps: 17 Steps
This step-by-step guide is going to help you get that pesky DVD drive back in tip-top shape! We’ll be taking apart an original Xbox, so don’t worry if you’re a little nervous about the process. We’ll walk you through it step-by-step. This Xbox had a little mishap – a game got stuck in there, and the original owner ended up taking the top spindle off! But don’t worry, they put it back together with electrical tape (don’t judge!), and this drive is working perfectly! So, put on your repair goggles and let’s get started! If you get stuck at any point, you can always schedule a repair.
Step 1

– Ensure your Xbox is unplugged and resting on a nice, flat surface that’s as stable as your favorite gaming chair.
Step 2

Flip your Xbox over and say hello to the four rubber feet on the bottom – it’s time to get started!
– Let’s get started by using a metal spudger to carefully remove the four rubber feet – it’s an easy first step!
Tools Used


Step 3


– Guess what? There are two sneaky screws hiding under the labels at the bottom of the case! Surprise!
– You have a couple of options here: you can either peel off the labels to unveil them or just use your fingers to feel for those little screw holes below. If you prefer, you can easily cut or punch a hole through the labels to access the screws. Whatever works for you!
Step 4

– Let’s get started by removing the six T20 Torx screws that hold the top cover in place – simply unscrew them from the bottom cover to release it.
Step 5


– Now that the top and bottom shells have broken free, it’s time to flip that Xbox over like a champ! Gently lift the top cover off and set it aside – you’re doing great!
Step 6


The screw hanging out in the lower left corner of the disk drive seems to be playing coy! It’s not quite in the hole it looks like; it’s just a bit shy and closer to the corner. Keep an eye on it as you go along your repair journey!
– Let’s get started by removing the three 3 mm T10 screws that hold the hard drive in place on your Xbox. These screws are pretty easy to spot, but make sure to lift up the IDE ribbon cable to find the one hiding on the rear left side. The other two are located on the front right and left sides of the hard drive.
– Take your time and carefully remove each screw. If you need a little extra help or just want some guidance, you can always schedule a repair with Salvation Repair.
Step 7


– First, gently release the hard drive power cable from the carrier to get some slack – you’ll need it to lift out the hard drive.
– Next, carefully lift the plastic hard drive carrier out of the Xbox case. If you’re having trouble, don’t worry, it’s a bit tricky – but you’ve got this!
Step 8


– First things first, let’s tackle those four 3.4 mm T15 Torx screws holding the plastic hard drive carrier in place—two on each side. You’ve got this!
– Now, gently coax the hard drive out of its cozy plastic home. A little rocking motion should help it slide right out with ease. Easy peasy!
Step 9


Be gentle when removing them, as they might be stuck in place. Remember to handle the wires with care – pulling too hard could damage the cable assembly, and that’s not what we want!
– Gently lift both the hard drive data ribbon cable and the power cable straight up from the hard drive, like you’re giving them a little high-five!
Step 10

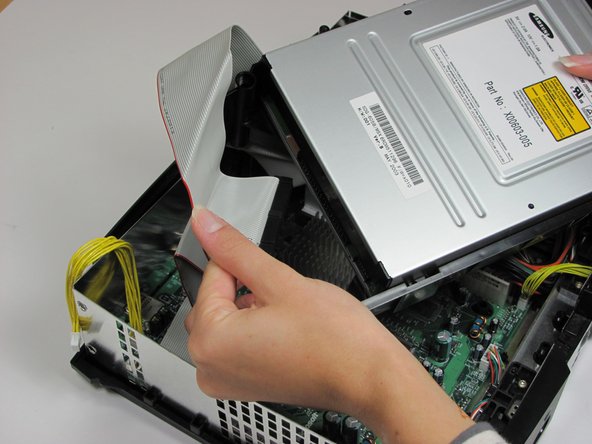

– Time to bid farewell to the disk drive! Just give it a gentle tug and it should pop right out.
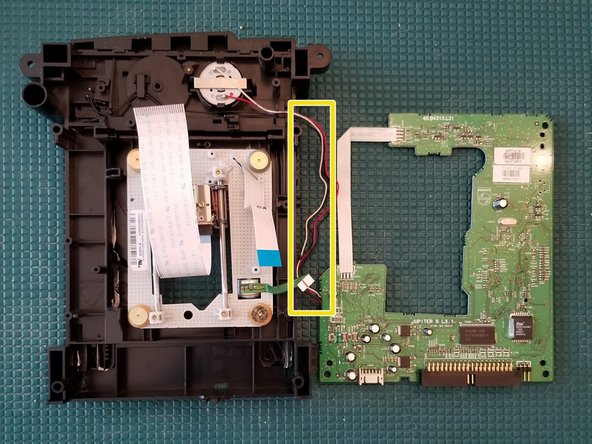
– Next up, let’s disconnect those cables. Unplug the ribbon cable and the yellow cables from the back of the disk drive. Easy peasy!
Step 11

If you’re digging into the motherboard, you don’t need to go through the hassle of removing the plastic case. We’re all about efficiency here! 😉
– Let’s pop those black plastic tabs around the disk drive! Give them a little pry and gently lift the drive out of its home. Time to put that drive aside for a moment.
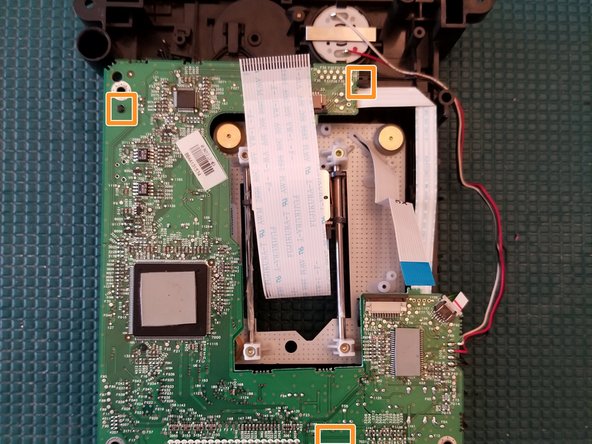
Step 12

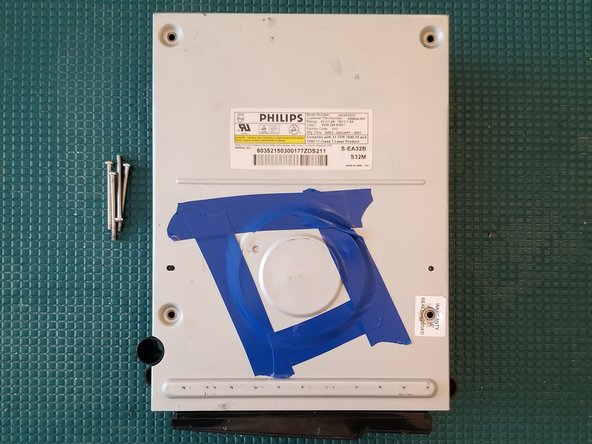
– Let’s get started – remove those 4 PH2 screws
– Now it’s time to take off the top cover
Step 13
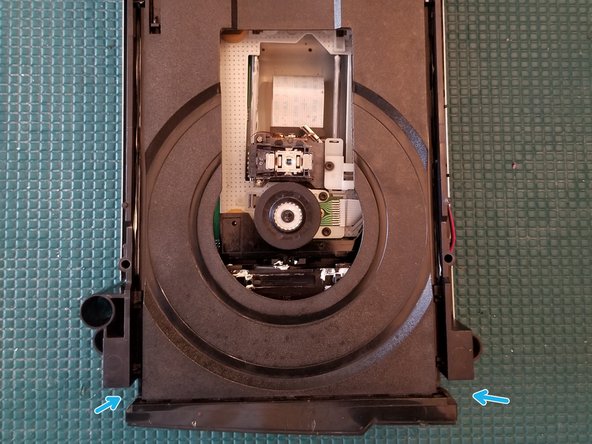

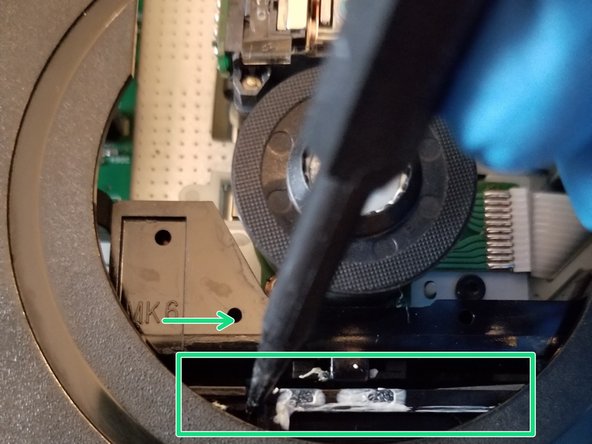
– Use the pointed end of a spudger to gently slide this piece to the right – it’s like you’re unlocking a secret door!
– As you do this, the laser assembly will drop down about a quarter inch, so be prepared for that
– The drive door will now open about a quarter inch, and you can manually open it the rest of the way – you’re making great progress!
Tools Used
Step 14
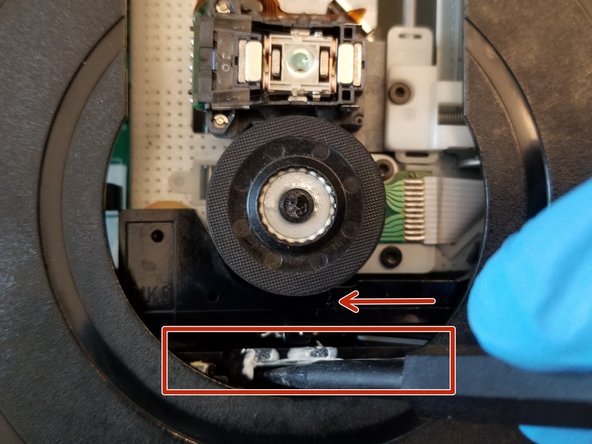

– Gently nudge that drive door into place.
– Give this piece a little push to the left.
– Watch as the laser assembly pops up about a quarter inch.
– Voila! The drive door is all locked in and secure.
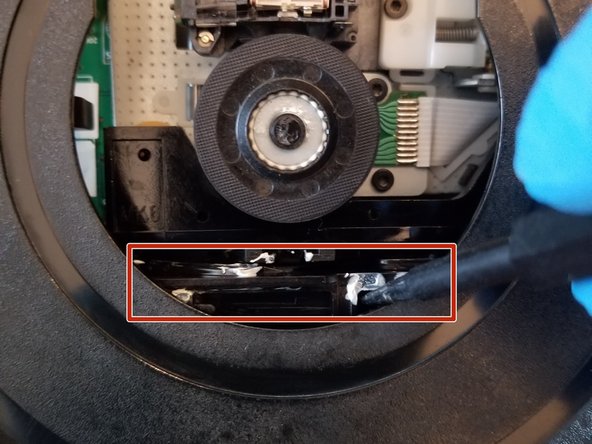
Step 15

Be careful when removing the lower shell – don’t put the drive down just yet! You could accidentally damage the lower ribbon cable and render the drive useless. Let’s take it one step at a time to get your device up and running smoothly.
Step 16

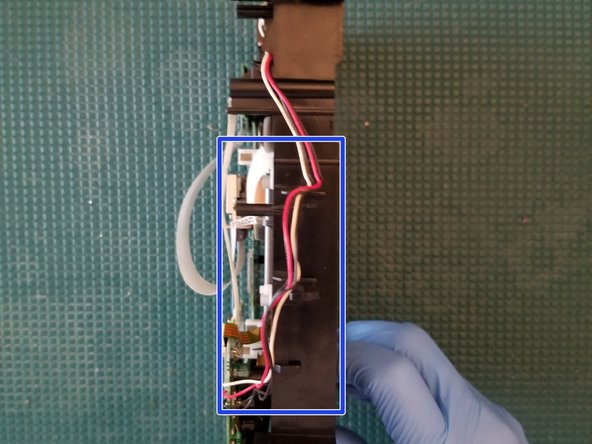
– Now it’s time to set those wires free – gently loop them out from their retaining brackets.
Step 17

Now it’s time to put everything back together – just reverse the steps you followed to remove the PCB and you’ll be golden!
– Alrighty, flip that drive over and give those ribbon cable retaining tabs a gentle tug to release the ribbon cable. Easy peasy!
– Now, you’ve got two plastic tabs and a post keeping that board snug as a bug. Just lift the post, slide the PCB to the left, and then give it a little nudge forward.
– Twist that PCB to the right and set it aside like a pro!
– No worries about the cable; there’s just enough length for you to pop the board into a PCB holder while you swap out those capacitors.
Success!