Xbox 360 E RF Module Replacement Guide: Step-by-Step Tutorial
Duration: 45 minutes
Steps: 13 Steps
Get ready to dive into some fun as you swap out the RF module in your Xbox 360 E! Follow along with this guide and you’ll be gaming in no time. If you need help, you can always schedule a repair.
Step 1

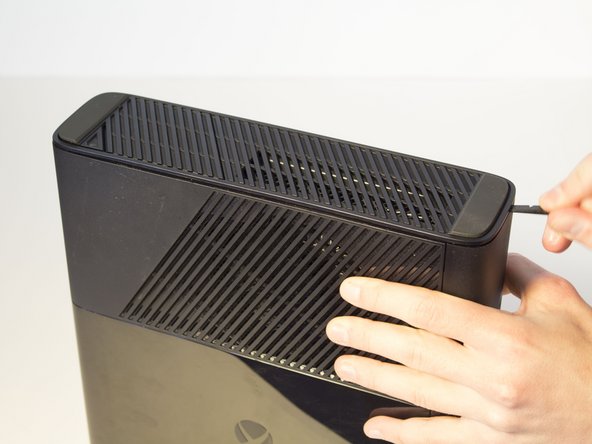
– Insert the Spudger into the gap between the Xbox’s grated top panel and the bottom body, where the rubber feet are located. Make sure it’s snug in there.
– Now, gently pry the top panel away from the bottom body by pulling the Spudger back like a lever. Keep it firmly in place in the gap as you do this.
Tools Used

Step 2

– Gently slide the spudger along the gap you’ve created between the grated panel and the bottom body of the Xbox – you’re making great progress!
– As you go, periodically pull back on the spudger like a lever, keeping it firmly in place in the crevice. You’re doing a fantastic job of loosening things up!
Tools Used


Step 7


– Look for the Xbox logo next to your CD drive. Right next to it? Yeah, that’s the spot. Go ahead and give that area a little press, and watch the disk tray panel pop right off! Easy peasy, right?


Step 9


– Keep that panel nice and wide open! It’s a breeze if you use a spudger to gently keep it apart, but hey, your hands work too if you prefer a more hands-on approach.
– Swing the Xbox to the left and say hello to the clip that’s holding the front panel snug against the body. Slide your spudger into the little gap to pop that clip free. You might need to do a little wiggle dance with the spudger. Once it’s loose, the front panel will be much easier to handle!
Tools Used


Step 11


Take your time when peeling off the panel! You definitely don’t want to mess up that ribbon cable. Gently lift the panel away, nice and steady.
Step 12


– Locate the charming brown section where the ribbon cable makes its grand entrance into the green board. Gently lift the brown piece up and give a little tug on the plastic tab at the end of the ribbon to set it free!
Step 13


– First up, take a look at the device’s body and find that snazzy green panel hanging out to the right of the CD drive.
– Next, grab your trusty T8 Torx screwdriver and unscrew those two 6 mm screws up at the top left and middle right. You’ve got this!
– Now, give the middle of that green board a gentle tug to pull it out. Easy peasy!