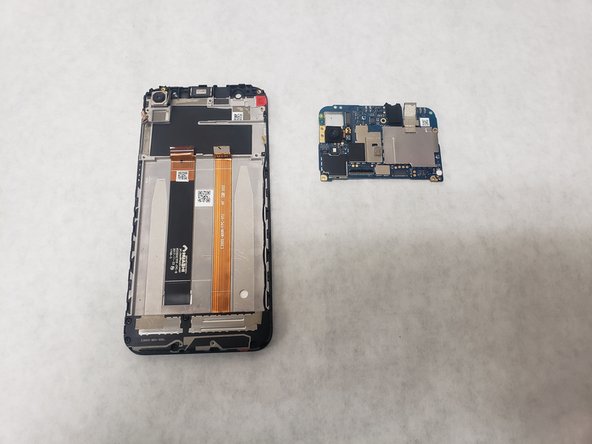
DIY Asus ZenFone 5 Motherboard Replacement Guide: Step-by-Step
Duration: 45 minutes
Steps: 11 Steps
The motherboard is like the phone’s brain, connecting all the parts together. It’s tricky to tell if the motherboard’s having a bad day, but if something’s not working right, it’s a good idea to check if the motherboard’s feeling okay.
Step 1
Heads up! When you’re warming up that iOpener, make sure to grab it by the sides. We want to keep those fingers safe and sound!
– Pop that iOpener into the microwave for a quick 30 seconds to get it nice and toasty!
Step 2
– Get your trusty iOpener nice and toasty by placing it on the side of your phone for about 10-15 minutes. Let it cool down.
– Now, warm up your iOpener again and give the other side of your phone a little love with some heat.
Step 3
Hey there, cool cat! Metal tools are cool, but they can be a little too cool for your device’s battery. Think of it this way, you wouldn’t want to poke a hole in a balloon, would you? Same goes for your device’s battery, it’s pretty delicate. We recommend using an ESD safe tool instead. It’s like a superhero tool for electronics. Want to know more about those tools? Check out our guide here
There are 6 nifty little tabs on each side of your phone that may require a bit of muscle to pry apart.
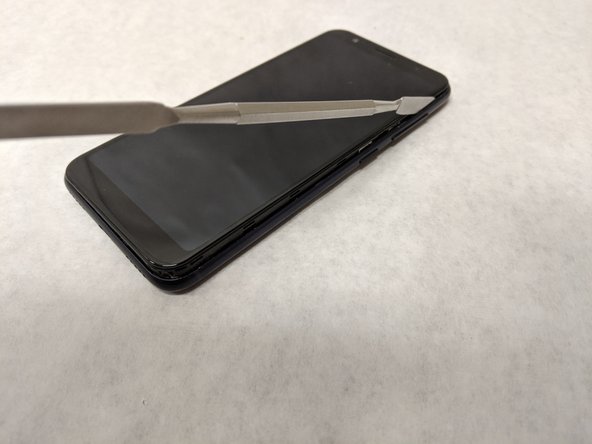
– Slide the jimmy along the edges like a pro to loosen that adhesive grip.
– Grab your opening picks and tool, and gently pry that back cover off—no rush, you’ve got this!
– Keep heating and prying until the back cover waves the white flag and comes off completely. If it’s being stubborn, remember, you can always schedule a repair.
Tools Used
Step 4
– Grab your trusty #00 Phillips head screwdriver and get ready to unscrew those six Phillips #00 3.175mm screws holding down the top cover plate.
– Next, take your spudger and gently work it along the edge of the top plate to pop those clasps loose.
Tools Used
Step 5
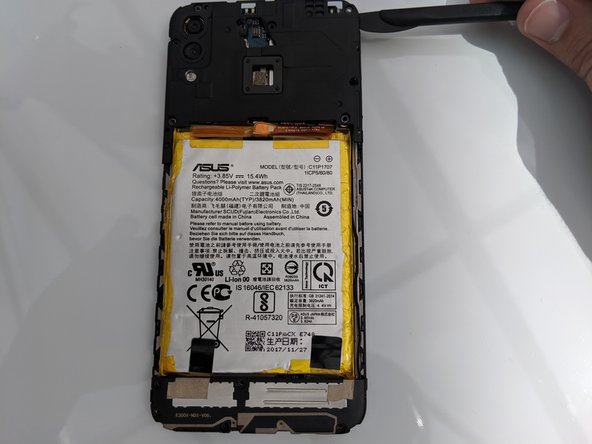
– Gently unplug the press fit connector found near the upper right corner of the battery to free the battery from the motherboard. You’ve got this!
Step 6
– Grab that trusty screwdriver and take out the five phillips #00 3.96mm screws holding the bottom plate in place.
– Now, gently use the spudger to pop off the bottom plate—easy does it!
Tools Used
Step 8
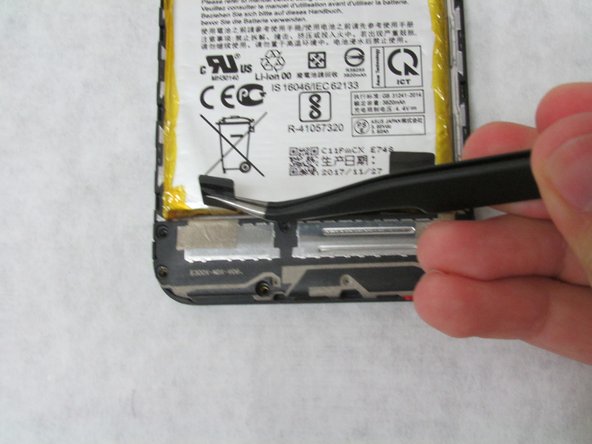
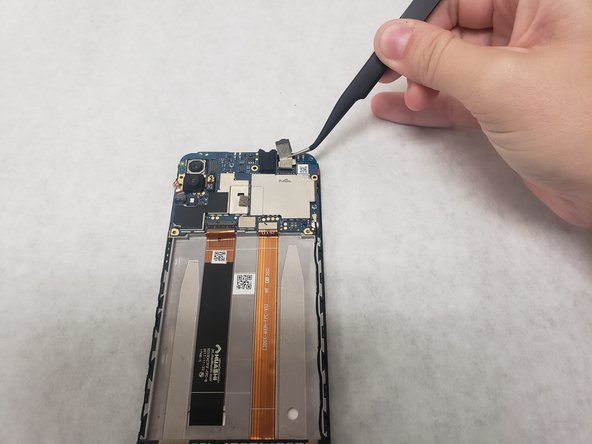
– Alright, time to get that silver tape off the right side of the audio jack – about halfway down, so it’s completely off the silver plate.
– Use your trusty tweezers to disconnect the press fit connector hiding underneath the tape, right above the silver plate.
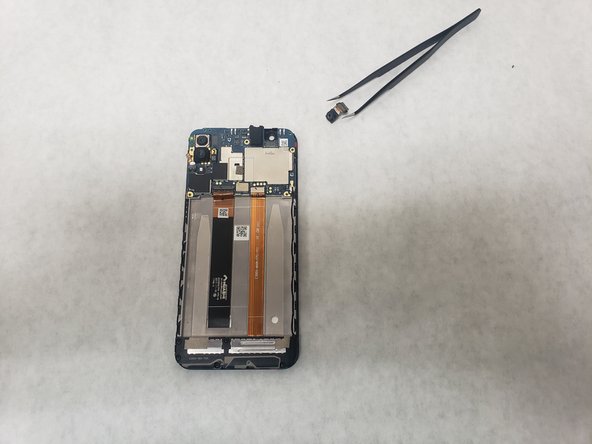
– Now, carefully lift the camera and connector up – easy does it! You got this.
Step 9
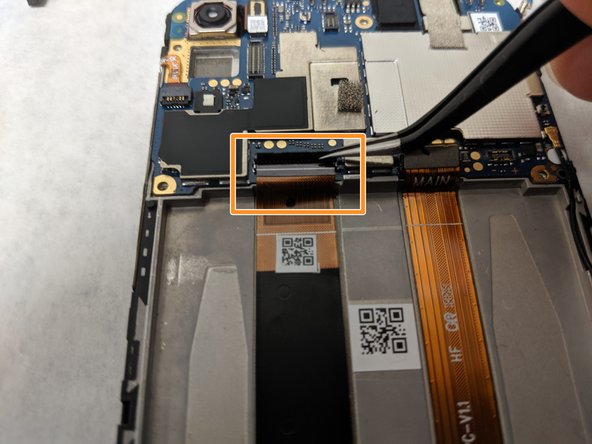
– Just above the battery socket, let’s give a little pop to the press fit connector at the end of that vibrant orange ribbon cable on the right.
– Now, gently pry up the tab of the ZIF connector on the left side to free the locking mechanism.
– With a soft touch, pull out the ribbon cable through the opening you’ve created by lifting that tab.
Step 10
– Gently tug on the tab sitting to the left of the camera button, right next to the volume up button. You’ve got this!
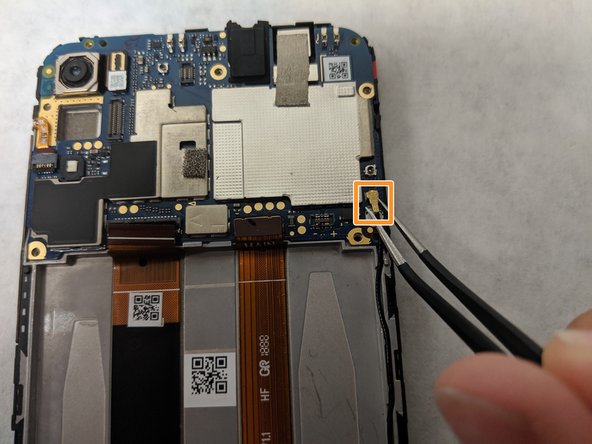
– Carefully pull out the shiny gold-headed coaxial cable found in the bottom right corner of the motherboard. Easy peasy!
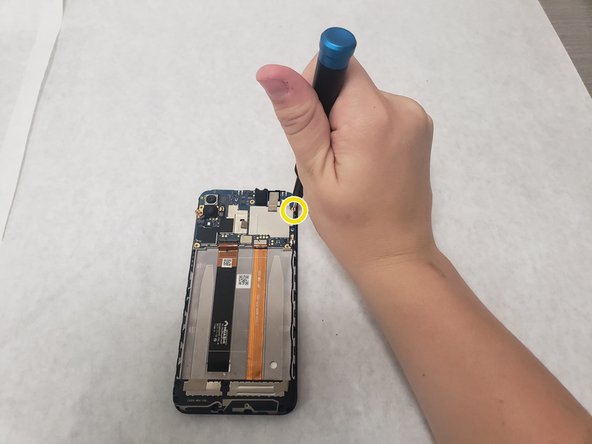
– Grab your trusty screwdriver and remove the one Phillips #00 head 3.175mm screw that’s hanging out just to the right of the silver plate. You’re making great progress!
Step 11
The motherboard’s pretty delicate, so it might snap if you use too much force.
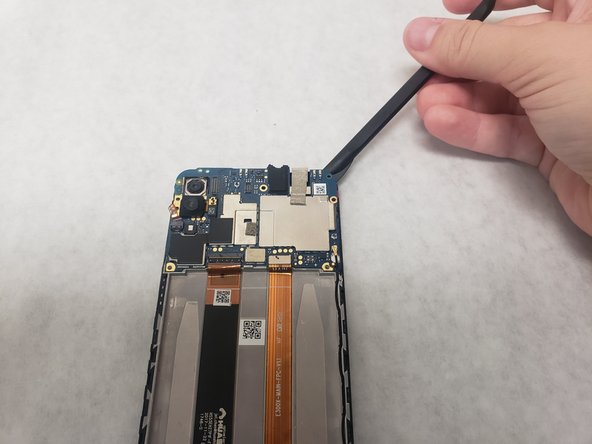
– Gently pop off the tab located to the right of the camera. You’ve got this!
– Take your trusty spudger and carefully pry around the edges of the motherboard to loosen it up.
Tools Used
Success!


