Asus PadFone X Mini Docking Port Replacement Guide – DIY Tutorial
Duration: 45 minutes
Steps: 6 Steps
Step 1

– Flip your phone over so the screen is facing down. Check out the bottom right corner for a little groove – that’s your starting point! Grab a plastic opening tool and gently lift to pop off the outer cover. Easy peasy!

Step 3

– Time to unleash your inner tech wizard! First, grab your trusty screwdriver and remove the 10 screws that are hanging out around the edge of your phone. They’re just waiting to be set free!
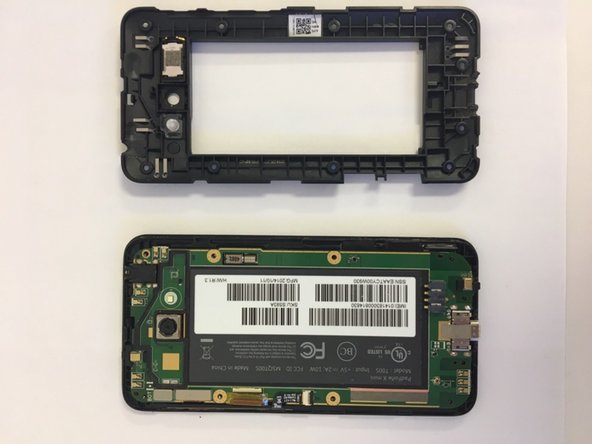
– Now that the screws are gone, gently lift off the cover. You’ve got this!
Step 4

Hey there! Just a gentle reminder to take it easy with that black strip in your phone. You’ll need it later, so only disconnect it from the motherboard. Treat it with care and you’ll be golden!
That big green board on the side with the screen? That’s your motherboard, and it’s the brains of the operation.
– Grab your trusty tweezers and gently peel away the black strip on the left side of the motherboard. You’ve got this!
Tools Used

Step 5

– Alright, time to take a peek under the hood! Carefully remove that fancy gold flap on the left side of the motherboard. It’s like opening a treasure chest, but instead of gold, you’ll find… well, motherboard stuff.
Step 6

Oops, looks like your docking port is connected to the motherboard. That means if it’s not working, you’ll need to get the whole thing replaced. No worries, we can help you out with that! If you need help, you can always schedule a repair.
– Put your device back together by following the steps in reverse order.
– Cancel: I did not finish this guide.
– If you need help, you can always schedule a repair
Success!

