How To Replace Google Pixel 9 Rear Camera: Step-by-Step Guide
Duration: 45 minutes
Steps: 34 Steps
This repair guide is powered by the awesome team here at Salvation Repair. If you’re looking for more helpful guides, check them out here!
Hey there, camera enthusiast! This step-by-step guide will walk you through replacing the rear camera module in your Pixel 9. Ready to capture the world in crisp, clear detail again? Let’s get started! This repair requires some replacement parts, like the rear cover adhesive and the autofocus sensor adhesive. Remember, this repair may affect the water resistance of your phone, but don’t worry, it’s not too tough to re-seal everything up. If you need extra help, you can always schedule a repair.
Step 1


Hey there, cool cat! Before we start our repair adventure, let’s make sure your Pixel’s battery is a little sleepy – below 25%. A super-charged battery is like a party animal that could get a little crazy if we accidentally poke it. Let’s keep things safe and chill! If you need help, you can always schedule a repair.
Simultaneously press the power button and the volume up button to open the shutdown menu.
– First things first, give your phone a break and unplug all the cables.
– Then, power it down completely. Let’s give that phone a little breather.
Step 2

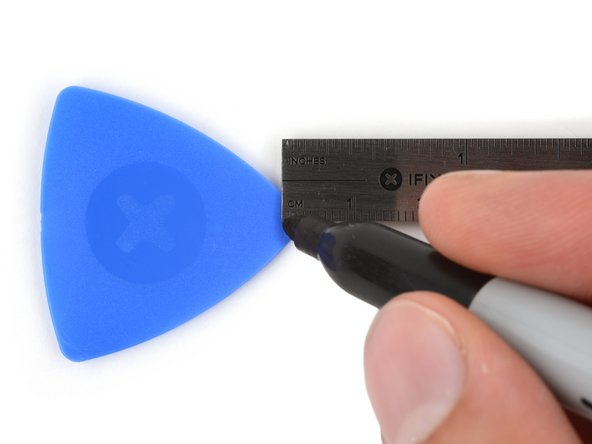

Hey there, tech enthusiast! Make sure to keep your tool insertion to just 3mm for this step – don’t want to unleash the Apple beast within, right?
Cracked screens or back glass can be tricky, so if your suction cup is having trouble getting a good grip, don’t sweat it!
Just grab an opening pick and use a permanent marker to mark a spot 3mm from the tip. You’ll be a pro in no time!
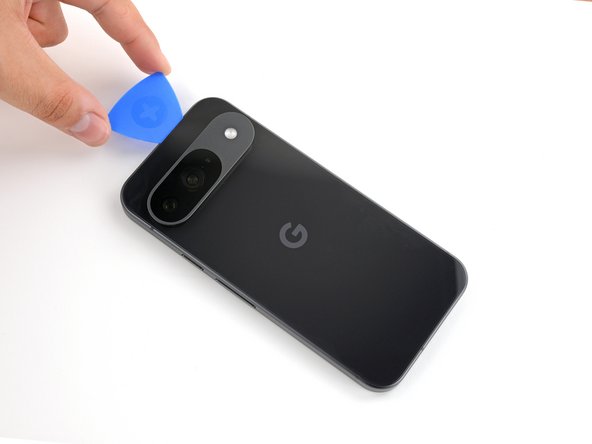
– Let’s get this party started with some adhesive. It’s keeping that back glass glued to the frame, so it’s gonna take a little love to separate them.
– Now, get your sticky hands on some packing tape and lay down some overlapping strips on that back glass. This will help you keep your cool and make it easier to take things apart. Make sure you’ve got a smooth, clear patch near the bottom edge that’s big enough for a suction cup to get a grip.
Step 3
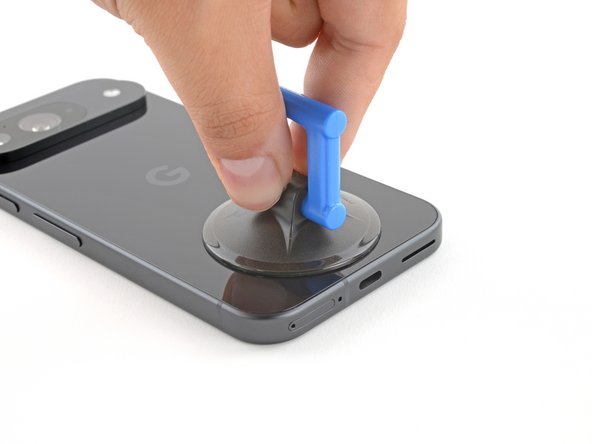

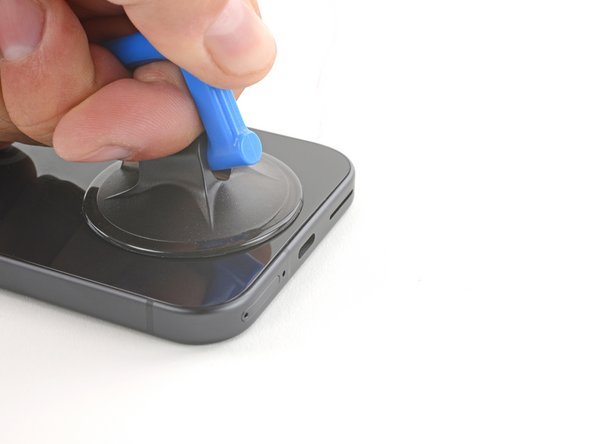
– Grab your suction handle and pop it right on the bottom edge of the back glass. Make sure it’s as close to the edge as you can get it.
– Press down gently to make sure that suction handle is secure. You got this!
Tools Used

Step 4
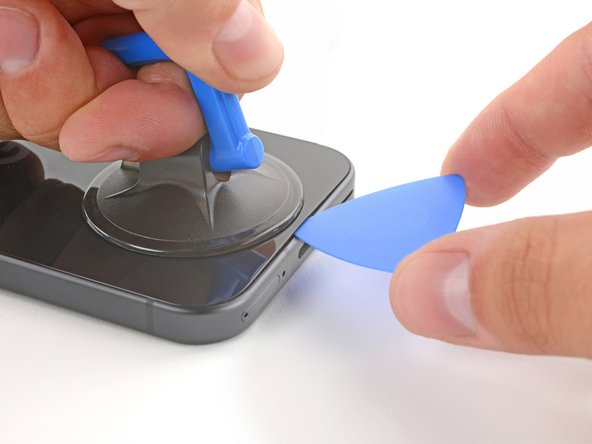

– Wahoo, open up a world of possibilities by creating a small gap under the back glass! With your trusty opening pick, gently slide it in like a superhero saving the day.
Tools Used
Step 5
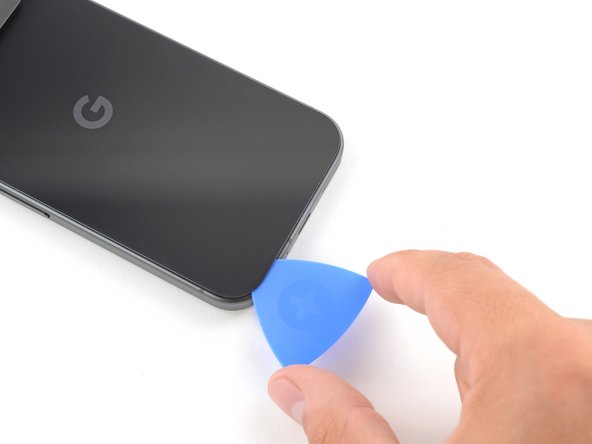

Hey there! Just a friendly reminder: please don’t push that opening pick deeper than 3 mm, alright?
– Now, let’s loosen that glue holding things together! Gently wiggle that opening pick back and forth along the bottom edge. You’ll feel that adhesive start to give way, and soon those parts will be ready to separate.
Step 6


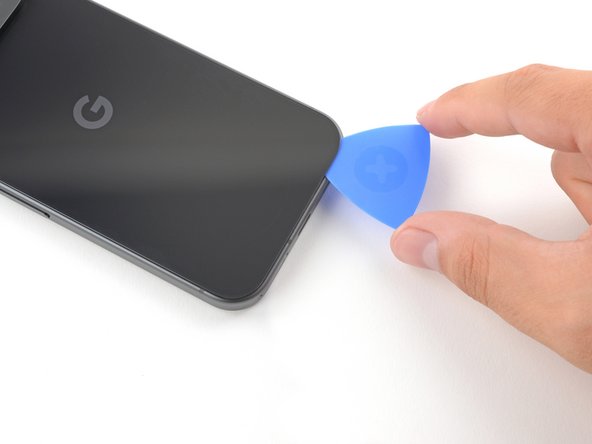
– Gently glide the opening pick along the edge of the phone, cutting through the remaining adhesive like a pro.
Step 7
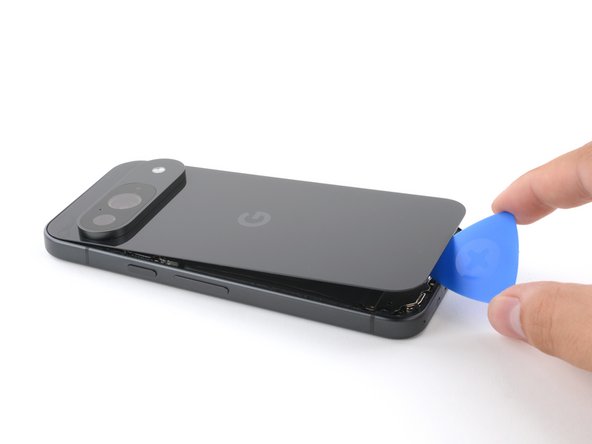


– Okay, now that you’ve loosened up most of the adhesive, give that opening pick a little twist at the bottom edge. You’ll want to lift the back glass just enough to get a good grip on it with your fingers.
– Keep using the opening pick to work your way around the rest of the adhesive holding that back glass in place. You got this!
Step 8

– Time to pop off that back glass! Let’s get started.
– As you piece everything back together:
– Now’s your moment to give that phone a quick test drive before sealing it up! Power it on, make sure everything’s working smoothly, and then power it back down to continue your reassembly journey.
– Use this guide to smoothly apply some fresh adhesive and securely put your back glass back in place.
Step 9

As you dive into this repair adventure, keep a close eye on each screw and remember to put it back where it belongs. It’s like a little puzzle, and you want to make sure all the pieces fit perfectly!
The Pixel 9 likes to party with Torx Plus screws, but don’t worry—standard Torx bits are also invited! Just remember to apply steady, downward pressure to keep everything in line and prevent any stripping mishaps.
– Grab your trusty 3IP Torx Plus driver and unscrew that single 5.4 mm-long screw holding down the upper board cover. You’ve got this!


Step 11

– Grab your trusty 3IP Torx driver and let’s get to work! Start by unscrewing those five screws holding the midframe and wireless charging coil in place:
– Four screws that are 5.4 mm long, just waiting to be freed!
– And don’t forget about the one little 2.2 mm long screw, it’s important too!

Step 13

– Time to get those hands in there! Let’s remove the midframe, wireless charging coil, and NFC assembly. It’s like taking apart a puzzle, but with more tech!


Step 16


You’ve got this! A teeny-tiny, flexible cable keeps your antenna happy and connected. Don’t sweat if it’s not, just give it a gentle nudge and reconnect it with a buddy called ‘press connector.’ Stable and strong, your device will be up and running again in no time!
– Let’s kick things off by removing the 5G mmWave antenna. It’s not as scary as it sounds!
– When you’re putting everything back together, make sure to tuck that antenna right between the frame and the tiny metal bracket at the top right corner. It’ll fit like a glove!
Step 17

– Get your groove on and grab that 3IP Torx Plus driver! It’s time to kick this antenna board cover off the dance floor with a mighty 5.4 mm-long screw. Booty-shaking not required, but you know, it’s fun to imagine, right?
安全:
如果你想玩得更开心,或者只是想委托专业人士来为你搞定这个问题,你总可以安排一个maintenance appointment!

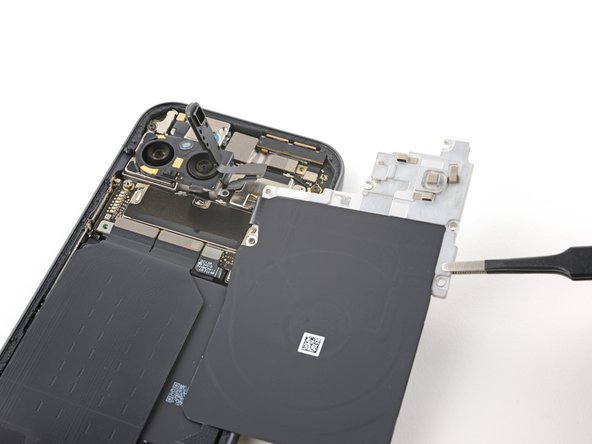
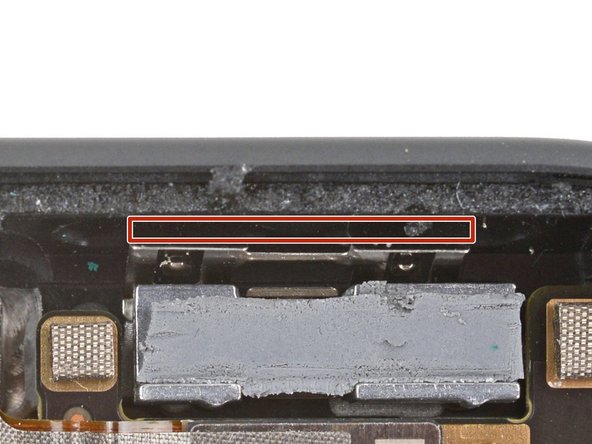
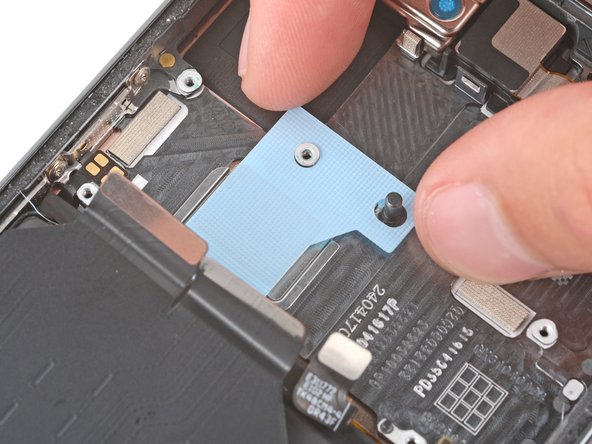
Step 19

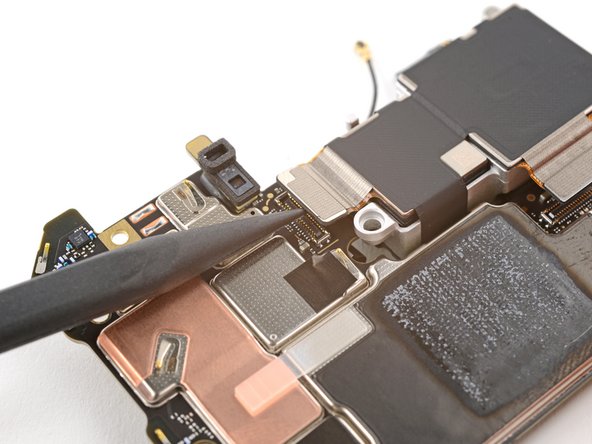
– Grab your spudger and give that autofocus connector a gentle nudge to disconnect it from the motherboard. It’s like saying ‘bye bye’ to your friend, but in a techy way!
Tools Used
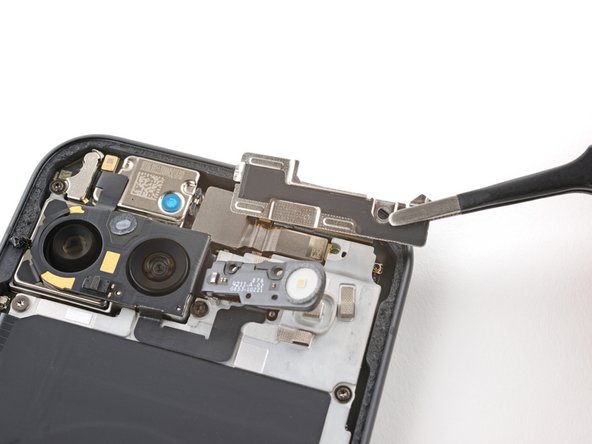
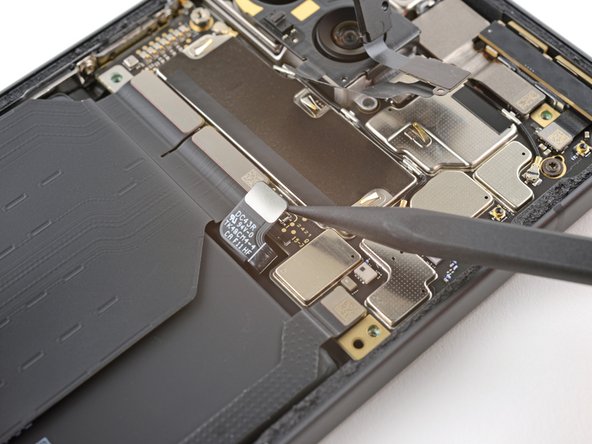
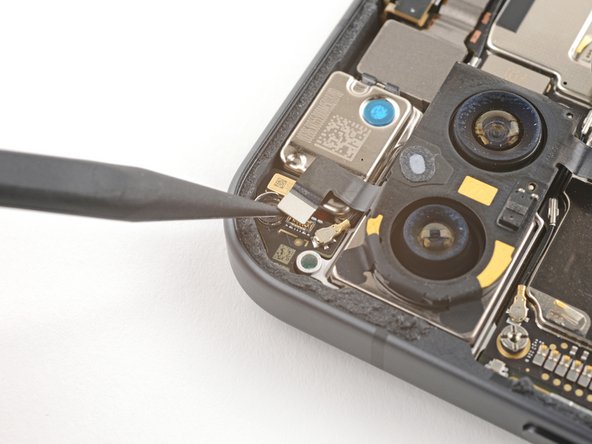
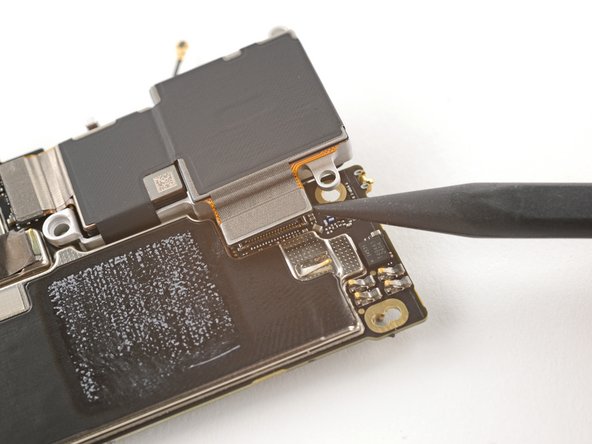
Step 20
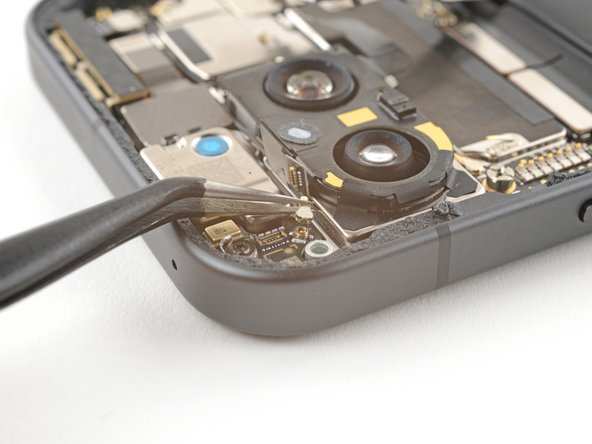

– Gently slide one side of your trusty angled tweezers beneath the metal neck of the coaxial antenna cable on the antenna board.
– Now, with a smooth motion, lift straight up to free the antenna. You’ve got this!
Tools Used

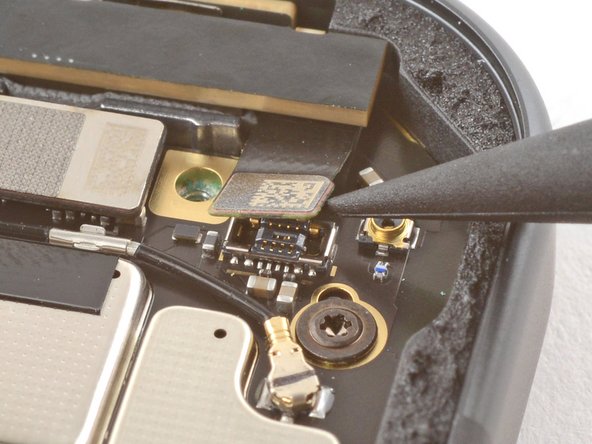
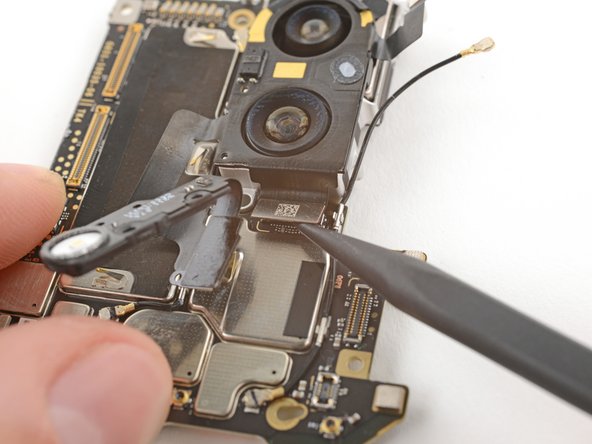
Step 21

– Gently wiggle the spudger’s tip underneath the front camera press connector and pop it up to disconnect it. You’re doing great!
Tools Used
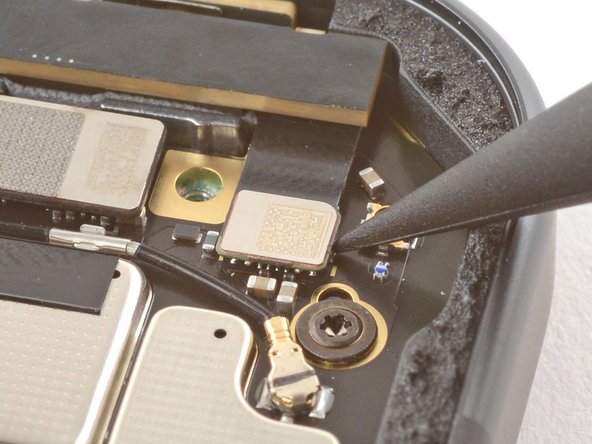
Step 22
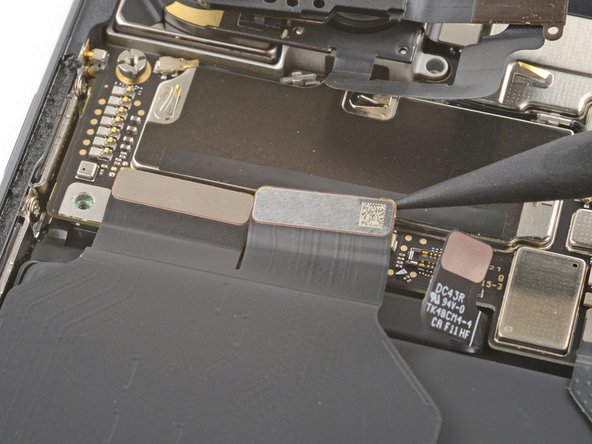


– Gently use the spudger’s tip to lift and disconnect the top two interconnect cable press connectors from the motherboard’s bottom edge. You’re doing great!
Tools Used
Step 23

– Let’s get into it! First up, you’ll need to take out those two screws holding the motherboard in place:
– One 2.9 mm-long 3IP Torx Plus screw – it’s like a tiny bolt of lightning!
– And then grab that one 5 mm-long standoff screw – it’s standing guard for your motherboard!
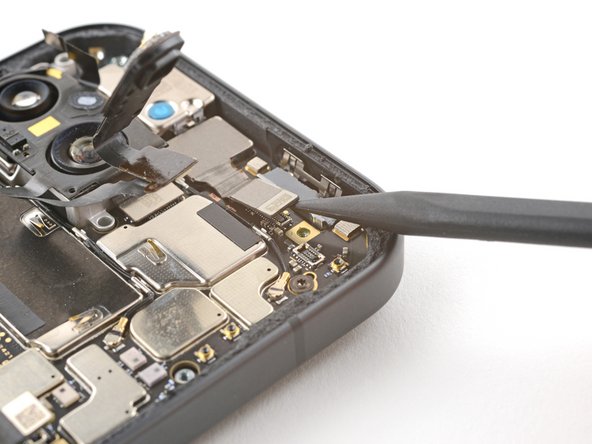
Step 24
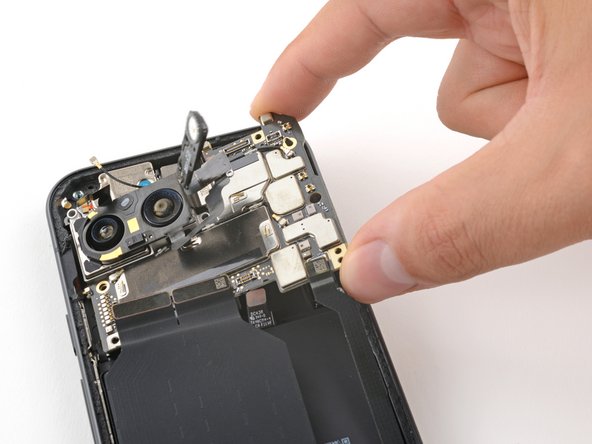
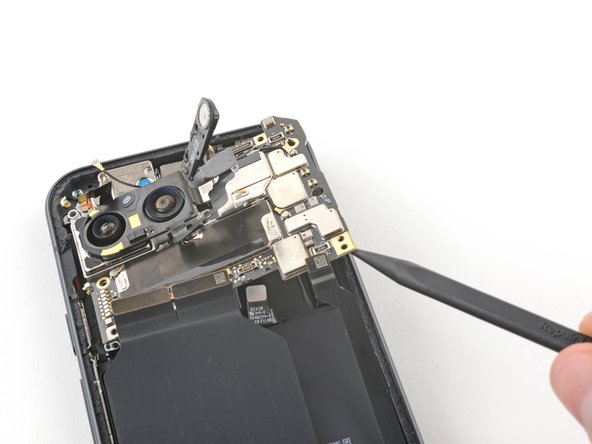

– Gently slide the tip of your spudger under the bottom right corner of the motherboard, just like tucking in a cozy blanket.
– Give it a little lift with the spudger to pop the motherboard free, as if you’re helping it stand up for a great performance.
– Now, carefully raise the motherboard until you can grab it with your fingers, ready to take on the next step of your repair journey.
Tools Used
Step 25
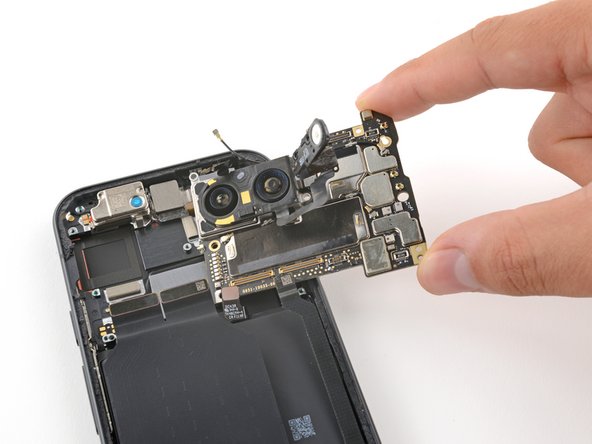

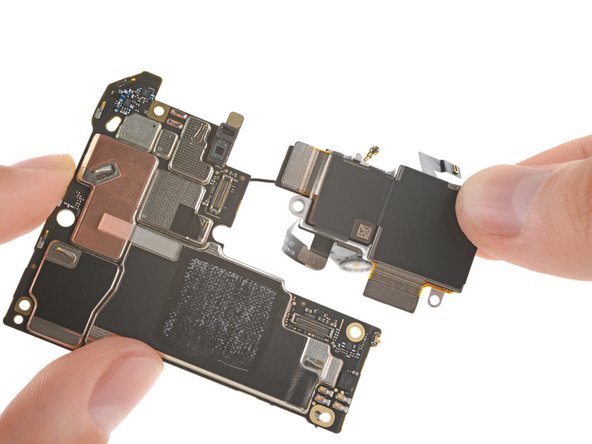
– Time to give that motherboard a little vacation! Carefully remove it, making sure you’re gentle with those delicate connections.
Step 26

– Alright, it’s reassembly time! Let’s make sure everything’s in tip-top shape.
– First up, check out the logic board thermal pad—it’s either chillin’ on the bottom of the logic board or hanging out on the frame.
– If it looks good, you can breeze past the rest of this step.
– But if it’s seen better days, grab your trusty spudger and gently scrape it off. Bye-bye, old pad!
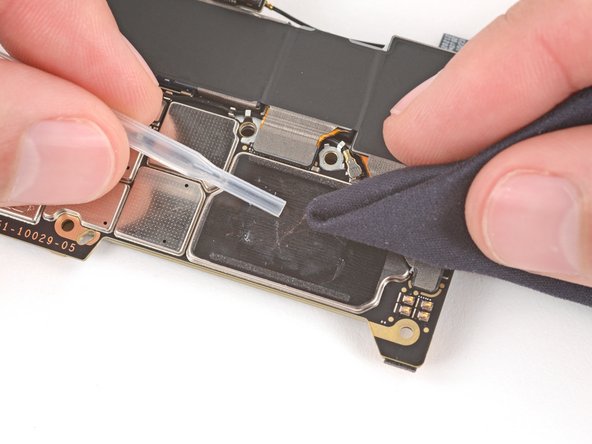
– Now, let’s tidy up! Use some isopropyl alcohol (90% or higher, please) and a microfiber cloth to wipe away any leftover thermal pad residue from both the frame and the bottom of the logic board.
– Finally, pop a fresh thermal pad into its designated spot on the frame, and you’re golden!
Tools Used

Step 27

– Using the tip of a spudger, give that flash connector a little nudge to disconnect it from the motherboard. It’s like giving it a high five, but with a tool!
Tools Used


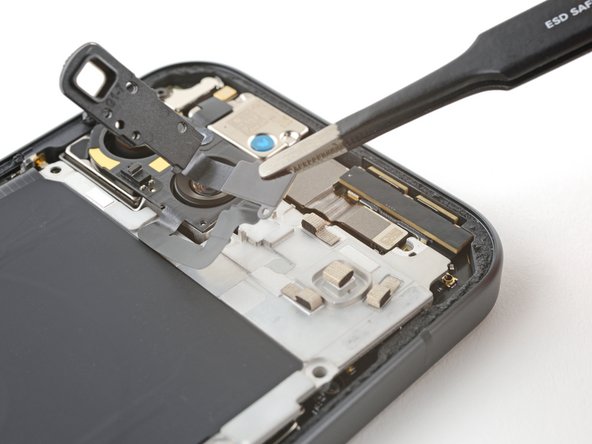
Step 32

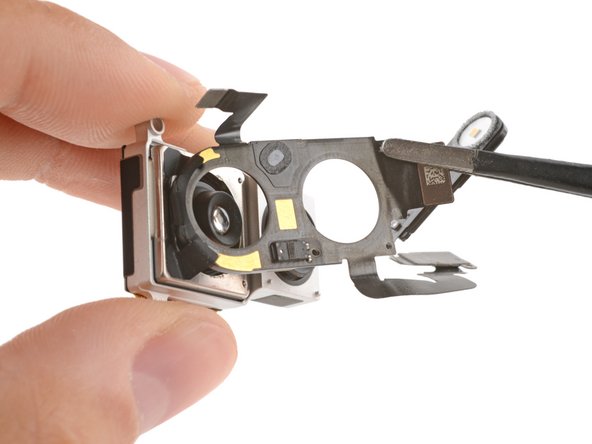
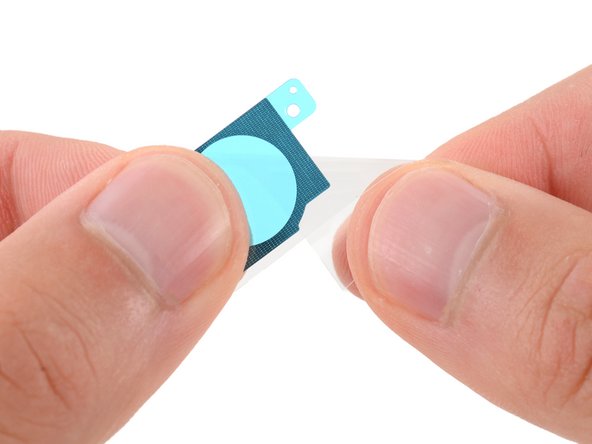
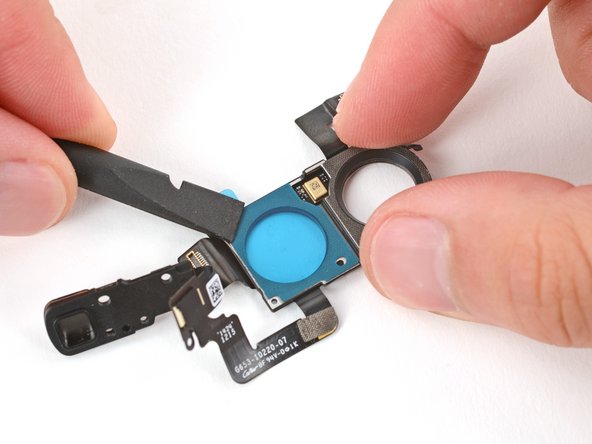
Hey there, let’s check if your new camera has an autofocus sensor. If it doesn’t, no worries, we’ll just snag it from your old camera. Super simple!
If you’re having trouble getting the sensor off, just use an iOpener or hairdryer to give it a little warm-up. That’ll help loosen things up!
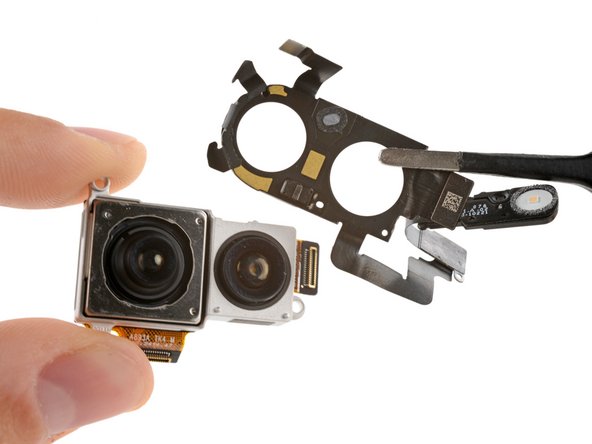
– Grab your trusty tweezers and gently coax the autofocus and flash assembly away from the rear camera module. Just a friendly reminder: watch out for that delicate cable and those tiny press connectors—let’s keep them safe and sound!
– And voilà! You’ve got just the rear camera module hanging out now.
Tools Used