Google Pixel 9 Back Glass Replacement Guide – DIY Repair Tutorial
Duration: 45 minutes
Steps: 8 Steps
Hey there, this guide was put together by the Salvation Repair team. We’re here to help you fix your stuff! If you need some extra support, you can always schedule a repair.
Hey there, tech lover! This step-by-step guide is here to help you fix that cracked or broken glass back cover on your Pixel 9. You’ll need some replacement back glass adhesive to get this done, so grab it before you get started. Remember that any repair can impact your phone’s water resistance. How well you apply the rear cover adhesive will determine if your phone stays water-resistant. Let’s do this! If you need help, you can always schedule a repair.
Step 1


Make sure your device’s battery is below 25% before you start the repair. This helps to avoid any risk of fire from a damaged lithium-ion battery.
Simultaneously press the power and volume up buttons to pop up the shutdown menu.
– Unplug all cables from your device.
– Turn off your device completely.
Step 2

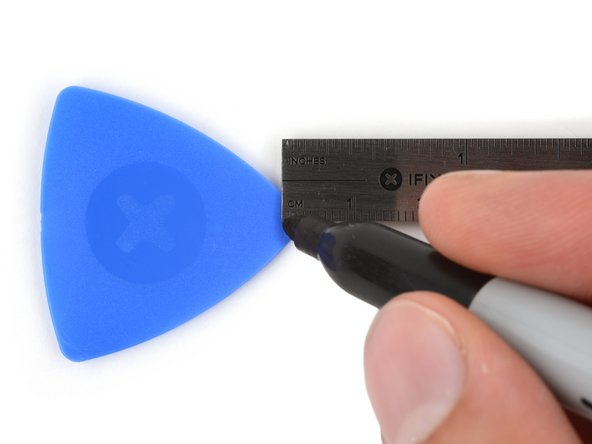

Keep your tool chill – don’t go deeper than 3mm under the back glass to keep those internal parts happy!
Whoa, cracked screen? Don’t sweat it, we got this! Just mark 3 mm from the opening pick tip with a cool marker, and you’ll be back to scrolling in no time. And if you need help, you can always schedule a repair.
– This back glass is stuck on tight, but we’ve got this! The adhesive holding it to the frame is strong, but it’s not unbreakable. We’re gonna make this easier for ourselves by using some packing tape. Wrap a few overlapping strips around the glass to give us a good grip, and to protect ourselves from any sharp edges. Now, find a nice, smooth area near the bottom edge. It needs to be big enough for our trusty suction cup to get a good hold.
Step 3
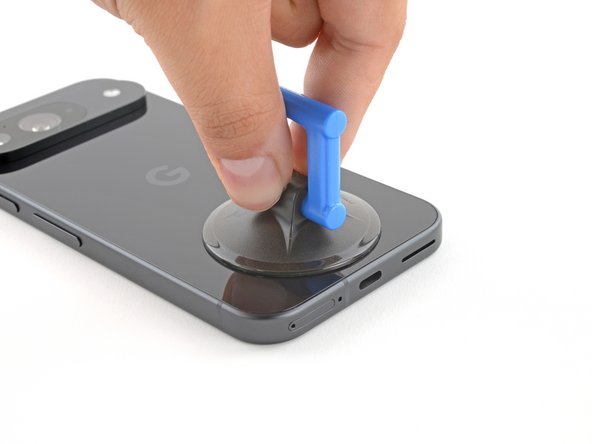

– Grab that suction handle and place it right at the bottom edge of the back glass, getting as close to the edge as you can.
– Give it a little push down to secure that suction cup.
Tools Used

Step 4
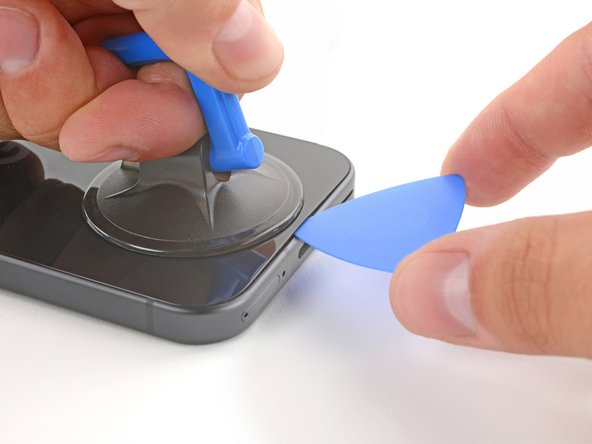

– Give that suction handle a good, firm pull to make a tiny gap under the back glass. You got this!
– Now, gently slide the tip of your opening pick into that gap. Easy peasy!
Tools Used
Step 5
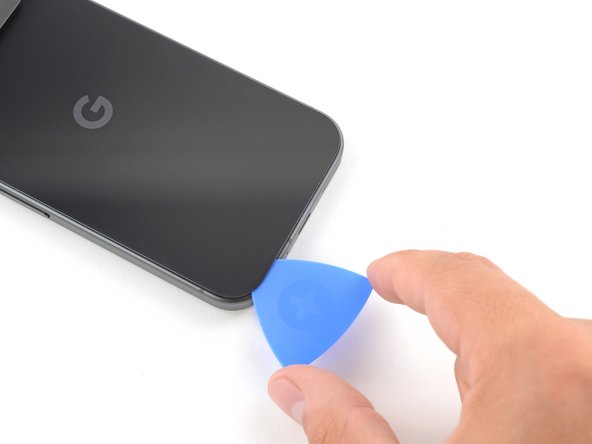

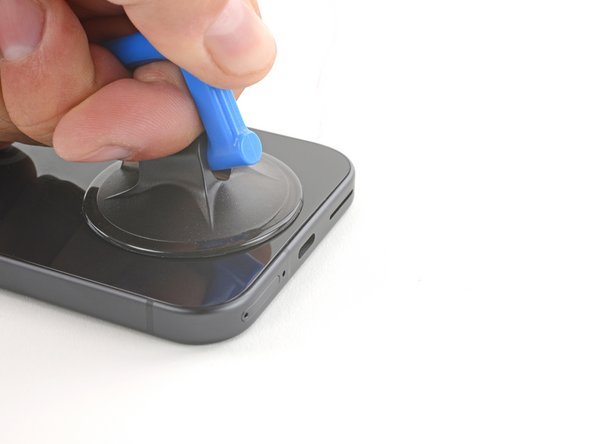
Hey there! Just a friendly reminder: keep that opening pick no deeper than 3 mm, alright?
– Time to get that phone open! Gently wiggle that opening pick along the bottom edge, separating the adhesive holding it in place. Just like a little dance for your phone!
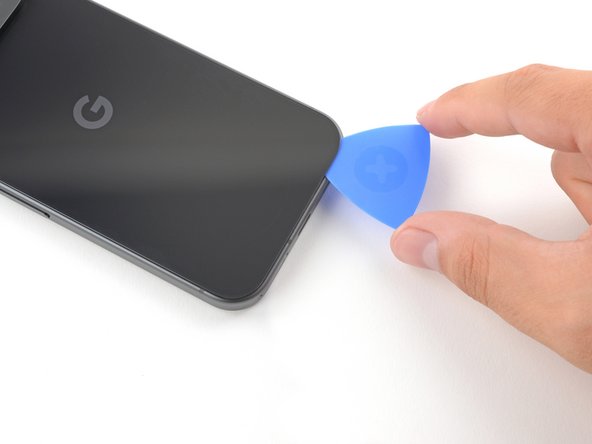
Step 6


– Gently glide the opening pick all around the phone’s edge, cutting through the remaining adhesive like a pro.
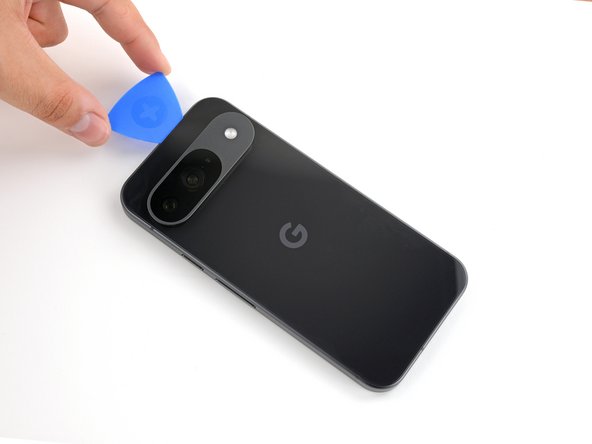
Step 7


– With most of the adhesive separated, get ready to give that back glass a little twist! Gently rotate the opening pick at the bottom edge to lift the glass up until you can get a good grip with your fingers.
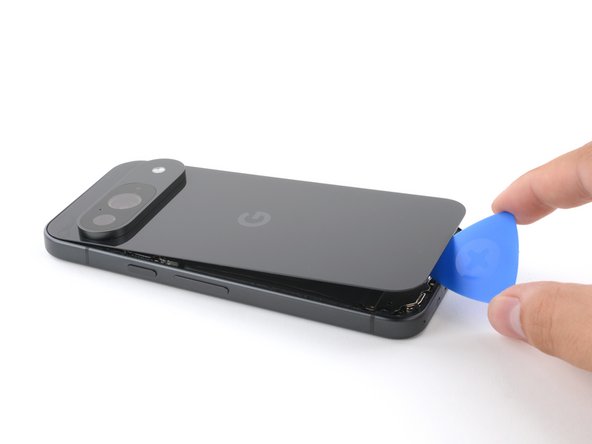
– Now, use the opening pick to give any remaining adhesive holding onto the back glass a friendly farewell. It’s time for that glass to go on an adventure!
Step 8

– You’re all set to put your device back together! Just follow this guide to wrap things up.
– Want to check how your device is feeling? Run a diagnostics test with the built-in Pixel Diagnostic tool; just click here.
– Got some old tech lying around? Don’t forget to recycle it responsibly at an R2 or e-Stewards certified recycler.
– Repair didn’t go smoothly? No worries! Try some basic troubleshooting or reach out to our Pixel 9 Answers Community for a little extra support.
– Uh-oh! If you didn’t finish this guide, just hit cancel.
–
Success!

