
Xbox 360 Power Supply Teardown
Duration: 45 minutes
Steps: 13 Steps
Before diving in, make sure the power supply is unplugged. It’s super important to discharge those big capacitors—they pack enough punch to do some serious damage. Play it safe, and don’t skip this step!
I’ve got a couple of these power supplies lying around, so why not crack one open and see what’s inside? This one’s a 175w PSU—easy to spot from the label and the plug. Tearing down this power supply is actually a breeze; no hidden screws, no glue traps, just straightforward steps. Seriously, it’s way simpler than the rumors make it sound. Quick PSA: always unplug your power supply before you get started. And don’t skip discharging those big capacitors—they pack a punch you definitely don’t want to mess with!
Step 1


– Check out this image for a quick look at the different plugs used by these power supplies—each one’s got its own style.
– We’re diving into Model # HP-AW175EF3. It runs on 100V-127V input and gives you 12V at 14.2A, plus a 5V 1A output.
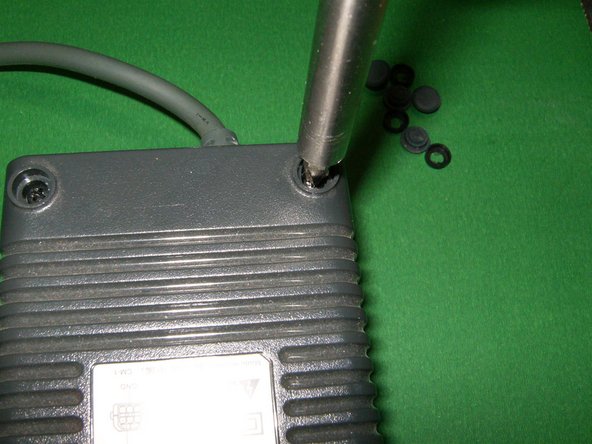
– Flip the PSU over and pop off all four rubber feet from the bottom. A small screwdriver or something similar works perfectly for this—just give them a gentle pry.
Step 2


– Now that the rubber feet are off, you’ll spot a plastic cap waiting to be popped out.
– Grab a small screwdriver or something similar, and gently flip it out.
Step 3


– Once you’ve taken off the rubber feet and the plastic caps, you’ll spot the Phillips screws holding things together.
– Go ahead and remove all four of those screws to loosen the assembly.
– All the Phillips screws are 3/4 inch long. Here’s a quick rundown: the feet, caps, and screws that need to come out before proceeding.
Step 4
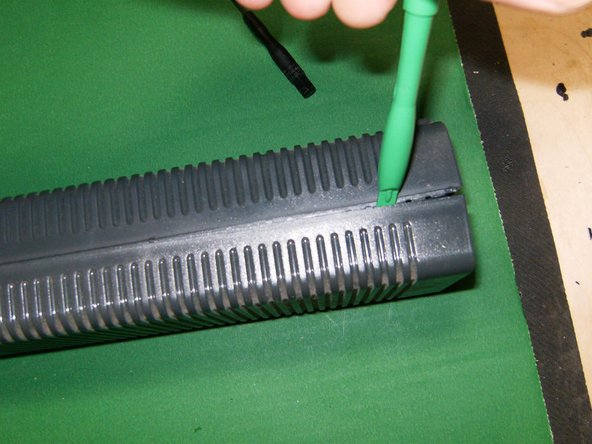

– Grab a plastic opening tool or a similar prying instrument, and gently wedge it into the seam between the top and bottom halves of the PSU.
– Carefully slide the opening tool along the gap to pop loose the clips that hold the two halves together.
– Repeat the process on the opposite side of the PSU to fully separate the parts.
Step 5


Hold up! Don’t yank the two pieces apart just yet—there’s still a fan wire keeping them connected.
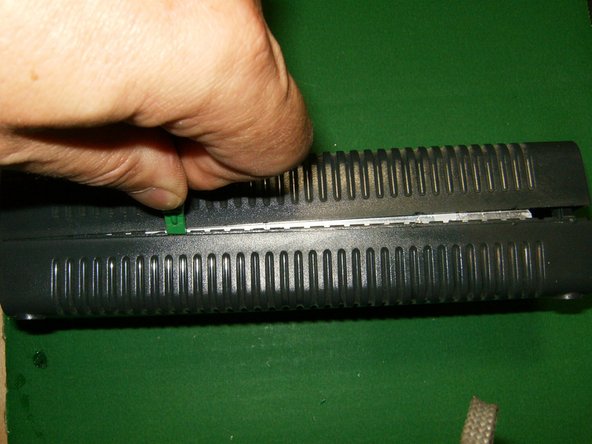
– Once the snaps are released with the opening tool,
– gently wiggle the two parts apart. Start at an angle,
– and then pull them straight apart. No glue or anything else is holding the PSU together.
Step 6


– Now that we’ve got the two parts split, you can see the fan wire hanging out in plain sight.
– To detach the connector, just give the tab a gentle pull away from it, then lift it up.
– Once the fan is unplugged, the two parts should separate with no problem.
– First thing that catches the eye? A whole lot of thermal paste, and it’s everywhere – on every heatsink and large capacitor.
Step 7


Look out for the PDIP IC on this board; it’s a Power Integrations TNY276P AC-DC converter ready to do its magic!
– Check out the circuit board still chilling in the bottom half of the case.
– There are no screws or clips holding it down—just lift it up and set it aside.
– Now you’ve got the circuit board and the case as two separate pieces!
Step 8
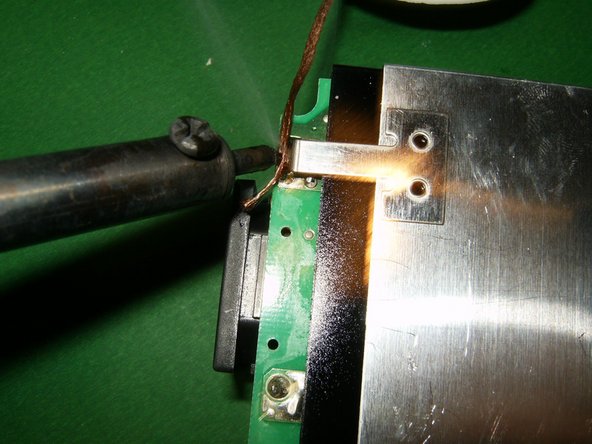


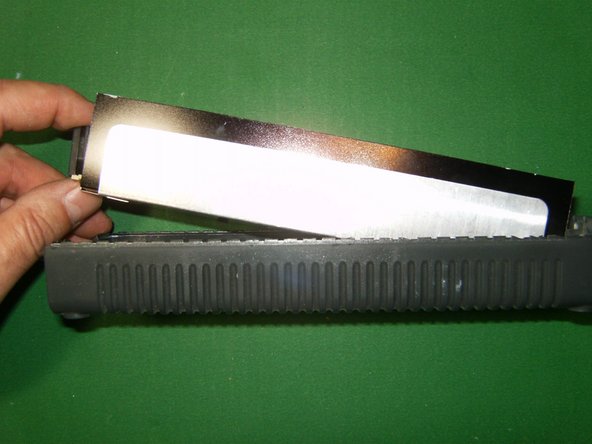
– There’s a big EMI metal shield soldered onto the PCB that’s got to go.
– Fire up your soldering iron, grab some flux, and whip out that desoldering wick.
– Carefully tackle the solder joints on both the left and right sides until the shield is free.
Step 9


– Kick off by taking off the shield.
– Check it out! Here’s the PSU circuit board, all naked without its shield.
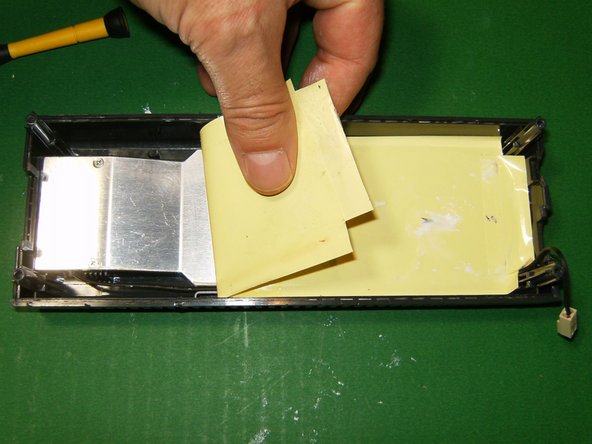
– Now, inside the top part of the case, you’ll find a plastic tape (might be Kapton) that needs to go. Just give it a gentle tug and it will come right off!
Step 10

– Here’s why we saw a mountain of thermal paste earlier: all those heatsink tops and capacitors press up against this big heatsink. The plastic sheet you removed? That’s the electrical insulator keeping things cool and safe.
– Lift out the heatsink from the case. All six screws are the same size, so no need to stress about mixing them up. Once you take it out, you’ll find the fan chilling underneath.
– Take out the six Phillips screws keeping the heatsink in place.
Step 11


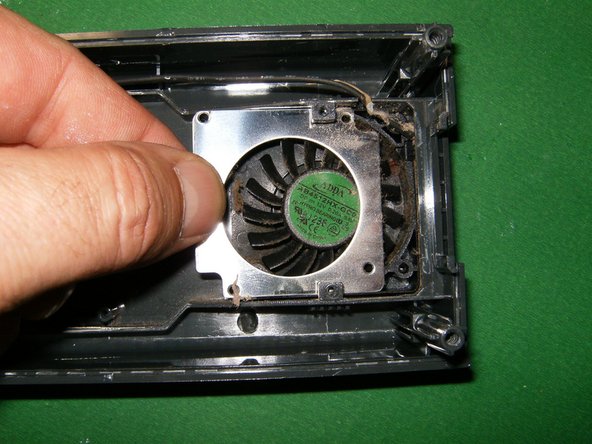
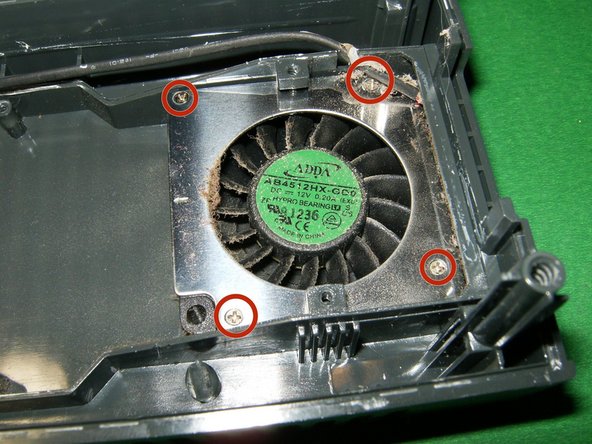
– Unscrew the four tiny Phillips screws—each one is a quarter inch long and they’re all twins.
– Gently slide out the metal top.
– Lift out the fan. Check out all the dust and debris hanging around from use!
Step 12


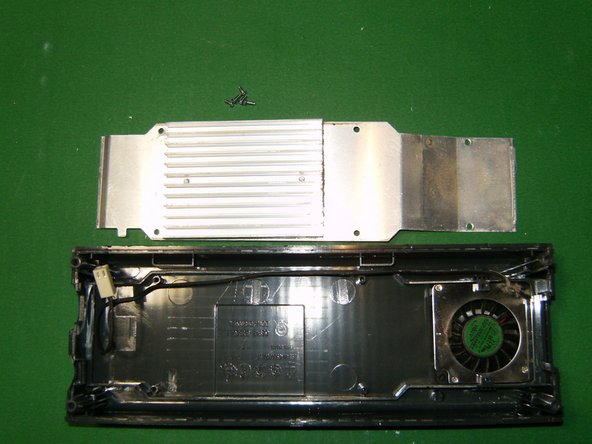
Disassembling this thing was a breeze! Just a heads up, some PSUs come with a T10 Security screw, so keep that in mind. The next two images show a 150W PSU. Make sure you’re all set with the right tools for the job, and you’re good to go!
– Here’s a look at the top side of the PSU, minus the heatsink and fan. Looking pretty bare up here!
Step 13

– If your power supply is acting up, give these parts a look:
– the fuse
– and the thermistor.
Success!
