Google Pixel Fold Flip Battery Replacement Guide: DIY Tutorial
Duration: 45 minutes
Steps: 43 Steps
This repair guide is brought to you by the Salvation Repair team. It’s packed with useful info to help you get your device back in tip-top shape. Want more cool repair tips? Check us out here.
Welcome to your go-to guide for swapping out that flip battery in your Pixel Fold! While this guide is crafted with care, it’s important to note that it’s not officially backed by any big names. Some of the pictures might show different stages of disassembly, but don’t worry—these little variations won’t mess with the steps you need to follow. If you find yourself stuck at any point, just remember, you can always schedule a repair for a helping hand!
Step 1

– Alright, first things first, make sure your phone’s completely off and you’ve unplugged any cables. We want to make sure we’re starting with a clean slate, right?
Step 2


– Grab your trusty SIM eject tool, a bit, or even a straightened paper clip, and gently slide it into the SIM card tray hole.
– Give it a firm push to pop that SIM card tray out like a pro!
Step 3

– Warm up your trusty iOpener and gently press it against the bottom edge of the screen for a solid two minutes.
Step 4


Hey there! Just a friendly reminder: don’t push your pick any further, or you might end up giving your screen and internal parts a surprise they really don’t want!
As you’re getting ready to pop off that screen, remember to slide your opening pick just deep enough to reach the border. You’ve got this!
Step 5


If your screen is sporting some serious cracks, slapping on a layer of clear packing tape might just do the trick to help that suction cup stick. If you want to get creative, some heavy-duty tape could replace the suction cup altogether. And if everything else fizzles out, why not give superglue a shot to attach the suction cup to the screen?
Now, depending on how old your phone is, this might be a little tricky. No worries, though! Just warm up the edges a bit more and give it another go. You’ve got this!
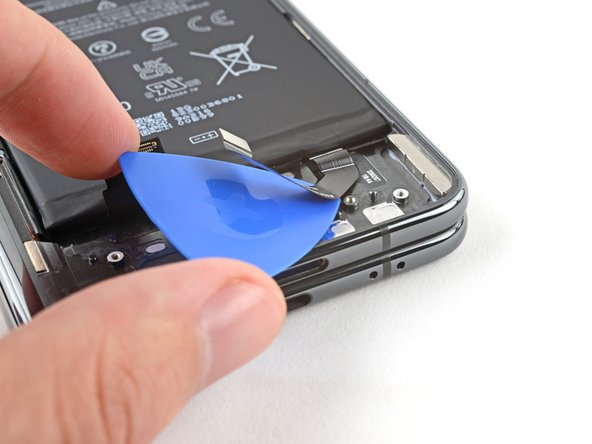
– Grab your trusty suction cup and stick it right on the screen, as close to the center of the bottom edge as you can get.
– Now, give that suction cup a good, strong pull! You want to create a tiny gap between the screen and the frame.
– Time to slip in an opening pick into that gap. You got this!
Step 6


– Gently glide the opening pick along the bottom edge to break free the adhesive holding everything together.
– Keep the opening pick in the bottom right corner to hold the place while you move on to the next step.

Step 8


– Alrighty then, let’s spin that opening pick around the bottom right corner and start breaking loose that adhesive! Keep it up, you’re a repair rockstar!
Step 9


– Let’s get this party started by inserting a new opening pick into the bottom right corner.
– Slide the pick towards the top right corner – you’re separating the adhesive like a pro!
– Leave the pick in the top right corner, we’ll need it for the next step.


Step 12


– Grab a new opening pick and slide it into the top right corner – it’s like giving your device a gentle nudge!
– Now, smoothly glide that opening pick over to the top left corner to break free its sticky bonds. You’re doing great!
Step 13

– Warm up your iOpener and cozy it up against the left edge of the screen for two whole minutes. It’s like giving your device a little spa treatment!
Step 14


Be super careful around that sharp corner—it’s a bit of a fragile friend! Make sure to apply plenty of heat and treat it with extra gentleness during this step.
– Position your pick as flat as you can against the screen, almost like you’re giving it a gentle hug!
– Gently twist the opening pick around the top left corner, like you’re unveiling a surprise, to break free the adhesive.
Step 15


– Gently slide a new opening pick into the top left corner like you’re giving your device a little nudge.
– Now, glide that pick down towards the bottom left corner to break free the adhesive like a pro!
Step 16


Be careful with that sharp corner—it’s a bit of a delicate flower! Make sure to warm things up nicely and treat that corner with extra gentle care during this step.
– Tilt your pick so it hugs the screen as closely as possible.
– Gently twist the opening pick around the bottom left corner to break free the adhesive.

Step 18

– Get your iOpener nice and toasty by heating it up. Then, give the top right corner of the screen a two-minute warm hug.
Step 19


– Slide an opening pick under the right edge of the screen, just by that top right corner. You’ve got this!
– Gently push the opening pick beneath the screen, going as far as you can while keeping a good grip. It’s like giving your device a gentle nudge to let it know you’re ready to get things moving!
Step 20


Take it easy during this step—your screen will thank you! Move slowly and don’t hesitate to give it a little extra warmth if needed.
If the adhesive isn’t coming apart, give it a little more heat or try sliding the pick in from a new angle. You’ve got this!
– Twist and twirl that opening pick like it’s your favorite dance partner to loosen up that adhesive!
Step 21


Hold up! Don’t yank that screen out just yet. It’s still chilling with the phone, connected by a cable. We’ll get to it in a sec.
Alright, it’s time to give that screen a little wiggle! It should be popping away from the frame like a champ. If it’s still holding on tight around the edges, grab an opening pick and gently nudge it to break any stubborn adhesive. You’ve got this!
– Whoa there, amigo! It’s time to do the tango with your device. Simply twirl the left side of the screen to the right, just like you’re dancing a merry jig. Let your screen partner rest gently next to its phone pal before continuing the adorable dance! If you need some assistance, you can always schedule a repair with our awesome team!
Step 22

Keep track of your screws – they’re like your repair buddies! Make sure each one goes back to its original spot.
You’re in for a treat with those Torx Plus screws! Regular Torx bits work too. Use the same size or maybe a bit bigger, like a T3 or T4 bit with a 3IP Torx Plus screw. Just press down firmly and you’ll be a pro in no time.
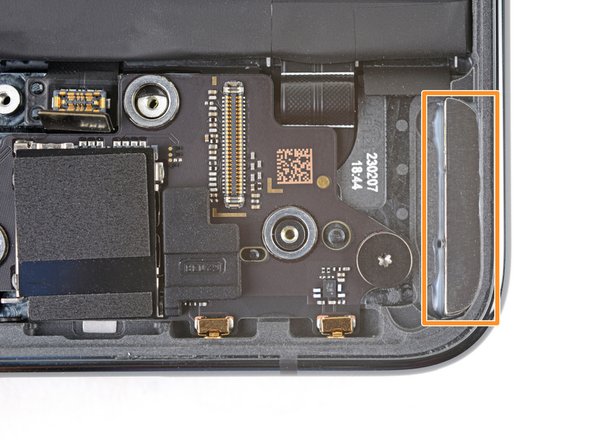
– Grab your trusty Torx Plus 3IP screwdriver and let’s get to work! Carefully unscrew those five 2.5 mm-long screws that are holding the bottom bracket in place. You’ve got this!
Step 23


– Grab those tweezers or your fingers and take out the bottom bracket!
– When putting it back together, make sure the bottom bracket is snug in its two alignment pegs before you secure it.
Step 24


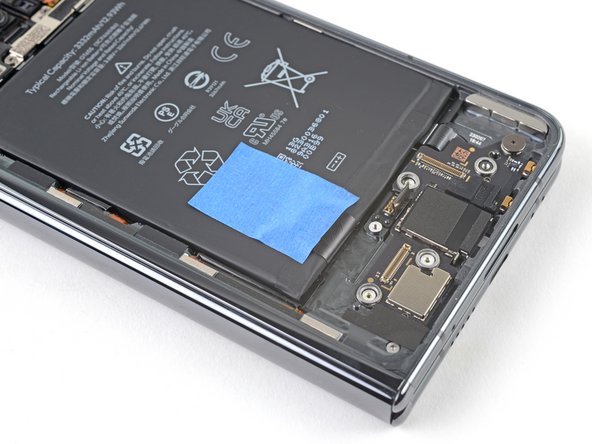
Don’t get too aggressive with your spudger during this step! Be gentle and just slide it under the left or right edges of the press connector. You got this!
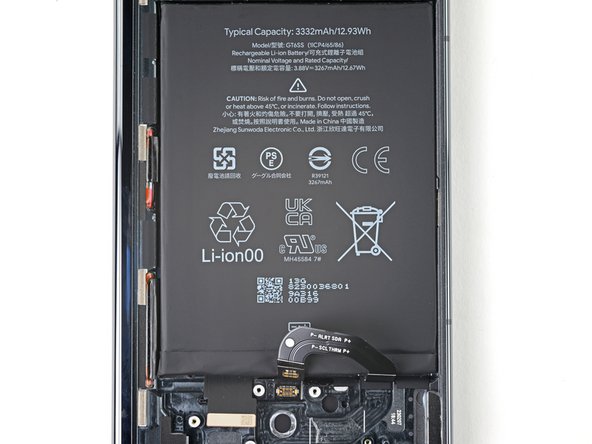
– Use the flat end of a spudger to gently pry up and disconnect the flip battery press connector. Think of it like giving the connector a little high-five!
– To re-attach press connectors like this one, carefully align and press down on one side until it clicks into place, then repeat on the other side. Don’t press down in the middle – think of it like a gentle hug, not a squeeze! If the connector is misaligned, the pins can bend and cause permanent damage. If you’re feeling unsure, you can always schedule a repair
Step 25


Keep that spudger in its lane! Poking it around anywhere else could lead to some serious damage to the delicate bits on the logic board. Stick to the plan and you’ll be golden!

Step 27


If your top right adhesive is still sticky, you can stick it back down! Awesome!
– As you piece everything back together, keep these tips in mind:
– If you’re bringing your screen back to life, grab some tweezers to gently pry away any large blobs of adhesive lurking around the edges.
– Don’t forget to check the frame for any sticky spots too, especially that tiny bit of adhesive hiding at the top right corner.
– To make sure everything’s squeaky clean, use some isopropyl alcohol (more than 90% is best) along with a lint-free cloth to wipe away any stubborn adhesive remnants.
– For a smooth screen replacement, follow this guide to refresh your screen adhesive.
Step 28


– Grab your trusty spudger and gently lift up that bottom interconnect cable press connector to disconnect it. You’re doing great!
Step 29

Having a tough time getting that screw in? No worries! Grab some tweezers to keep it steady while you twist in those first few threads. You’ve got this!
– Grab your Torx Plus 3IP screwdriver and carefully unscrew the 2.2 mm-long screw holding the lower board in place. It’s a simple twist and pull, just like popping a lid off a soda!
– Oh, and a little heads up—there’s a magnet hanging out in the bottom right corner of the phone. When you take out that sneaky nearby screw, don’t be surprised if it decides to play a game of tag and sticks to the magnet!
Step 30

– For this next part, make sure to keep that sneaky bottom interconnect cable out of your way! You can use your hands or some light adhesive tape to get the job done.


Step 32


– Alright, let’s get this lower board back in place! It’s like a puzzle, but way cooler.
– Slide the left side of the board into its little peg. Easy peasy!
– Now, do the same thing on the right side. We’re almost there.
– Give it a little push down, and you’ll hear those spring connectors click into place. That’s it, you’re a pro!