DIY Google Pixel Fold Detune Board Replacement: Step-by-Step Guide
Duration: 45 minutes
Steps: 30 Steps
This repair guide was created by the talented folks at Salvation Repair, and it’s all about empowering you to tackle your tech troubles. Dive into our repair guides for more tips and tricks!
This handy guide will walk you through the process of swapping out the detune board in your Pixel Fold. While we’re not officially recognized by any big names, we’re here to help you every step of the way. If things get tricky, remember, you can always schedule a repair to get back on track!
Step 1

– Completely power down your phone and disconnect any cables. Let’s get started on this repair journey!


Step 3


Be careful not to push your pick in too far; you might accidentally hurt the screen or some of the delicate parts inside.
When you’re getting ready to remove the screen, just slide your opening pick in nice and easy, only as deep as the edge. You’ve got this!
Step 4


If your screen is sporting some serious cracks, slapping on a layer of clear packing tape might just do the trick to help that suction cup stick. Alternatively, if you’re feeling adventurous, a strong tape could replace the suction cup altogether. And if you’re really in a bind, a little superglue can go a long way in keeping that suction cup attached to the screen.
Depending on how vintage your phone is, this might be a bit of a challenge. If you’re struggling, don’t hesitate to apply a bit more heat to the edges and give it another go.
– Grab that suction cup and place it right near the center of the bottom edge of your screen—let’s make it snug!
– Now, give a solid, steady pull on the suction cup to create a little gap between the screen and the frame. You’re doing great!
– Slide an opening pick into that gap you just made. Smooth and easy does it!
Step 5


– Alrighty then, buddy, let’s slide that pick along the bottom edge and break up that sticky friend holding our device together.
– Now, don’t forget to leave that pick tucked nicely in the bottom right corner, like a good little gadget buddy!

Step 7


– Gently spin that opening pick around the bottom right corner to break free the adhesive. You’ve got this!
Step 8


– Pop a new opening pick into the bottom right corner like a pro.
– Gently slide that pick up towards the top right corner to break free from the adhesive’s grip.
– Keep the opening pick snug in the top right corner while you move on to the next steps.

Step 10


– Gently maneuver the opening pick around the top right corner to break free the adhesive. Keep it smooth and steady—you’re doing great!
Step 11


– Pop a new opening pick into that top right corner like a pro!
– Ease the pick along to the top left corner, gently coaxing the adhesive apart. You’re doing great!

Step 13


Be super careful with that sharp corner—it’s delicate! Make sure to warm it up nicely and handle it with care during this step. You’ve got this!
– Position your pick so it’s as close to flat against the screen as you can manage.
– Gently rotate the opening pick around the top left corner to break free the adhesive.
Step 14


– Pop in a fresh opening pick at the top left corner like a pro!
– Gently glide that pick down towards the bottom left corner to break free from the adhesive’s grip.


Step 18


– Alrighty, tech aficionado! Let’s get our hands on some high-fiving victory by sneaking our trusty pick under that right peripheral screen edge, oh so close to the top right corner. It’s showtime; give that pick a little push to make its grand entrance under the screen’s stage! Hold on tight and let the magic unfold right before our very eyes!
Step 19


Take it easy during this step—your screen’s safety is on the line! Go slow and feel free to add a bit more heat if you need to. You’ve got this!
If the adhesive isn’t budging, crank up the heat a bit more or switch up the angle with your pick. You’ve got this!
– Gently wiggle the opening pick back and forth to help break free the adhesive.
Step 20


Hold your horses! The screen is still chillin’ with the phone, connected by a cable. Let’s not be too hasty and give it some time.
At this stage, the screen should be popping free from the frame. If you’re still feeling some sticky resistance around the edges, grab an opening pick and gently nudge away any stubborn adhesive that’s hanging on.
Step 21

As you dive into this repair adventure, make sure to keep an eye on each screw. They might try to escape, so it’s crucial to return them to their original homes!
The Pixel Fold has a flair for Torx Plus screws, but don’t worry, regular Torx bits can join the party too! Stick with the same size or one size up (T3 Torx or T4 bits alongside 3IP Torx Plus screws), and remember to apply steady, downward pressure to keep things from getting stripped!
– Grab your trusty Torx Plus 3IP screwdriver and carefully unscrew the five 2.5 mm-long screws holding down the bottom bracket. You’ve got this!


Step 23


Be careful not to get too aggressive with your spudger during this step! Just gently angle it under the left or right edges of the press connector. You’ve got this!
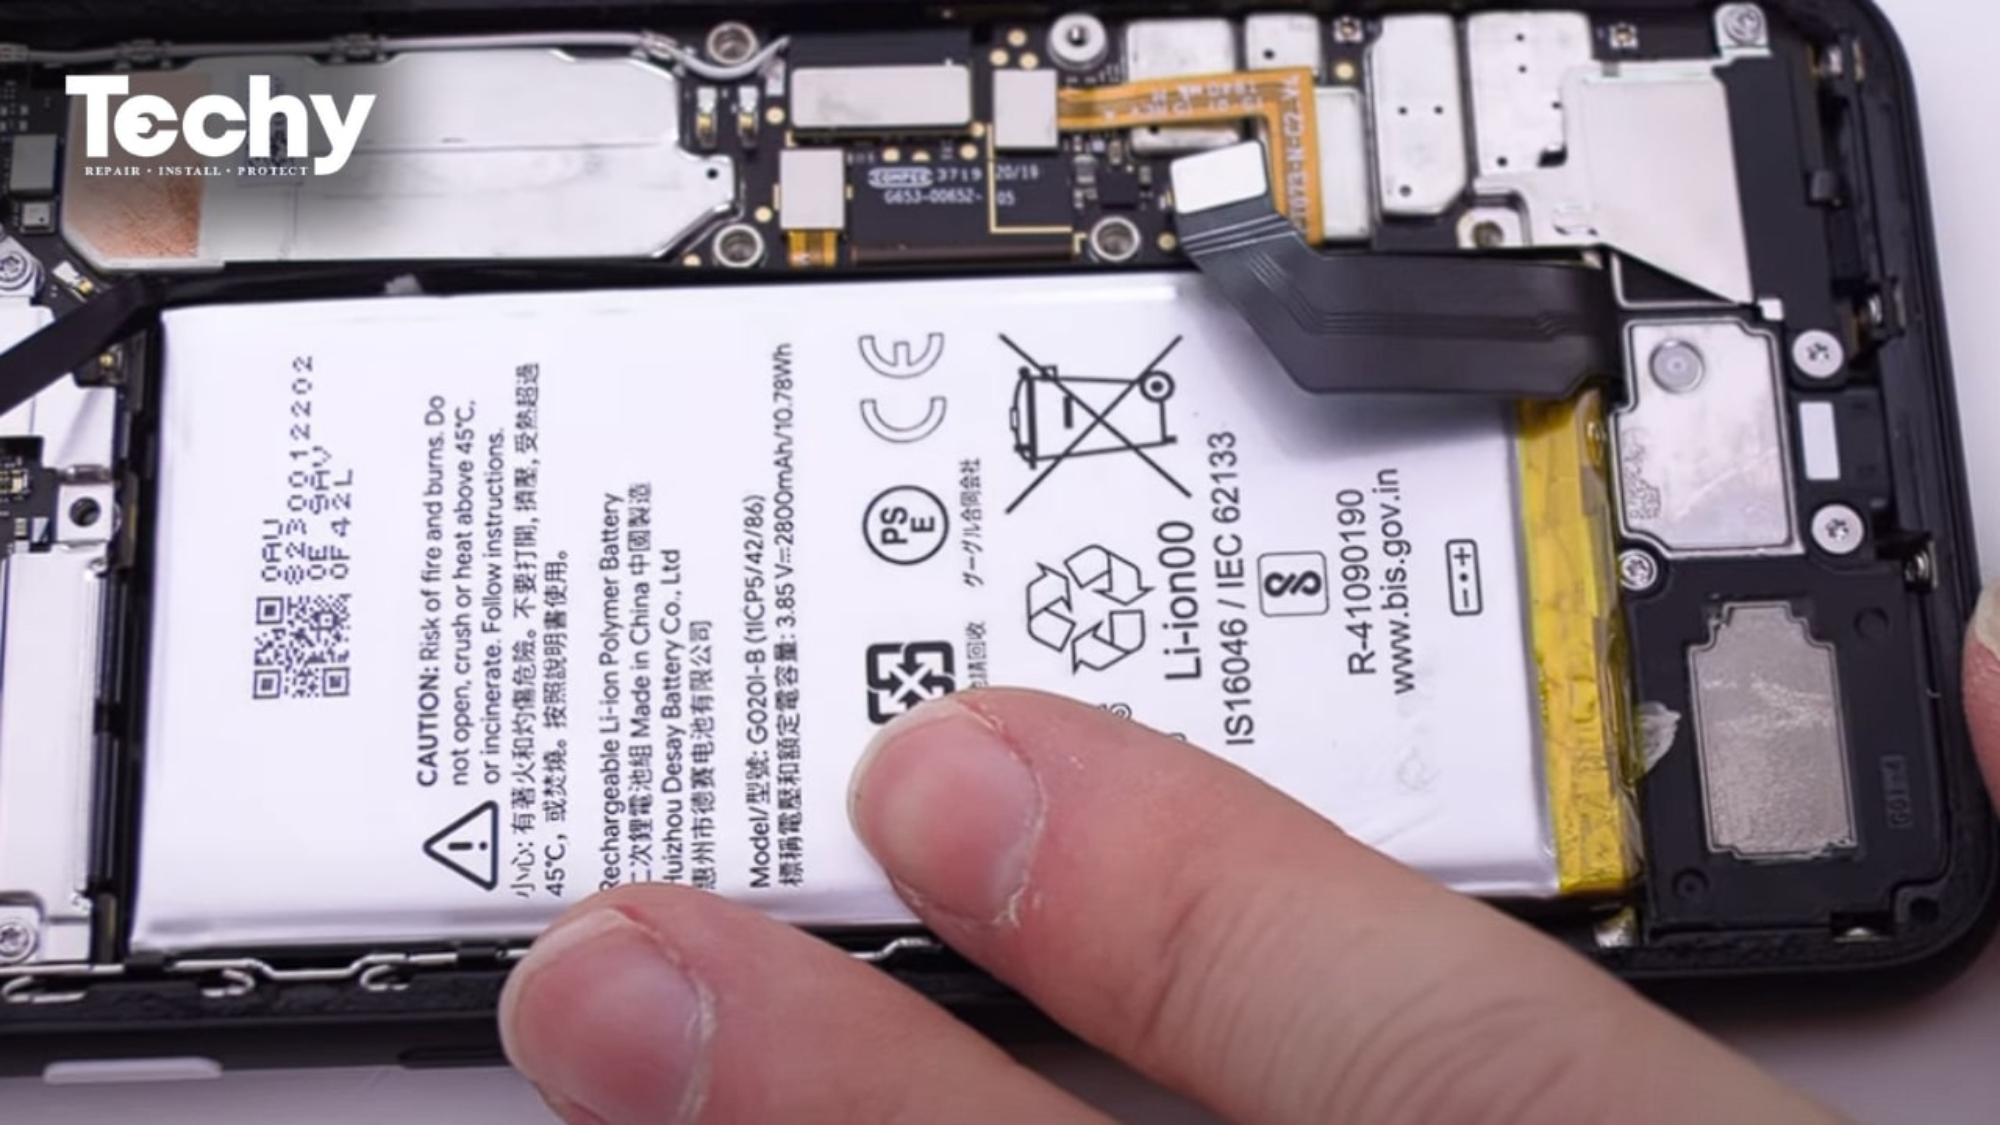
– Grab the flat end of a spudger and gently pry up to disconnect the flip battery press connector. You’ve got this!
– When it’s time to reconnect those press connectors, take a deep breath and align one side first. Give it a gentle press until you hear that satisfying click. Then, do the same on the other side, but remember, no pressing in the middle! If things seem a bit off, a misaligned connector can bend those pins and that’s a no-go.
Tools Used

Step 24


Keep your spudger in its designated zone! Straying into other areas might lead to unplanned adventures involving surface-mounted components on the logic board. Let’s avoid that, shall we?
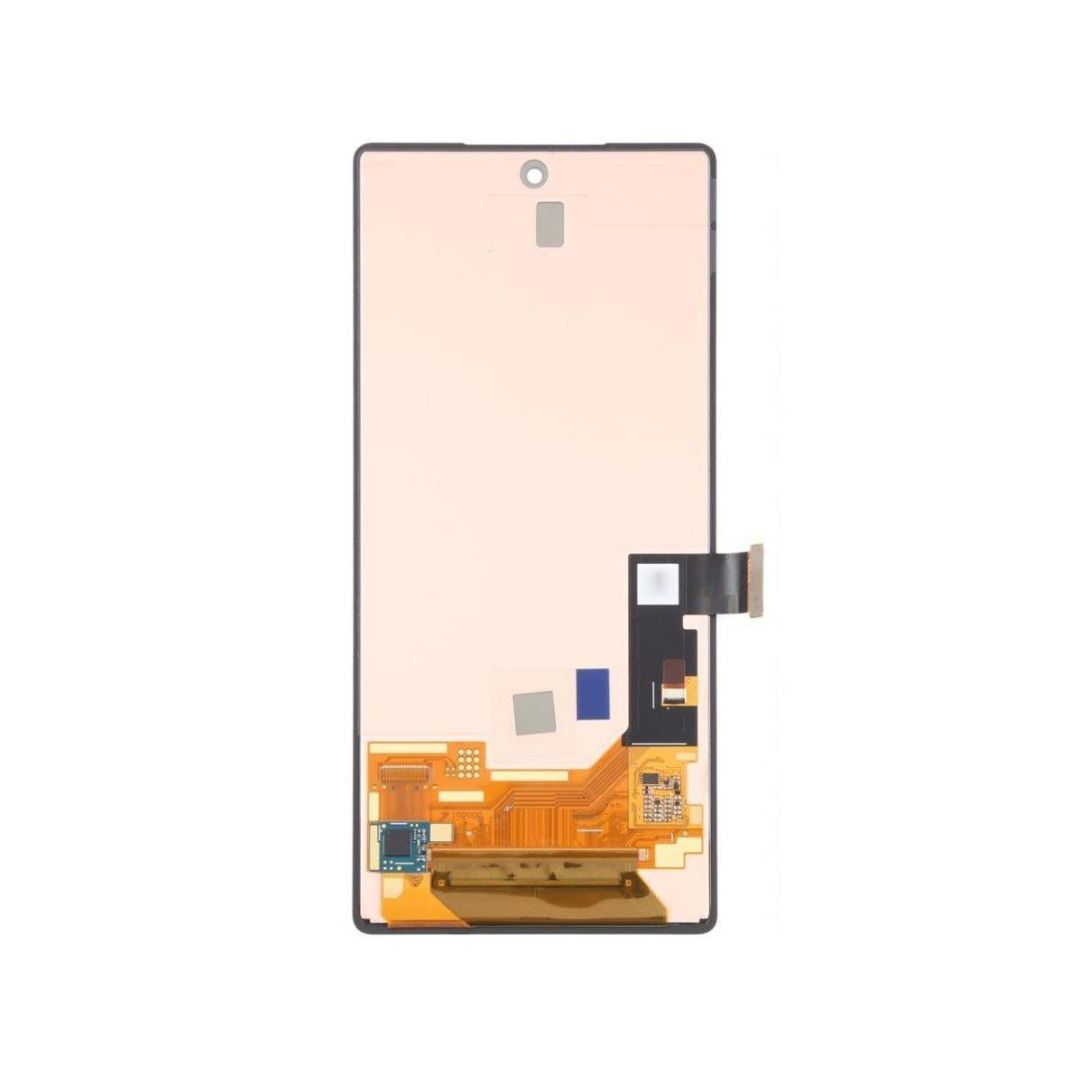
– Let’s get that screen connector out of the way! Use the tip of your trusty spudger under the short edge of the screen connector, making sure it’s facing the bottom of the phone.
– Now gently pry it up to disconnect the screen connector. You got this!
Tools Used