Replace Google Pixel 8 Pro Rear Camera: Step-by-Step Guide
Duration: 45 minutes
Steps: 38 Steps
Hey there, this repair guide is all about getting your device back to its best, so don’t worry, we’ve got you covered! It was put together by the awesome folks at Salvation Repair, and we’re always here to help. If you run into any hiccups, you can always schedule a repair.
Hey there! Ready to dive into some phone repair magic? This guide will help you swap out the rear camera assembly (wide, ultrawide, and telephoto) in your Pixel 8 Pro. If your photos are coming out all fuzzy or your camera’s gone on strike, it’s time for a change! Just a heads up, you’ll need some replacement screen adhesive to wrap things up nicely. Also, this guide is tailored for the 5G mmWave antenna version of the Pixel 8 Pro, but don’t fret if you have the non-mmWave model—just skip the steps that mention the 5G mmWave antenna. Remember, if you run into any tricky spots, you can always schedule a repair to get some expert help.
Step 1


Before you dive into this repair adventure, make sure your Pixel’s battery is below 25%. A fully charged lithium-ion battery could throw a little tantrum and catch fire if it gets damaged—let’s avoid that excitement!
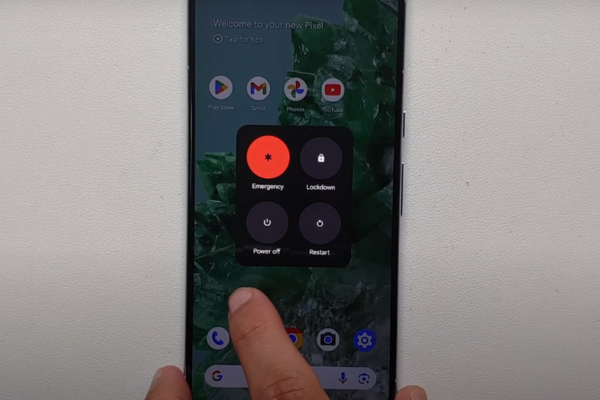
Hold down the power button and volume up button at the same time. You’ll see the shutdown menu pop up. It’s like magic!
– First things first, let’s disconnect all those pesky cables from your phone!
– Now, give your phone a little break by powering it down completely.
Step 2


Get ready to use those handy opening picks to gently pry the screen away from the frame. Just a friendly tip: if you push the pick in too deep, you might accidentally hurt your device. So, take a moment to mark your pick to keep everything safe and sound.
Another fun option is to tape a coin to the pick about 3 mm from the end. It’s a simple trick to help you stay on the safe side while you work!
– Grab your trusty permanent marker and measure out 3 mm from the tip. Make a little mark on that opening pick—it’s like giving it a stylish accessory for the task at hand!
Step 3


Watch out for those pesky glass shards—they can make disassembly tricky and could even lead to a little ouch! If your phone’s screen is cracked, just follow these handy steps:
Make sure to only tape over the glass—keep that tape away from the frame!
– Layer on some packing tape like a pro, covering that cracked glass until the entire screen is snug as a bug.
– Don those safety glasses to keep your peepers safe from any sneaky glass shards that might try to escape during the repair.
Step 4

– Let’s warm things up! Grab your trusty iOpener, give it a good heat, and place it on the bottom edge of the screen for a couple of minutes. This will help soften the adhesive holding the screen in place.
Tools Used


Step 5


The next few steps show off our coolest gadget yet, the Anti-Clamp. It’s like having a trusty sidekick to help you open! If you’re not using the Anti-Clamp, just skip ahead a few steps for another way to tackle this project.
– Let’s get this party started! Pull that blue handle back to unlock the Anti-Clamp’s arms.
– Time to give your phone a comfy spot! Place it screen-side up on something level so it can chill between the Anti-Clamp’s arms—make sure the bottom edge is hanging off the edge.
– Slide those arms over the left side of your phone, so you can get to the bottom edge. You’re almost there!
– Now for the suction cups—try to get them as close to the center of the bottom edge as possible.
– Squeeze those suckers together to create a sweet, strong suction.
Step 6


– Give that handle a gentle yank forward to snug those arms in place.
– Now, twist that handle clockwise all the way around (that’s a full 360 degrees!), or until you see those suction cups start to stretch out.
– While those cups are flexing their muscles, keep an eye on their alignment. If they start slipping around, no worries! Just take off the Anti-Clamp and slap on some tape to help those cups stick like they mean it.
Step 7


Be gentle with your opening pick! Keep it under 3 mm to steer clear of any spring contact mishaps.
– Give it a minute – let that screen and frame have some space to breathe. You got this!
– Slide that opening pick in between the screen and frame. It’s like opening the door to a new world of tech repair!
– Pull that blue handle back to unlock the arms. Then grab those pull tabs on the suction cups and pop off the Anti-Clamp. It’s like doing a little tech dance!
– Time for a little shortcut. You can skip the next two steps and keep on rollin’!


Step 9


If you’re having trouble creating a gap, don’t worry! Just add a little more heat and try again. You got this!
– Gently pull up on the suction handle with a firm and steady grip until you see a gap appear between the screen and the frame. You’re doing great!
– Now, slide an opening pick into that gap you’ve created. Keep it steady and you’ll be on your way!
Tools Used
Step 10


– You’ll find the screen cable hanging out just shy of halfway up the left edge of your phone. Tread lightly here to keep that cable in one piece!
– Keep your eyes peeled for the spring contacts sprinkled around the phone’s perimeter. Handle with care in these spots to ensure those contacts stay nice and straight.
Step 11


– Gently glide the opening pick along the bottom edge to break free the adhesive holding it in place.
– Keep that pick snugly in the bottom right corner to stop the adhesive from making a comeback.
Step 12

Alternatively, you can grab a hair dryer, heat gun, or hot plate—but tread lightly! Too much heat can be a screen and battery’s worst nightmare.
– Warm up your trusty iOpener and give the right edge of the screen a cozy hug for two minutes.
Tools Used
Step 13


Step 14


– Slide a third opening pick under the lower edge of your screen, like a pro.
– Gently glide that new pick over to the bottom left corner.
– Keep the pick in the corner for now to stop the adhesive from getting all snuggly again.
Step 15

Alternatively, you can grab a hair dryer, heat gun, or hot plate—but tread lightly! Too much heat can be a screen and battery’s worst nightmare.
– Warm up that trusty iOpener and apply it to the left edge of your screen for a cozy two minutes.
Tools Used
Step 16


– Slide a fourth opening pick right under the bottom left corner of your screen. You’ve got this!
– Gently glide that new pick up to the top left corner to break free the adhesive holding the left edge of the screen.
– Now, keep that pick snugly in the top left corner to stop the adhesive from playing its sneaky game and resealing!
Step 17

Alternatively, you can grab a hair dryer, heat gun, or hot plate—but tread lightly! Too much heat can be a screen and battery’s worst nightmare.
– Let’s heat things up! Apply a heated iOpener to the top edge of the screen for two minutes. This will help loosen up the adhesive holding the screen in place.
Tools Used
Step 18


– Slide a fifth opening pick under the top edge of the screen, just a whisker away from the left corner. You’re doing great!
– Now, gently glide that opening pick over to the top right corner. This will help free up the adhesive holding the screen’s top edge. Keep it up!
Step 19


If the screen feels a bit stuck, go ahead and take your opening pick for another spin around the edge. We’re just trying to get that last bit of sticky stuff loosened up!
– Grab a small box or stack of books and place it to the left of your phone. This will give your screen a nice little lift while you disconnect its cable.
– Now, gently swing up the right edge of the screen like you’re opening a book to your favorite page.
– Prop that screen up so you can easily access the screen cable without putting any unnecessary strain on it.
Step 20


– Grab your trusty opening tool and gently lift the top edge of that screen cable cover like you’re lifting the lid on a treasure chest.
– Once you’ve got it up, go ahead and take off the cover. You’re doing great!
Step 21


– Slide the tip of a spudger under the top right corner of the screen’s press connector with style.
– Carefully lift and detach the cable like a pro.
– Take out the screen like a cool tech wizard.
– When it’s time to connect a press connector again, make sure to line it up with its socket. Gently press down on one side until you hear that satisfying click, then do the same on the other side. Remember, no pressing in the middle! If you misalign it, those little pins might bend, and we definitely don’t want that!
Tools Used

Step 22


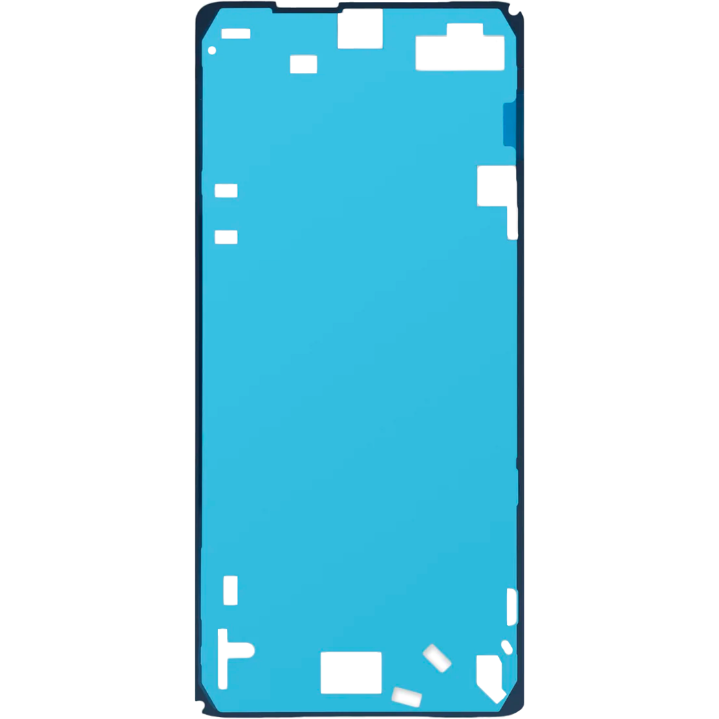
Got a shiny new screen with adhesive already on it? Awesome! Just remember to follow this step when putting everything back together. If you’re working with your old screen, no worries—check out this guide to get that adhesive on just right.
For an even stronger hold, give your phone a little love by applying even pressure to the screen. It’s like a gentle hug for your device!
– Give that screen a good once-over for any sneaky plastic liners or tape—don’t forget to use those handy pull tabs to yank them off! Keep your eyes peeled near the front camera cutout, the back of the screen, and all around the edges.
– Reconnect the screen cable like a pro and pop that cover back on.
– Now’s a perfect moment to give your phone a test run before sealing it up. Power it on temporarily to make sure everything’s working just right. Don’t forget to power it down again before moving on!
– Press the screen firmly into its frame—you should hear those clips give a satisfying ‘pop’ as they lock into place.
– Give the perimeter of the screen a solid press to secure it with the new adhesive. It’s all about that stickiness!
– Check out this guide to get your fingerprint sensor calibrated just right.
Step 23


Take it easy and watch out for those tiny surface-mounted components during this step—no one likes a scraped surface!
Alright, let’s get this 5G mmWave antenna cable out of the way! We’re going to disconnect it and detach it. But hey, if your phone doesn’t have one, skip the next four steps and we’ll move right along! No worries, we’ll get your device back in tip-top shape!
– Slide the spudger’s tip beneath the top edge of the 5G mmWave antenna’s press connector with a gentle touch.
– Carefully lift it up to disconnect that cable like a pro!
Tools Used